Modern full-stack applications are often based on data components like admin panels, dashboards, and internal tools. It may take a lot of time and involve repetitive work to create them from scratch each time.
In this article we will compare two open-source React frameworks, that can be used to build CRUD applications - refine and Redwood.
The first one is designed to accelerate the development of data-rich apps and includes a wide library of hooks, components, and providers. The other is a full-fledged framework, that is marketed as the best choice for startups.
We will review anything from the core features, history, installation, build structure, frontend, database, backend, and deployment options for both.
Overview
refine
refine is a React framework, that aims to eliminate repetitive work and offers pre-built solutions for routing, authentication, internationalization, and many other features that you would frequently implement in full-stack apps.
It is based on a headless architecture, meaning users are not tied to any specific stack of technologies, styling solutions, and settings. It allows you to focus on business logic and use the framework just to support you.
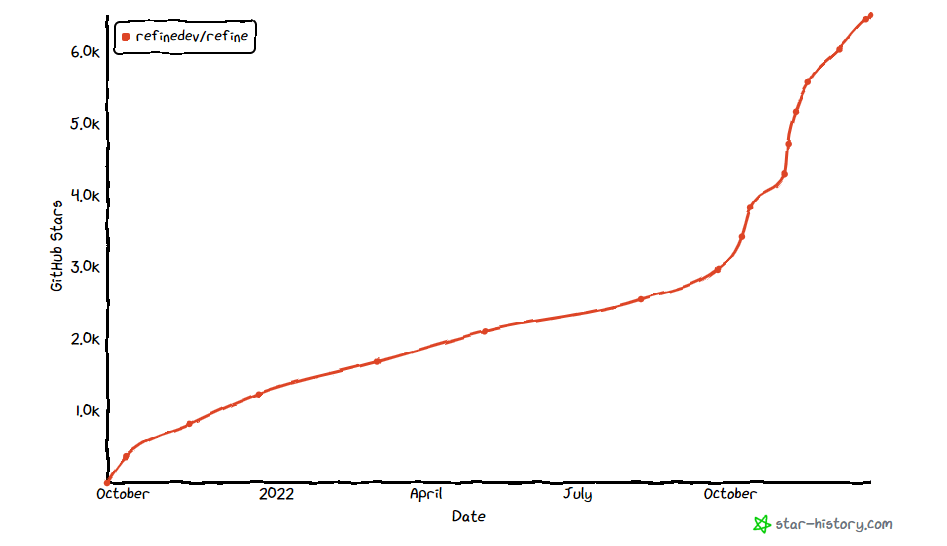
The project has experienced rapid growth since its release in 2021. On GitHub 100+ developers have made around 4000 contributions. As of the start of 2023, the project has been already starred 7000+ times.
Redwood
Redwood is a React framework designed to keep you moving fast as your app grows from side project to startup.
It it based on several core technologies - GraphQL for making API calls, Prisma as an ORM, TypeScript for type safety (optional), Jest for testing, Pino for logging and Storybook to assist with creating UI.
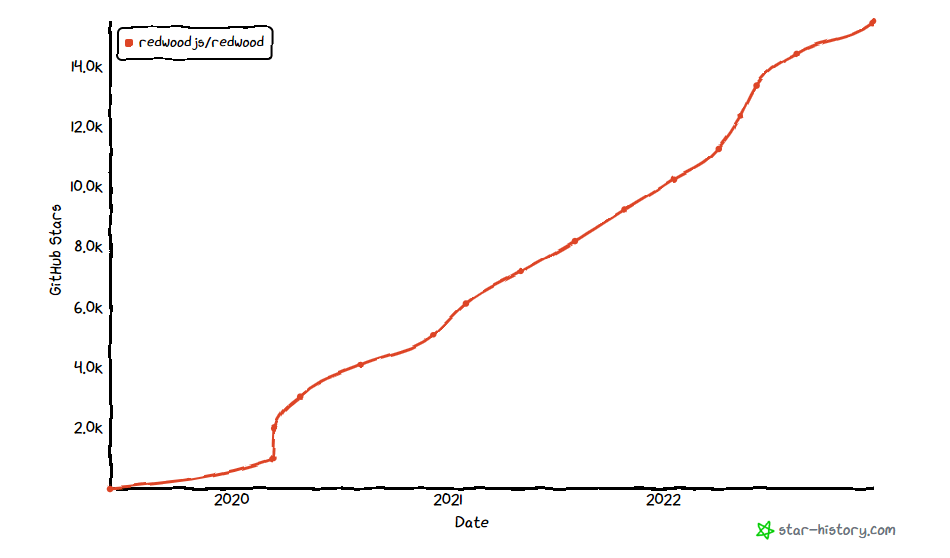
Since its release in 2020, the project has received over 7500 contributions on GitHub by 340 developers. As of the start of 2023, the project has already been starred more than 15000 times.
Installation
refine
The recommended way to set up a new refine project is to use their built-in CLI tool create refine-app. Run the command npm create refine-app@latest crud-refine and it will take you through a terminal wizard.
You will be asked to pick your preferred router solution, UI framework, auth provider, i18n approach, and other settings. For testing purposes, choose the settings provided below:
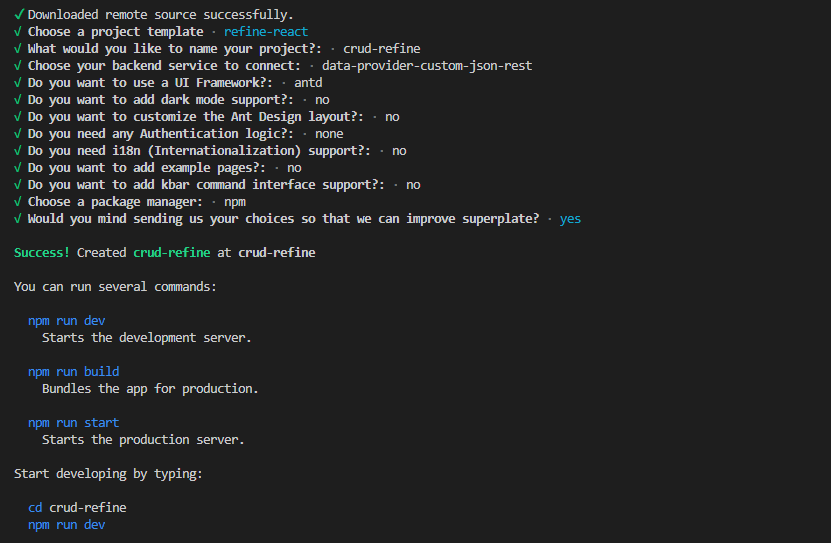
Once the installation setup is completed, change the working direction to the newly created project folder by running cd crud-refine and start the development server via npm run dev.
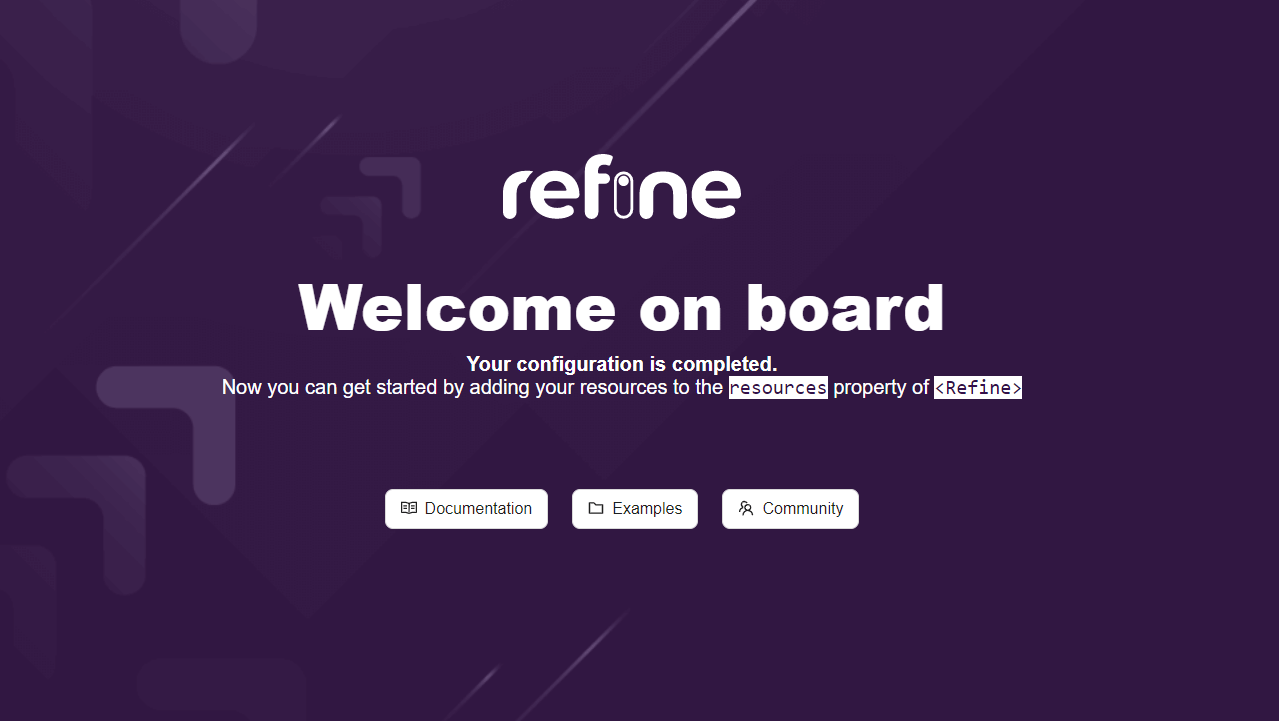
It should automatically open up a new tab on your default browser with the application preview. If it does not, open http://localhost:3000 manually. You should be presented with the welcome screen of refine:
Redwood
In order to set up a new Redwood app, open the terminal and run the command yarn create redwood-app crud-redwood --typescript.
If you prefer to set up the project on Vanilla JS, remove --typescript tag from the command. Notice, that Yarn package manager is the requirement to create a project.
During the terminal wizard, you will be asked whether or not to initialize the git repository. The rest of the wizard is fully automatic and should not take more than a couple of minutes to finish.
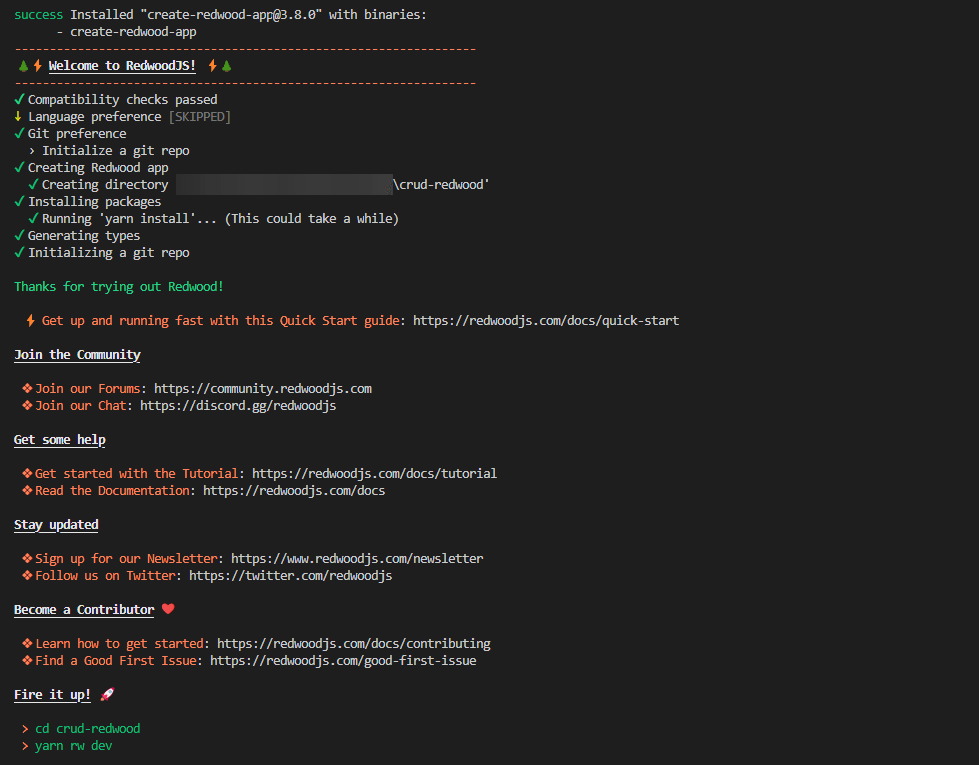
Next, change your working directory to the newly created project folder via cd crud-redwood and start the developer server by running yarn rw dev.
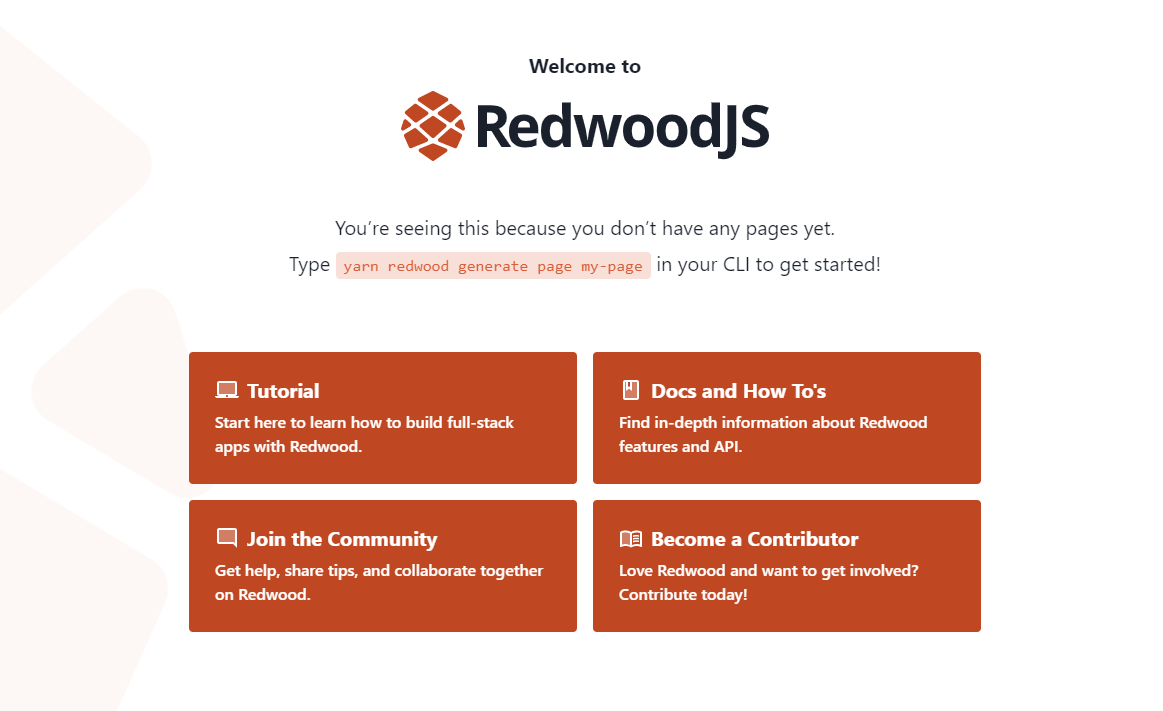
It should open a new tab on your default browser with the working project demo. If it's not, run http://localhost:8910 to see the Redwood welcome page.
Internal build
refine
Out of the box, refine file structure is as simple as it gets. The user is provided with just the bare minimum to be able to work with a functional React app.
There is the App.tsx file where the main logic of the app lives. The core refine functionality is achieved via the Refine component, which receives all of the application settings as props.
We can see all of the installed packages like Ant Design, route provider, and data provider already imported and passed successfully so we can use them in the refine app.
Here is what the App.tsx file should look like:
import { Refine } from "@refinedev/core";
import {
    notificationProvider,
    Layout,
    ReadyPage,
    ErrorComponent,
} from "@refinedev/antd";
import "@refinedev/antd/dist/reset.css";

import dataProvider from "@refinedev/simple-rest";
import routerProvider from "@refinedev/react-router-v6";

function App() {
    return (
        <Refine
            dataProvider={dataProvider("https://api.fake-rest.refine.dev")}
            notificationProvider={notificationProvider}
            Layout={Layout}
            ReadyPage={ReadyPage}
            catchAll={<ErrorComponent />}
            routerProvider={routerProvider}
            resources={}
        />
    );
}

export default App;
Finally, there is the index.tsx file in the src root direction, which renders the whole app to the screen. The code structure should be similar to this:
import React from "react";
import { createRoot } from "react-dom/client";

import App from "./App";

const container = document.getElementById("root") as HTMLElement;
const root = createRoot(container);

root.render(
    <React.StrictMode>
        <App />
    </React.StrictMode>,
);
Redwood
Redwood framework gives you a much more complex file structure right out of the gate. It is a full-fledged framework that recommends how you should go with authentication, database, separate logic from layout, and so on.
If we take a closer look at the internal build of a Redwood project, we easily notice that the whole app is divided into two main blocks. The first is the api directory, which deals with the backend and databases and the second is the web directory, which deals with the front-end, styling, and routing.
├── api
│ ├── db
│ │ └── schema.prisma
│ ├── dist
│ ├── src
│ │ ├── directives
│ │ │ ├── requireAuth
│ │ │ └── skipAuth
│ │ ├── functions
│ │ │ └── graphql.js
│ │ ├── graphql
│ │ ├── lib
│ │ │ ├── auth.js
│ │ │ ├── db.js
│ │ │ └── logger.js
│ │ └── services
│ └── types
└── web
 ├── public
 └── src
 ├── components
 ├── layouts
 ├── pages
 │ ├── FatalErrorPage
 │ │ └── FatalErrorPage.tsx
 │ └── NotFoundPage
 │ └── NotFoundPage.tsx
 ├── App.tsx
 ├── index.css
 ├── index.html
 └── Routes.tsx
The api folder is further divided into the db directory, which holds the Prisma schema, dist for compiled code, and the src folder which holds the information about GraphQL schema, lambda functions, and additional information required to configure authentication and logging.
The web folder holds the main App.jsx file for the app logic, Routes.tsx for routing configuration as well index.css for styling. There is also a dedicated folder for pages, layouts, and components to separate reusable code blocks.
Pages and routing
refine
In order to create the first page, run the following command in the terminal npm run refine create-resource test -- --actions list.
This will create a new folder pages and include 2 new files: list.tsx and index.ts and link everything to the Refine component.
Check your App.tsx file and it should now look like this:
import { Refine } from "@refinedev/core";
import {
    notificationProvider,
    Layout,
    ReadyPage,
    ErrorComponent,
} from "@refinedev/antd";
import "@refinedev/antd/dist/reset.css";

import dataProvider from "@refinedev/simple-rest";
import routerProvider from "@refinedev/react-router-v6";

import { TestList } from "pages/tests";

function App() {
    return (
        <Refine
            dataProvider={dataProvider("https://api.fake-rest.refine.dev")}
            notificationProvider={notificationProvider}
            Layout={Layout}
            ReadyPage={ReadyPage}
            catchAll={<ErrorComponent />}
            routerProvider={routerProvider}
            resources={[
                {
                    name: "test",
                    list: TestList,
                },
            ]}
        />
    );
}

export default App;
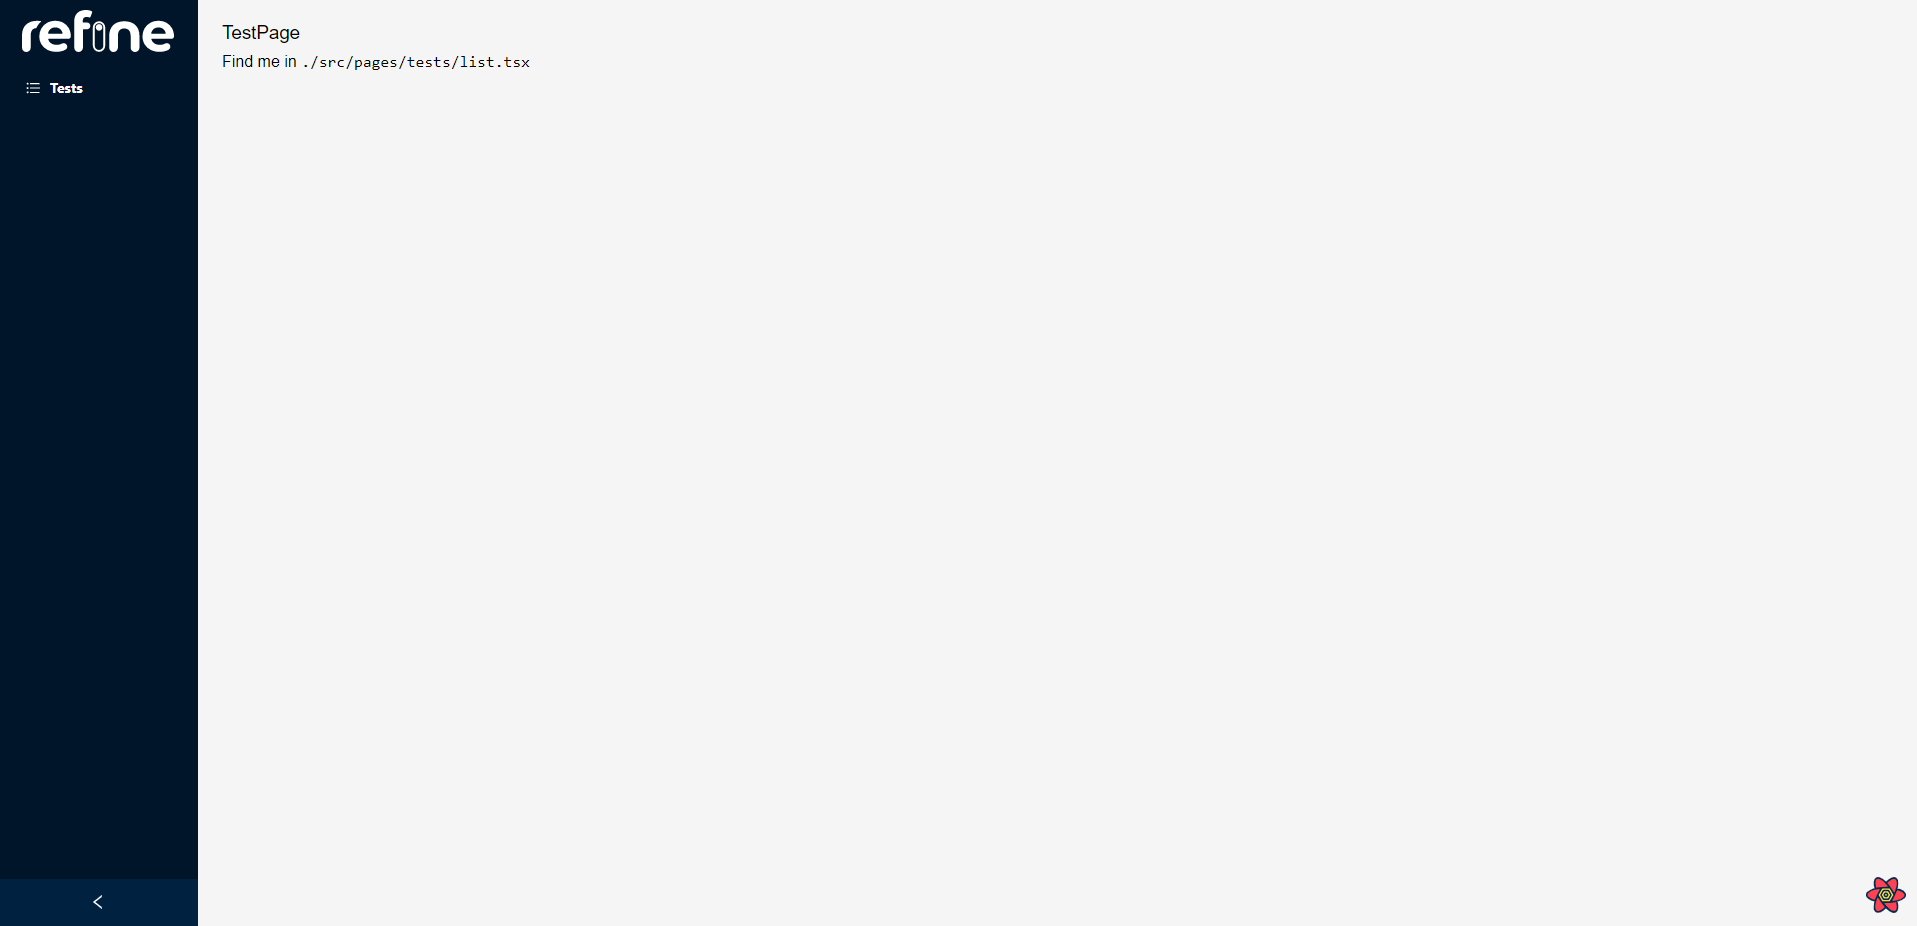
Now, let's create a page to display some sample data. Open the newly created list.tsx file in the pages folder and change the content to the following code:
export const TestList = () => {
    return (
        <>
            <h1>TestPage</h1>
            <p>
                Find me in <code>./src/pages/tests/list.tsx</code>
            </p>
        </>
    );
};
To test the route, open your browser and navigate to http://localhost:3000/test. You should be presented with the following view:
Redwood
To create your first page in the Redwood project, run the command yarn rw generate page test.
It will create a new file TestPage.tsx inside the pages directory with the following code in it:
import { Link, routes } from "@redwoodjs/router";
import { MetaTags } from "@redwoodjs/web";

const TestPage = () => {
    return (
        <>
            <MetaTags title="Test" description="Test page" />

            <h1>TestPage</h1>
            <p>
                Find me in <code>./web/src/pages/TestPage/TestPage.tsx</code>
            </p>
            <p>
                My default route is named <code>test</code>, link to me with `
                <Link to={routes.test()}>Test</Link>`
            </p>
        </>
    );
};

export default TestPage;
To test it out, run http://localhost:8910/test in your browser and you should be presented with something like this:


Data sources
refine
In order to set up data for the application, refine has a built-in REST data provider, that could simulate the use of the database. We already imported it in the initialization phase while setting up the app.
All we have to do is to check App.tsx and make sure it is passed in the Refine component as a dataProvider like so:
function App() {
  return (
    <Refine
      dataProvider={dataProvider("https://api.fake-rest.refine.dev")}
      .....
    />
  );
}
We can also check the data coming from the data provider. Open your browser and navigate to https://api.fake-rest.refine.dev. You will be presented with all the available endpoints:
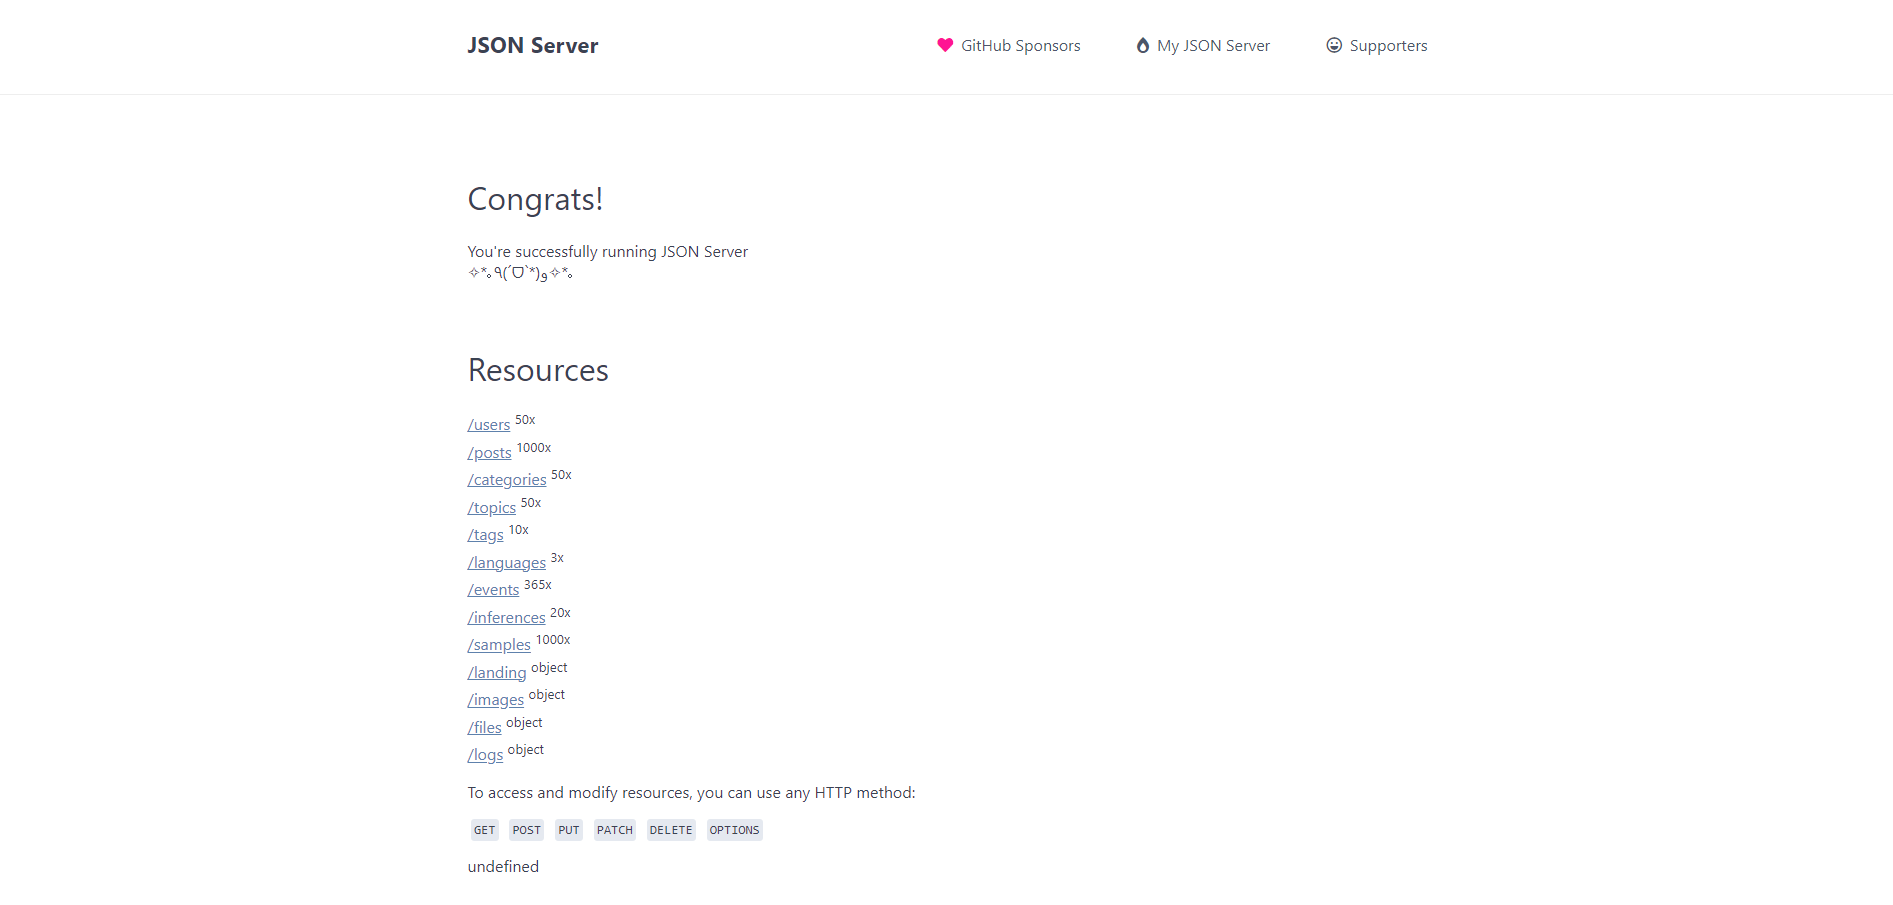
For this application we will use the posts route, so click on it and you will see sample data that is provided to the user:
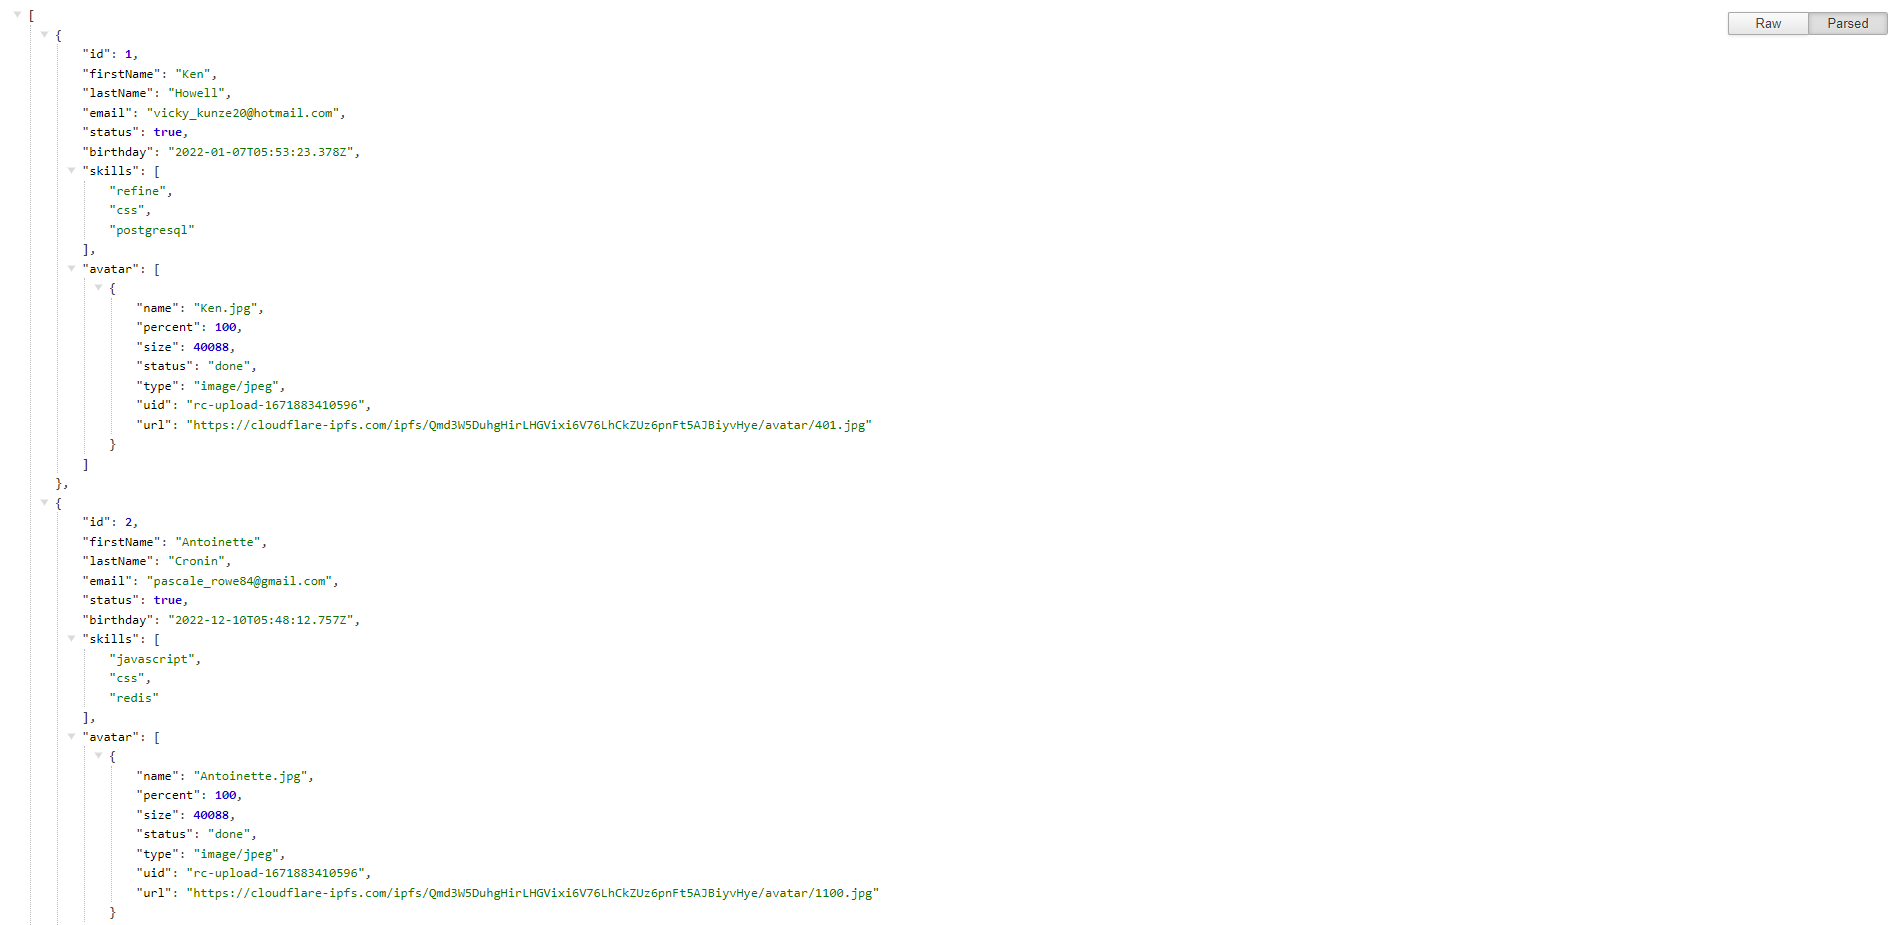
Make sure to install JSON formatter so the returned data is formatted and easy to read.
Redwood
Redwood does not come with the sample database, so we will create an SQLite and populate it with some sample data.
Open the schema.prisma file located in the api directory under the db folder and paste the following code:
datasource db {
  provider = "sqlite"
  url      = env("DATABASE_URL")
}

generator client {
  provider      = "prisma-client-js"
  binaryTargets = "native"
}

model Post {
  id    Int   @id @default(autoincrement())
  title  String?
}
Migrate the new changes with the command yarn rw prisma migrate dev for the new schema to take effect.
Redwood also comes with Prisma studio, so we get a graphical user interface (GUI) to work with database records. To access it, run yarn rw prisma studio. It will open it up on http://localhost:5555.
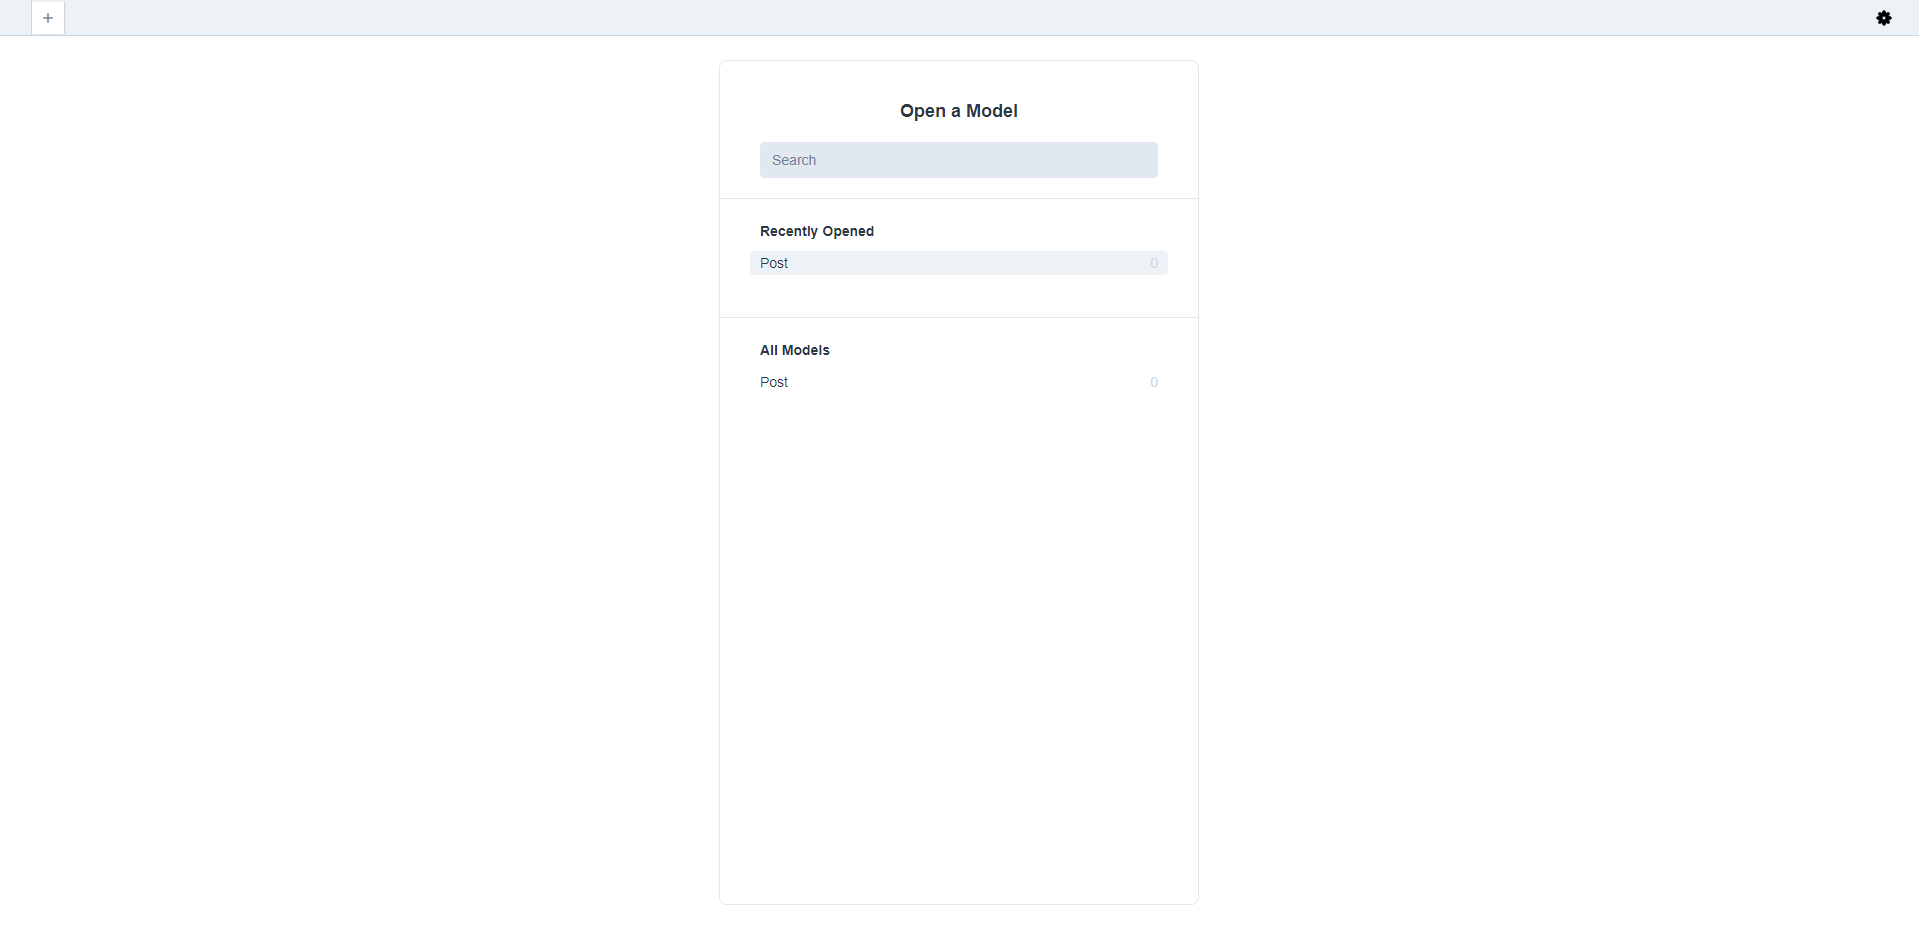
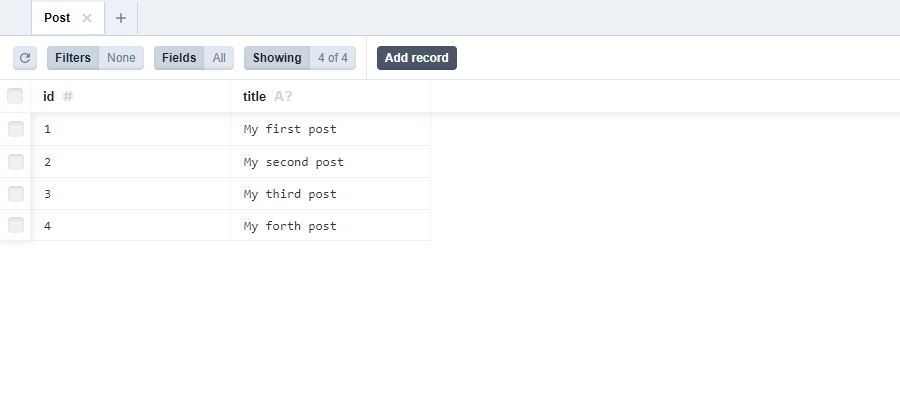
Click on the Post model and add some records into the database so we have data to work with.
CRUD approach
Refine
In order to implement the create, read, update and delete functionality, run the following command in the terminal npm run refine create-resource post.
This will create 5 new files: list.tsx, show.tsx, create.tsx, edit.tsx and index.ts in the pages directory and link everything to the Refine component.
Check your App.tsx file and change it to the following:
import { Refine } from "@refinedev/core";
import {
    notificationProvider,
    Layout,
    ReadyPage,
    ErrorComponent,
} from "@refinedev/antd";
import "@refinedev/antd/dist/reset.css";

import dataProvider from "@refinedev/simple-rest";
import routerProvider from "@refinedev/react-router-v6";

import { PostList, PostCreate, PostEdit, PostShow } from "pages/posts";

function App() {
    return (
        <Refine
            dataProvider={dataProvider("https://api.fake-rest.refine.dev")}
            notificationProvider={notificationProvider}
            Layout={Layout}
            ReadyPage={ReadyPage}
            catchAll={<ErrorComponent />}
            routerProvider={routerProvider}
            resources={[
                {
                    name: "posts",
                    list: PostList,
                    create: PostCreate,
                    edit: PostEdit,
                    show: PostShow,
                },
            ]}
        />
    );
}

export default App;
Next, open the list.tsx file and replace the current content with the following code:
import {
    List,
    Table,
    TextField,
    useTable,
    DateField,
    Space,
    EditButton,
    DeleteButton,
    ShowButton,
} from "@refinedev/antd";
import { IPost } from "interfaces";

export const PostList: React.FC = () => {
    const { tableProps } = useTable<IPost>();

    return (
        <List>
            <Table {...tableProps} rowKey="id">
                <Table.Column
                    dataIndex="id"
                    key="id"
                    title="ID"
                    render={(value) => <TextField value={value} />}
                />
                <Table.Column
                    dataIndex="title"
                    key="title"
                    title="Title"
                    render={(value) => <TextField value={value} />}
                />
                <Table.Column
                    dataIndex="createdAt"
                    key="createdAt"
                    title="Created At"
                    render={(value) => <DateField value={value} format="LLL" />}
                />
                <Table.Column<IPost>
                    title="Actions"
                    dataIndex="actions"
                    render={(_, record) => (
                        <Space>
                            <EditButton
                                hideText
                                size="small"
                                recordItemId={record.id}
                            />
                            <ShowButton
                                hideText
                                size="small"
                                recordItemId={record.id}
                            />
                            <DeleteButton
                                hideText
                                size="small"
                                recordItemId={record.id}
                            />
                        </Space>
                    )}
                />
            </Table>
        </List>
    );
};
Notice we already imported an interface to work with TypeScript. Create a new folder interfaces in the src root and include the index.d.ts file with the following code:
export interface IPost {
    id: number;
    title: string;
    createdAt: string;
}
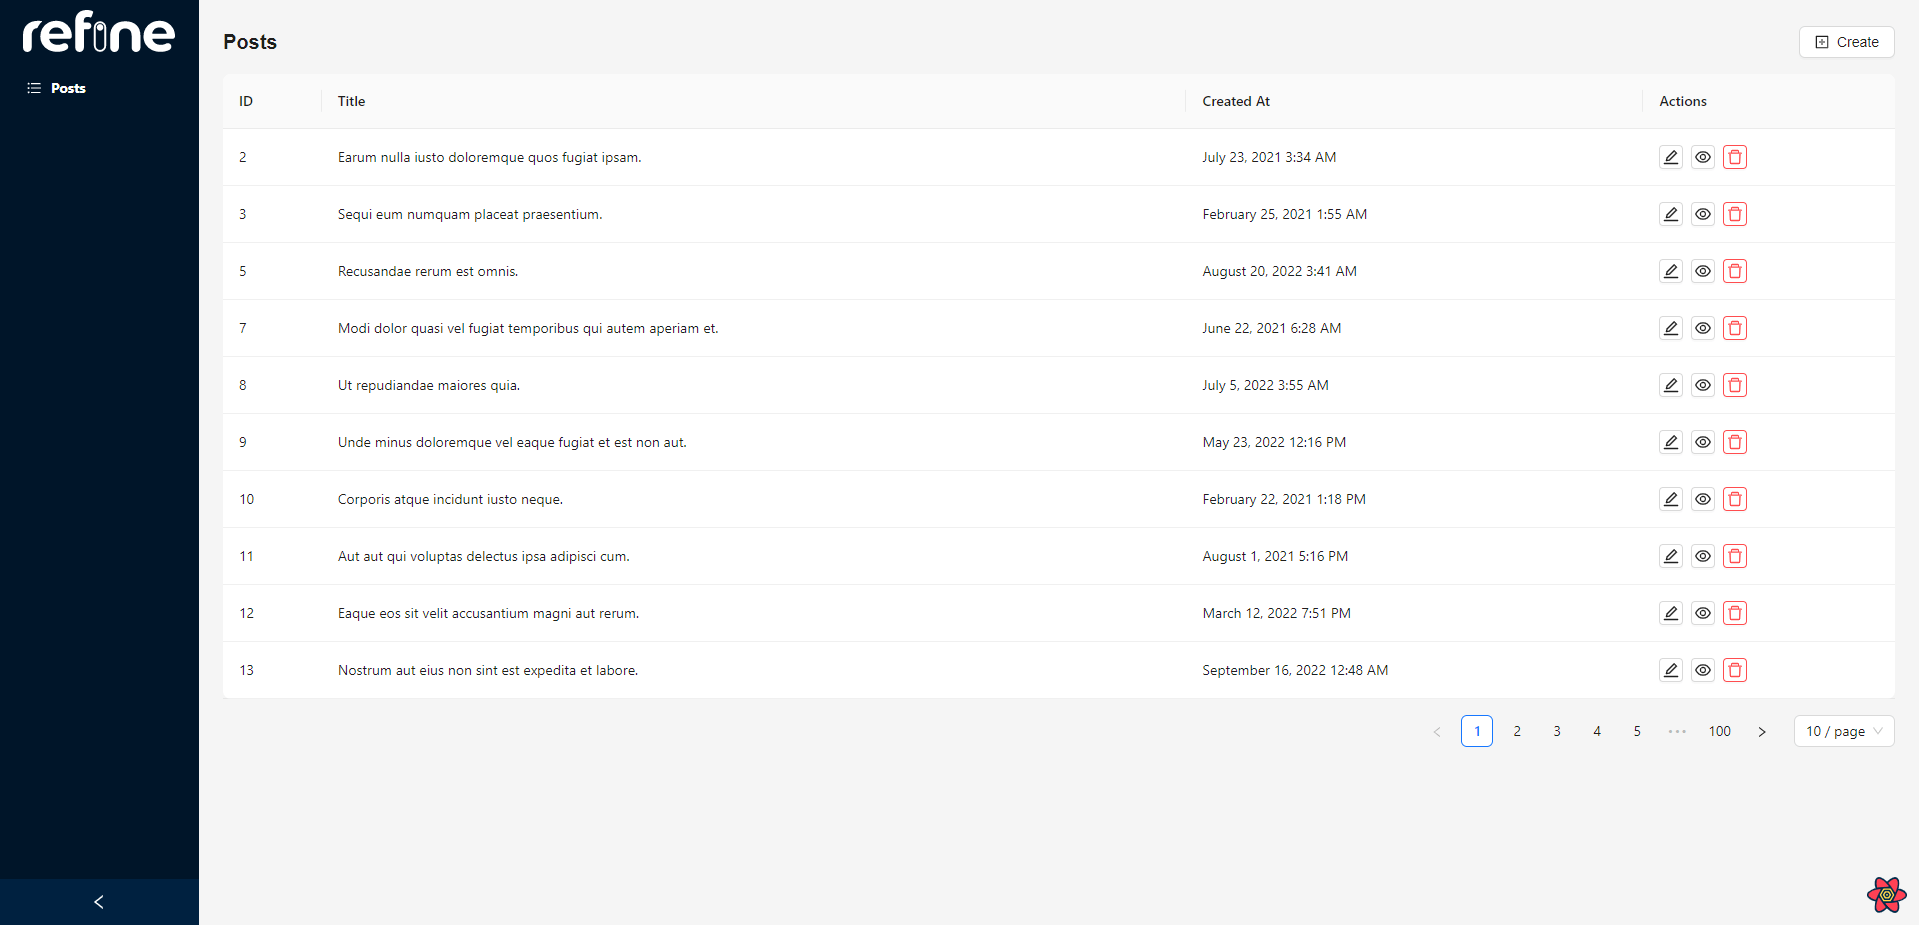
Now test the /posts route on http://localhost:3000/posts. This route will allow us to display all the data from the data provider and display the action buttons.
Let's also create a feature to create new records. Open the create.tsx file in the pages folder and paste the following code into the file:
import { Create, Form, Input, useForm } from "@refinedev/antd";

import { IPost } from "interfaces";

export const PostCreate: React.FC = () => {
    const { formProps, saveButtonProps } = useForm<IPost>();

    return (
        <Create saveButtonProps={saveButtonProps}>
            <Form {...formProps} layout="vertical">
                <Form.Item
                    label="Title"
                    name="title"
                    rules={[
                        {
                            required: true,
                        },
                    ]}
                >
                    <Input />
                </Form.Item>
            </Form>
        </Create>
    );
};
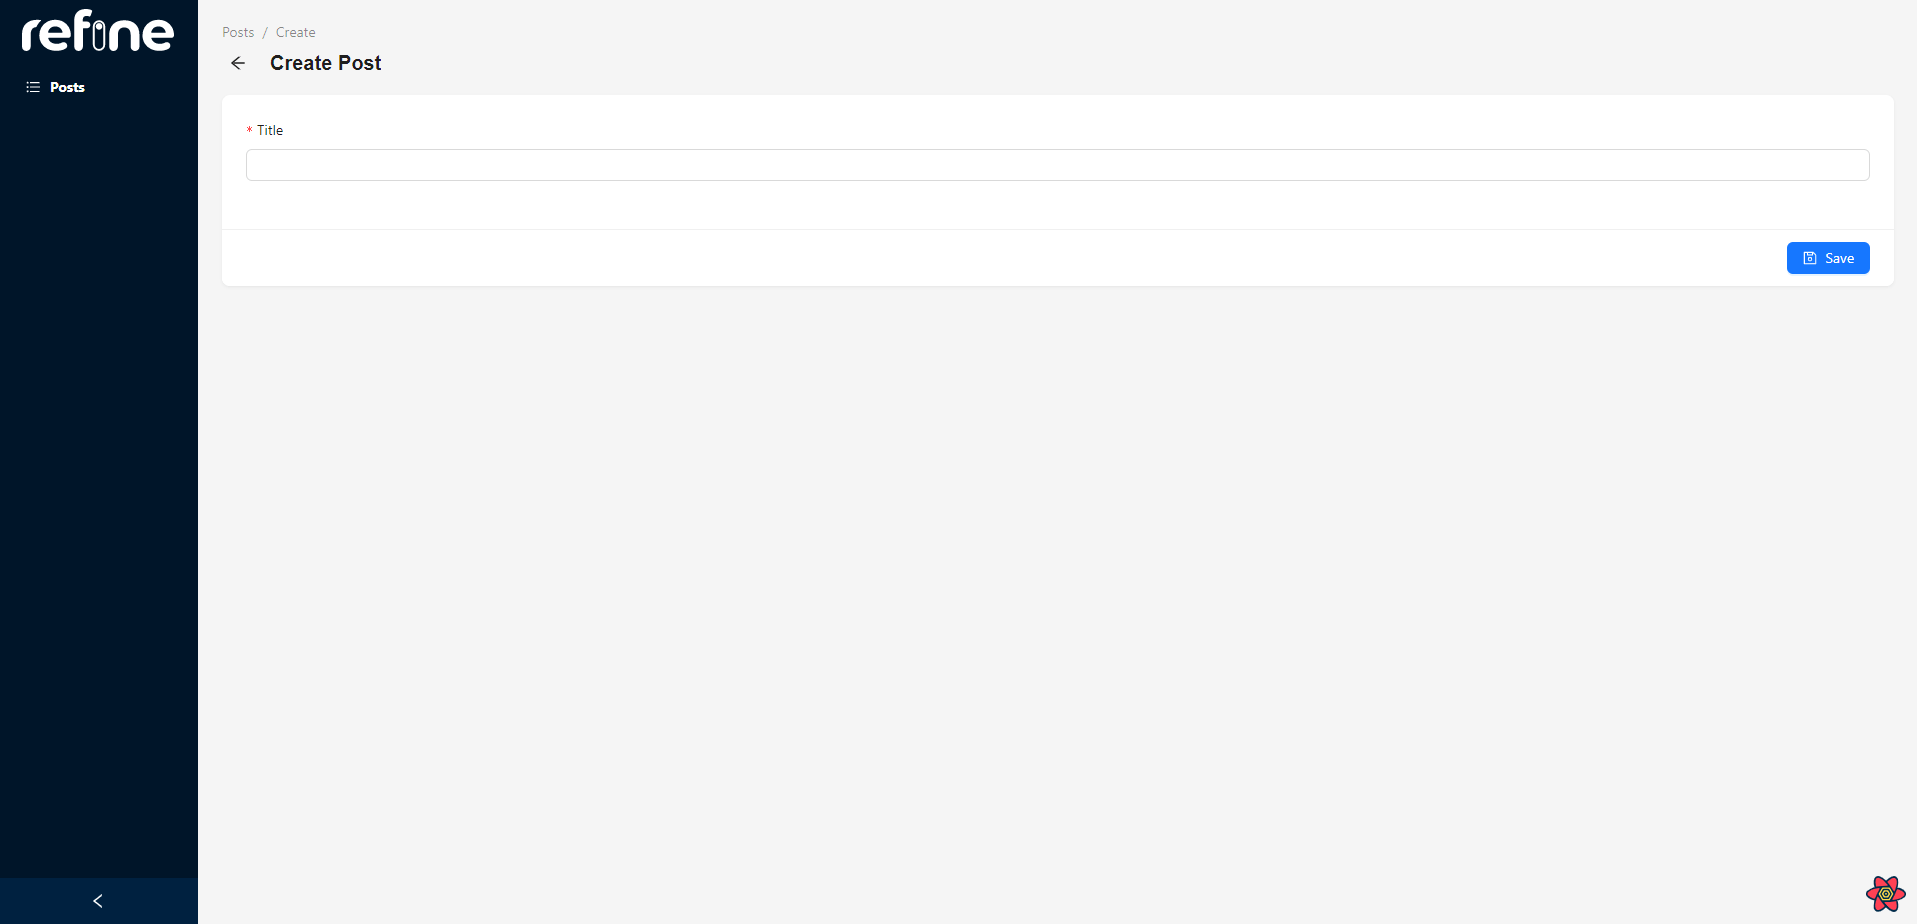
Now every time we want to create a new record, we have a dedicated route (http://localhost:3000/posts/create) for it:
Next, we will want to update the records. For that open the edit.tsx file and change the content to the following code:
import { Edit, Form, Input, useForm } from "@refinedev/antd";

import { IPost } from "interfaces";

export const PostEdit: React.FC = () => {
    const { formProps, saveButtonProps } = useForm<IPost>();

    return (
        <Edit saveButtonProps={saveButtonProps}>
            <Form {...formProps} layout="vertical">
                <Form.Item
                    label="Title"
                    name="title"
                    rules={[
                        {
                            required: true,
                        },
                    ]}
                >
                    <Input />
                </Form.Item>
            </Form>
        </Edit>
    );
};
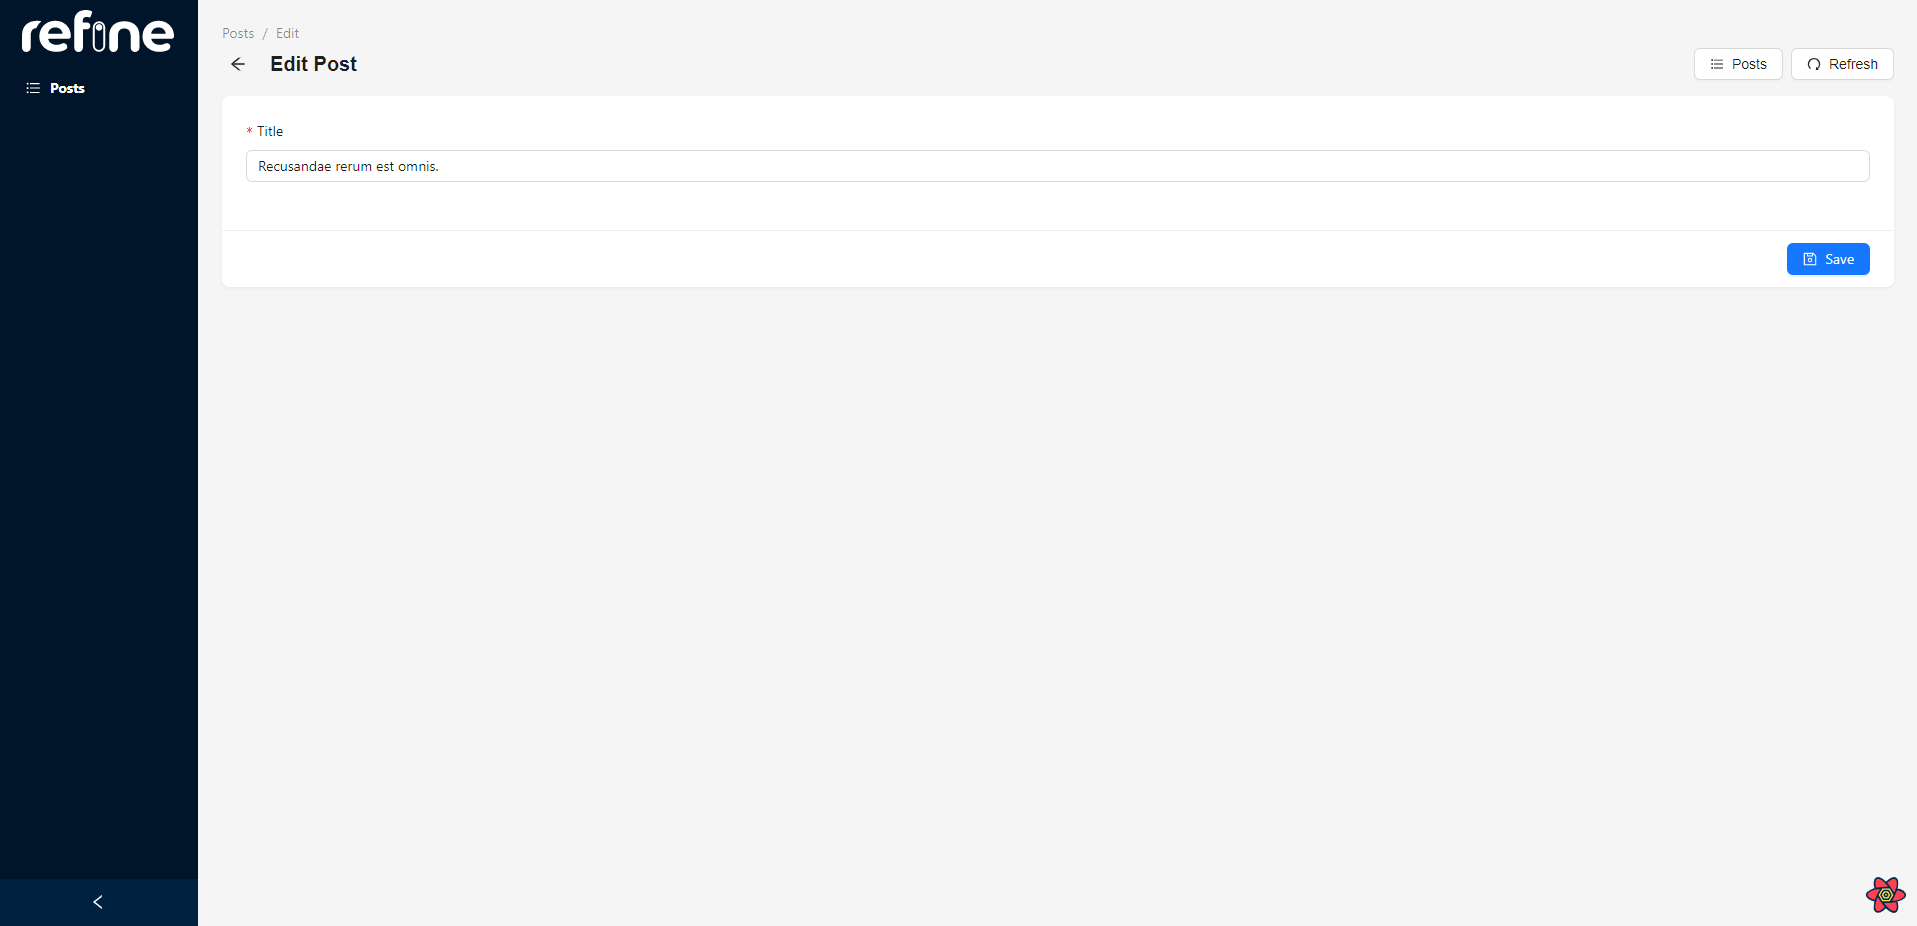
Each time there is the need to update some record, users will be presented with the current values that could be editable.
The posts can be edited via http://localhost:3000/posts/edit/5, where the number behind the last forward slash is the ID of the post:
Finally, users should be able to see individual posts by opening them separately. For that, open show.tsx file and include the following code:
import { useShow } from "@refinedev/core";
import { Show, Typography } from "@refinedev/antd";

import { IPost } from "interfaces";

const { Title, Text } = Typography;

export const PostShow: React.FC = () => {
    const { queryResult } = useShow<IPost>();
    const { data, isLoading } = queryResult;
    const record = data?.data;

    return (
        <Show isLoading={isLoading}>
            <Title level={5}>Title</Title>
            <Text>{record?.title}</Text>
        </Show>
    );
};
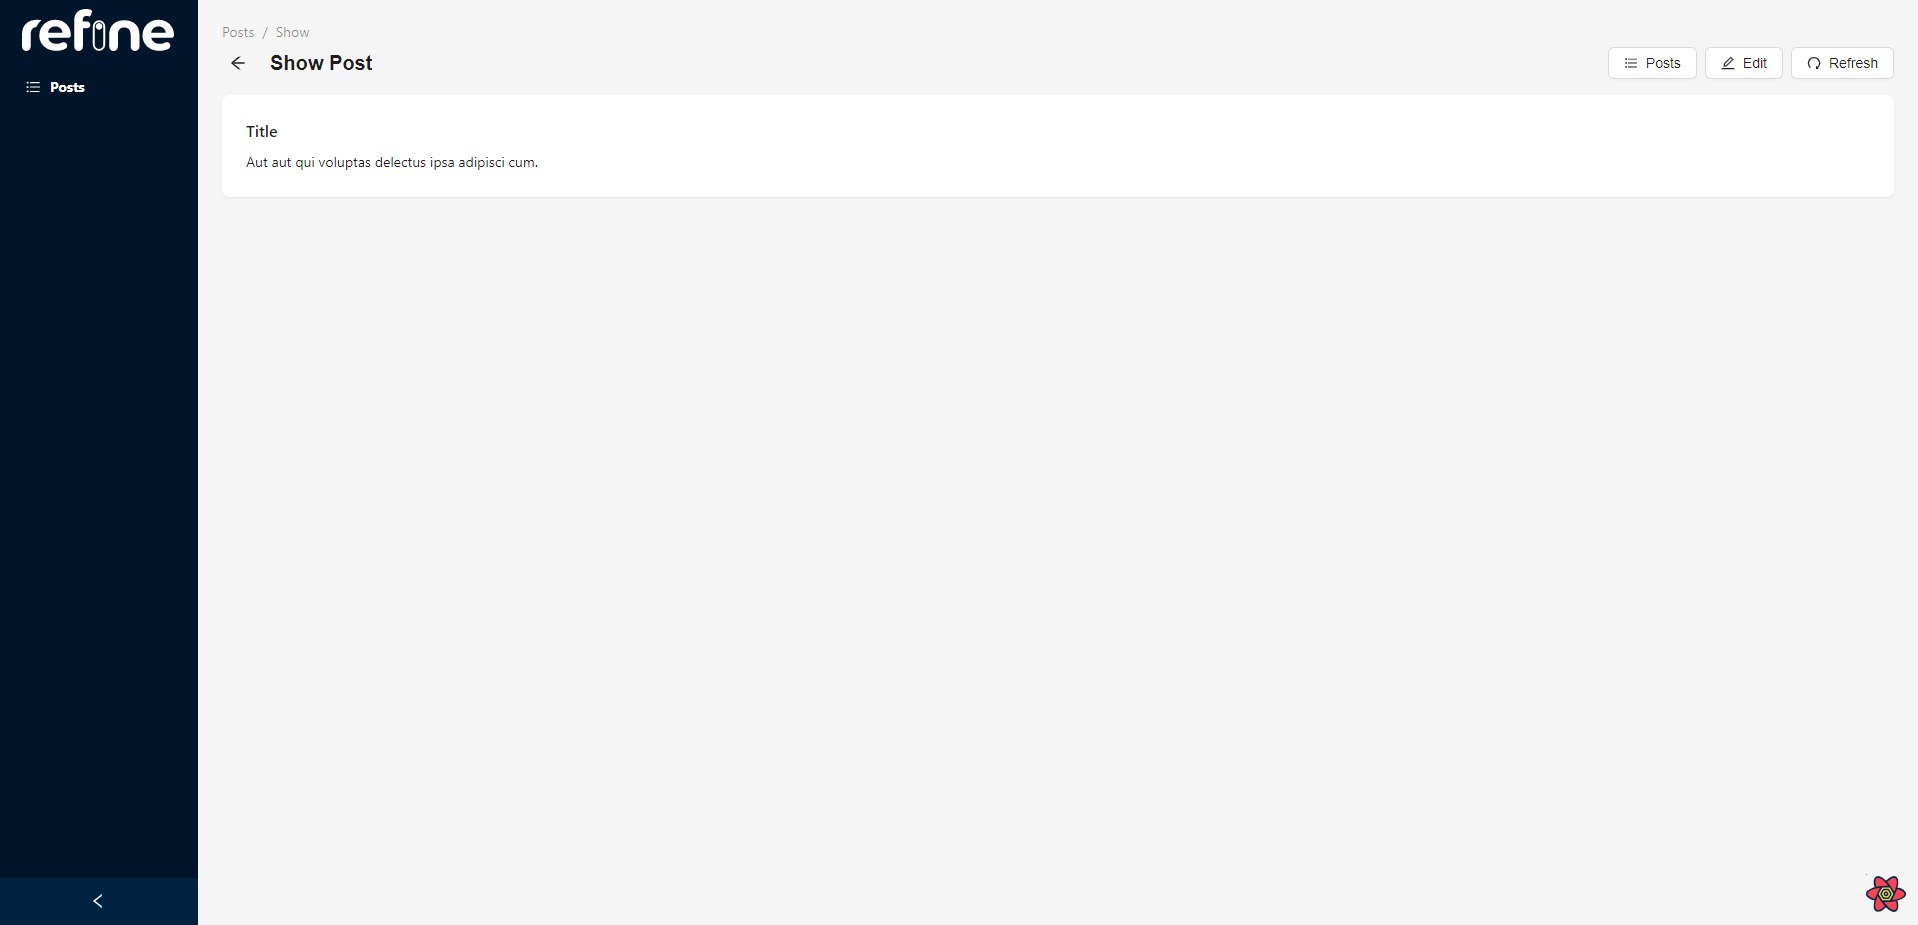
To read the data, users will be able to click on individual records and they will be opened in the new route.
Each post will be accessible on the http://localhost:3000/posts/show/11, where the number behind the last forward slash is the ID of the post:
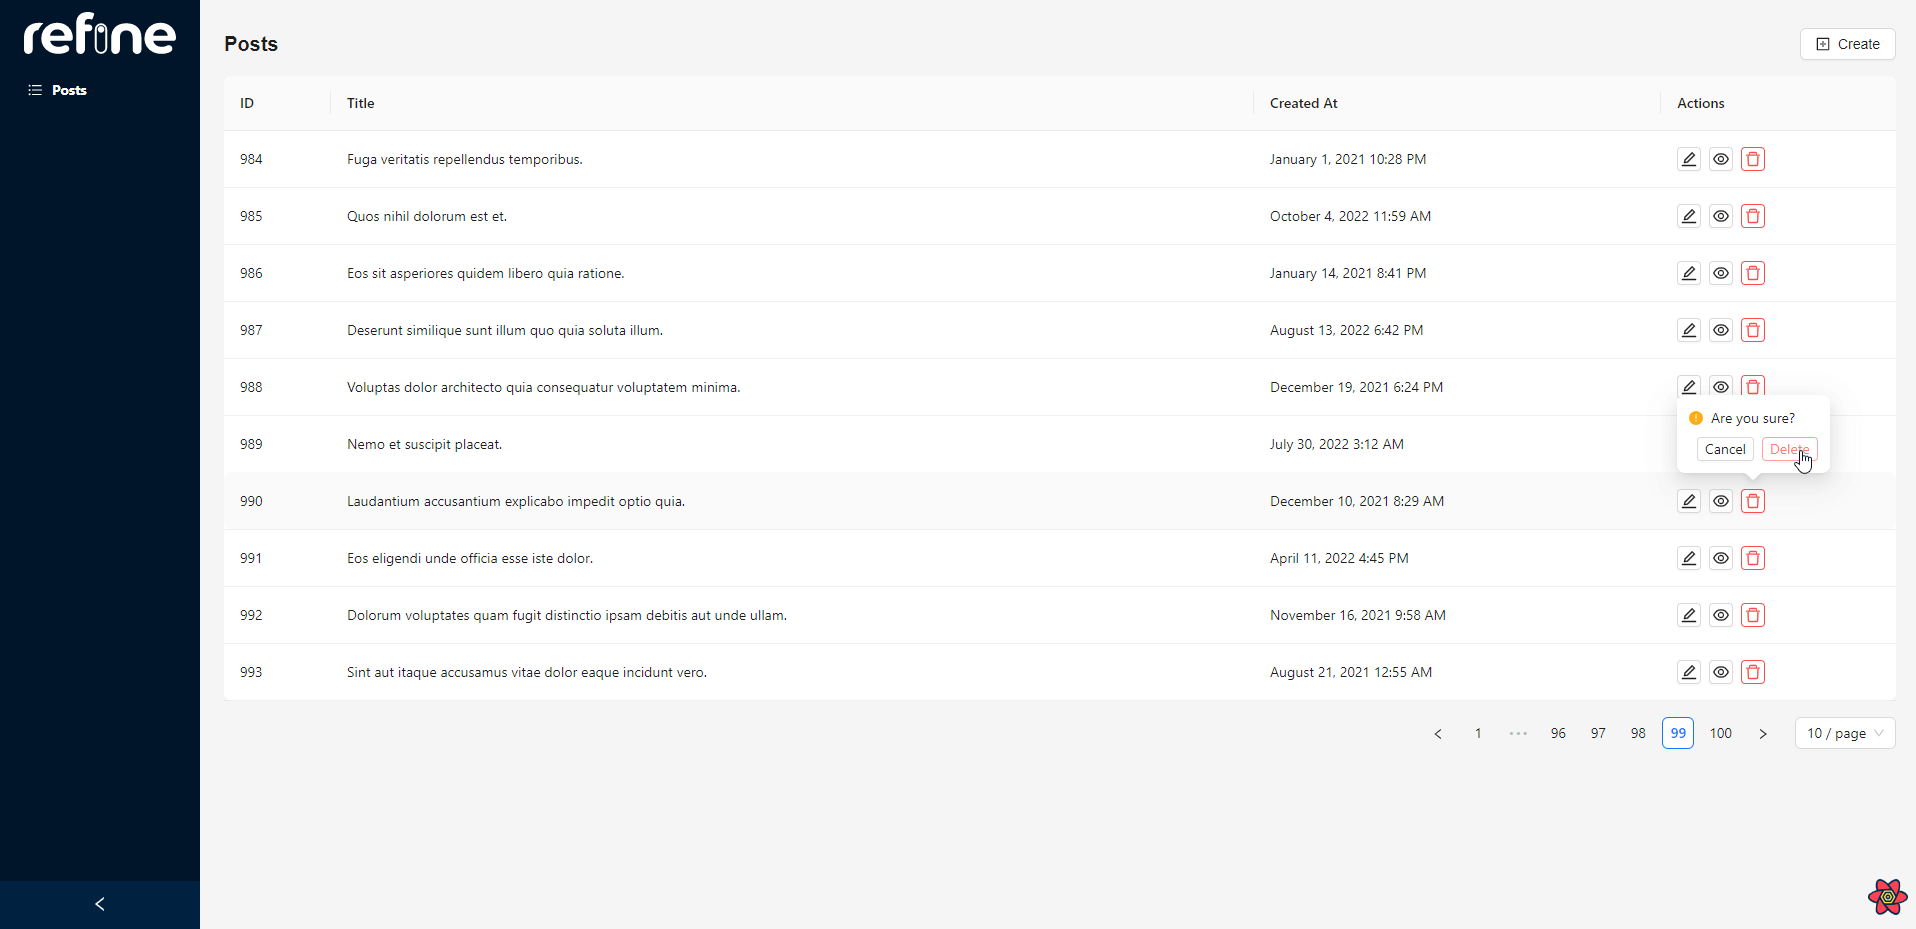
Users are also able to delete any record from the app by clicking on the bin icon. The UI is handled via a modal, where they are first asked to confirm the decision:
Redwood
In order to create the CRUD functionality in the Redwood app, run the following command on the terminal: yarn rw g scaffold post.
Redwood first created individual components to create, read, update and delete posts in the components folder. Here is the example of PostCell.tsx that uses GraphQL to fetch the data.
import type { FindPostById } from "types/graphql";

import type { CellSuccessProps, CellFailureProps } from "@redwoodjs/web";

import Post from "src/components/Post/Post";

export const QUERY = gql`
    query FindPostById($id: Int!) {
        post: post(id: $id) {
            id
            title
        }
    }
`;

export const Loading = () => <div>Loading...</div>;

export const Empty = () => <div>Post not found</div>;

export const Failure = ({ error }: CellFailureProps) => (
    <div className="rw-cell-error">{error?.message}</div>
);

export const Success = ({ post }: CellSuccessProps<FindPostById>) => {
    return <Post post={post} />;
};
After that Redwood created a separate page for each CRUD action in the pages folder and imported the component to keep the code organized and easier to manage. Here is the example of PostPage.tsx:
import PostCell from "src/components/Post/PostCell";

type PostPageProps = {
    id: number;
};

const PostPage = ({ id }: PostPageProps) => {
    return <PostCell id={id} />;
};

export default PostPage;
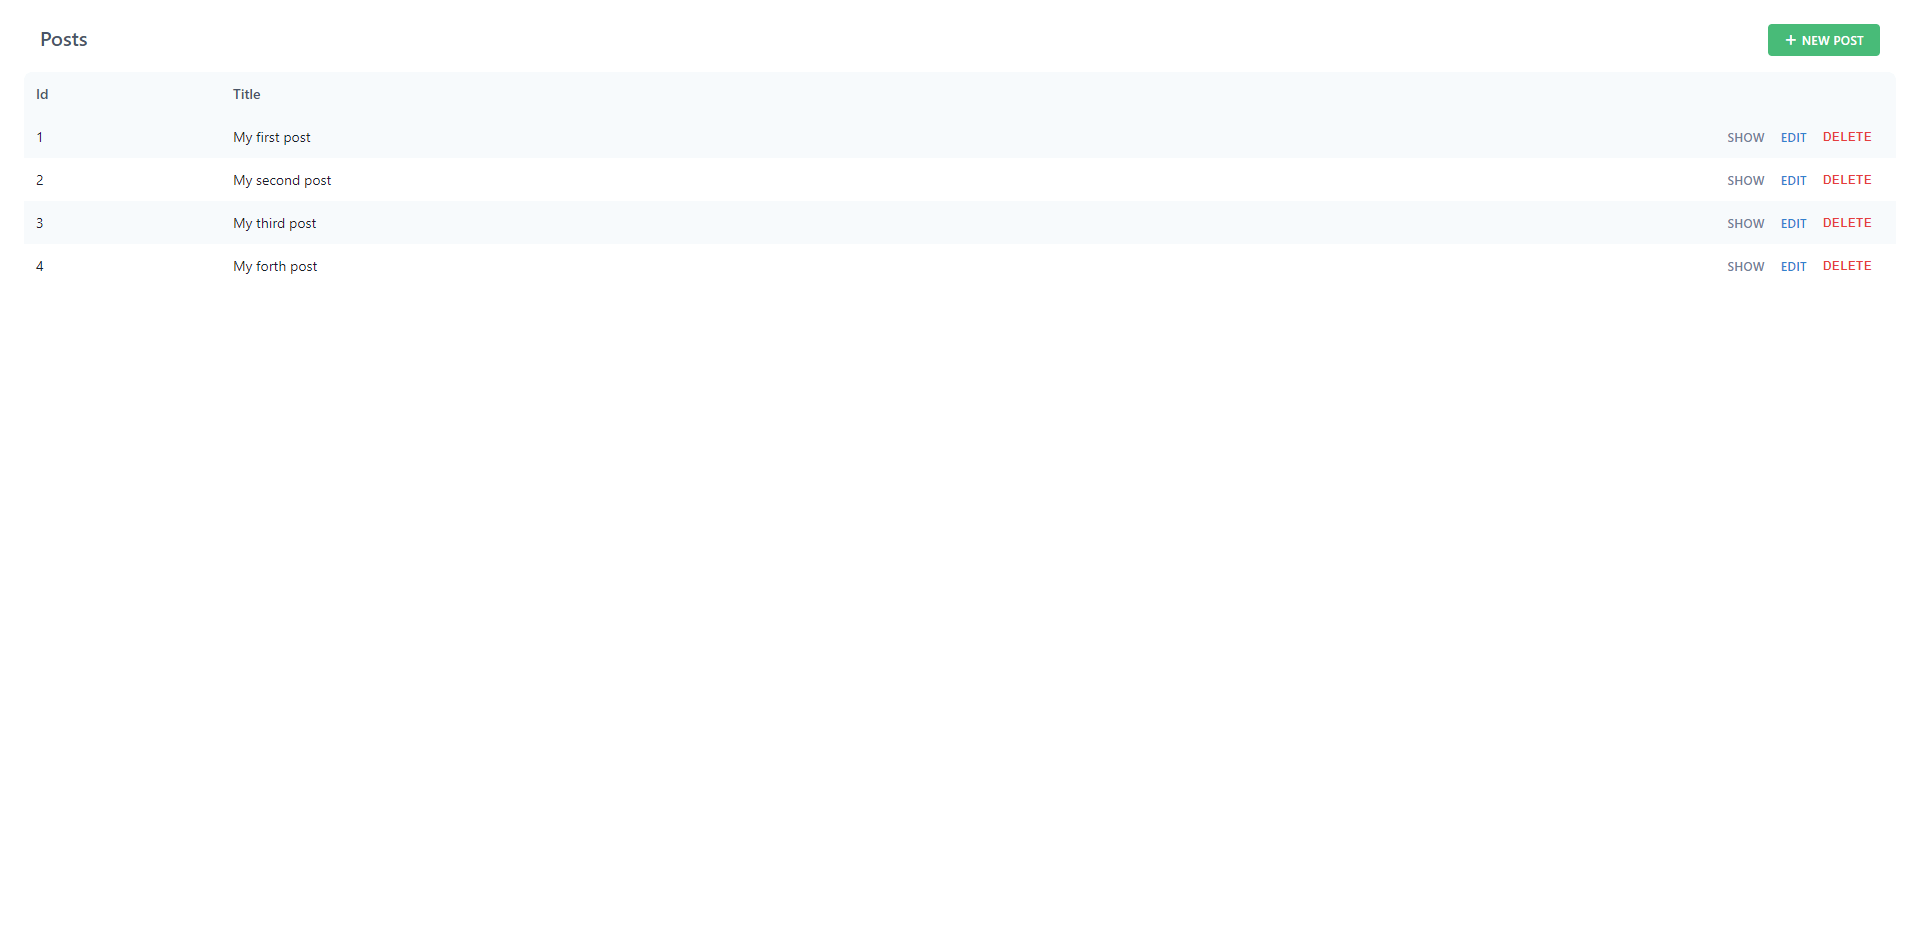
To see it working, access the route on http://localhost:8910/posts, which would display all of the posts available in the database:
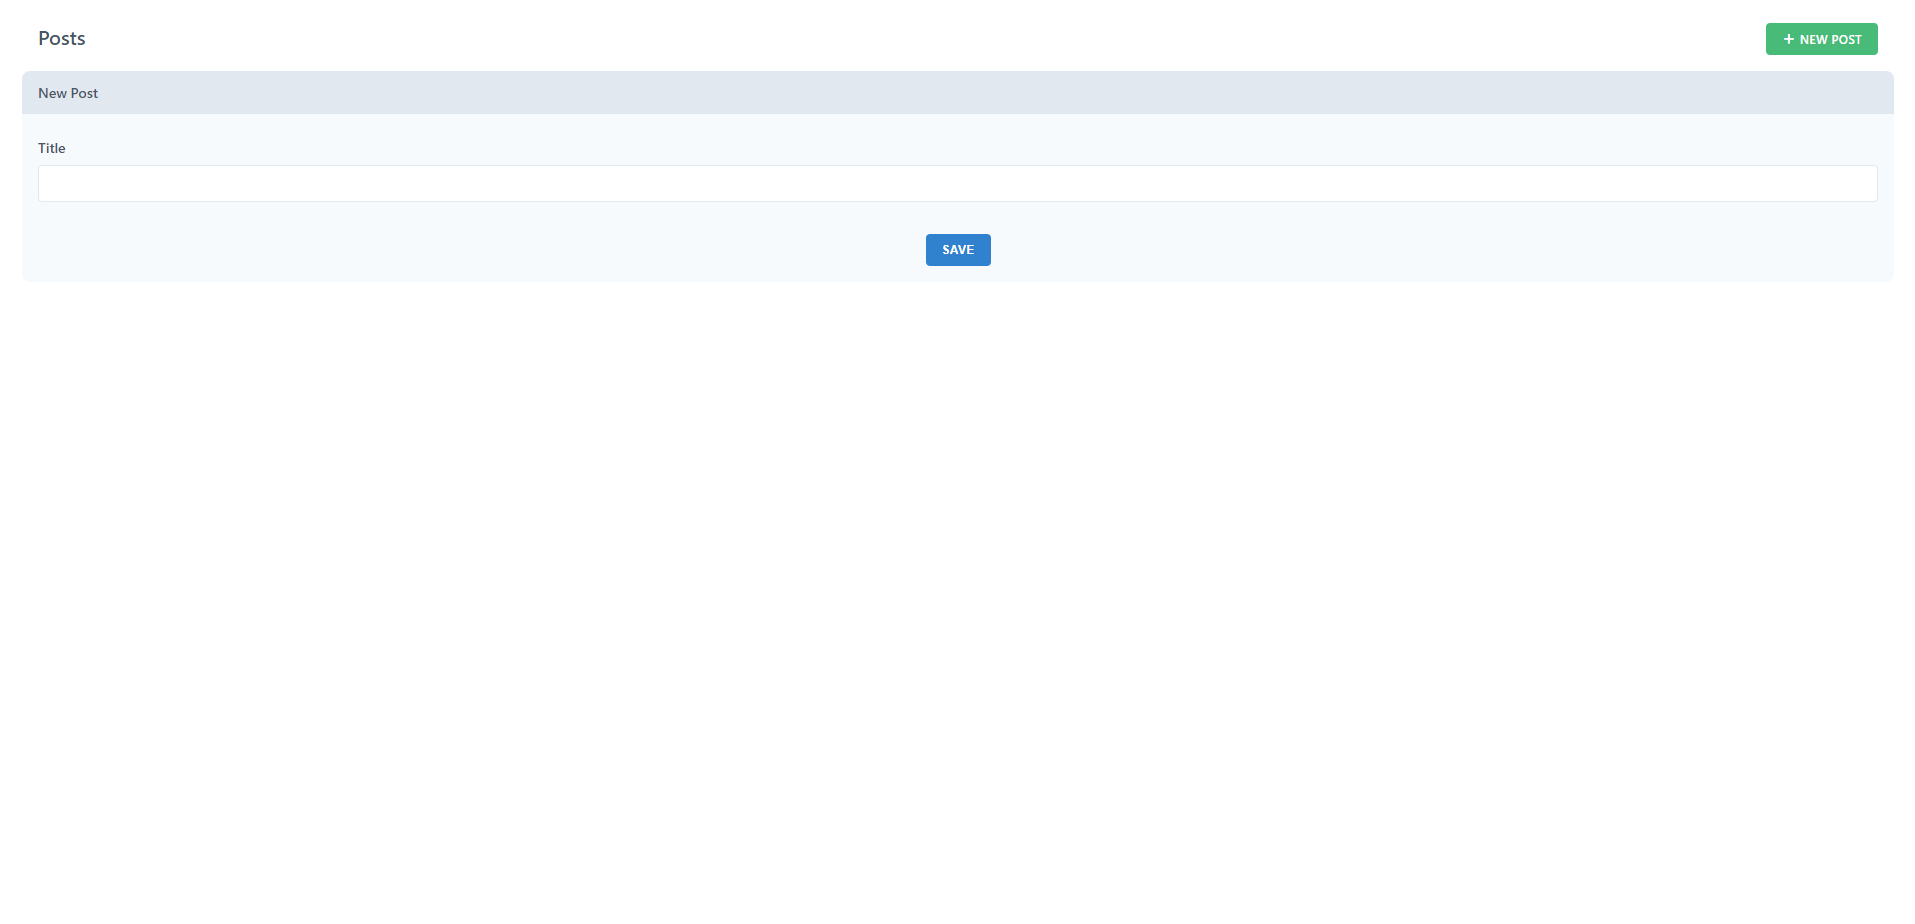
In order to create a new post navigate to http://localhost:8910/posts/new:
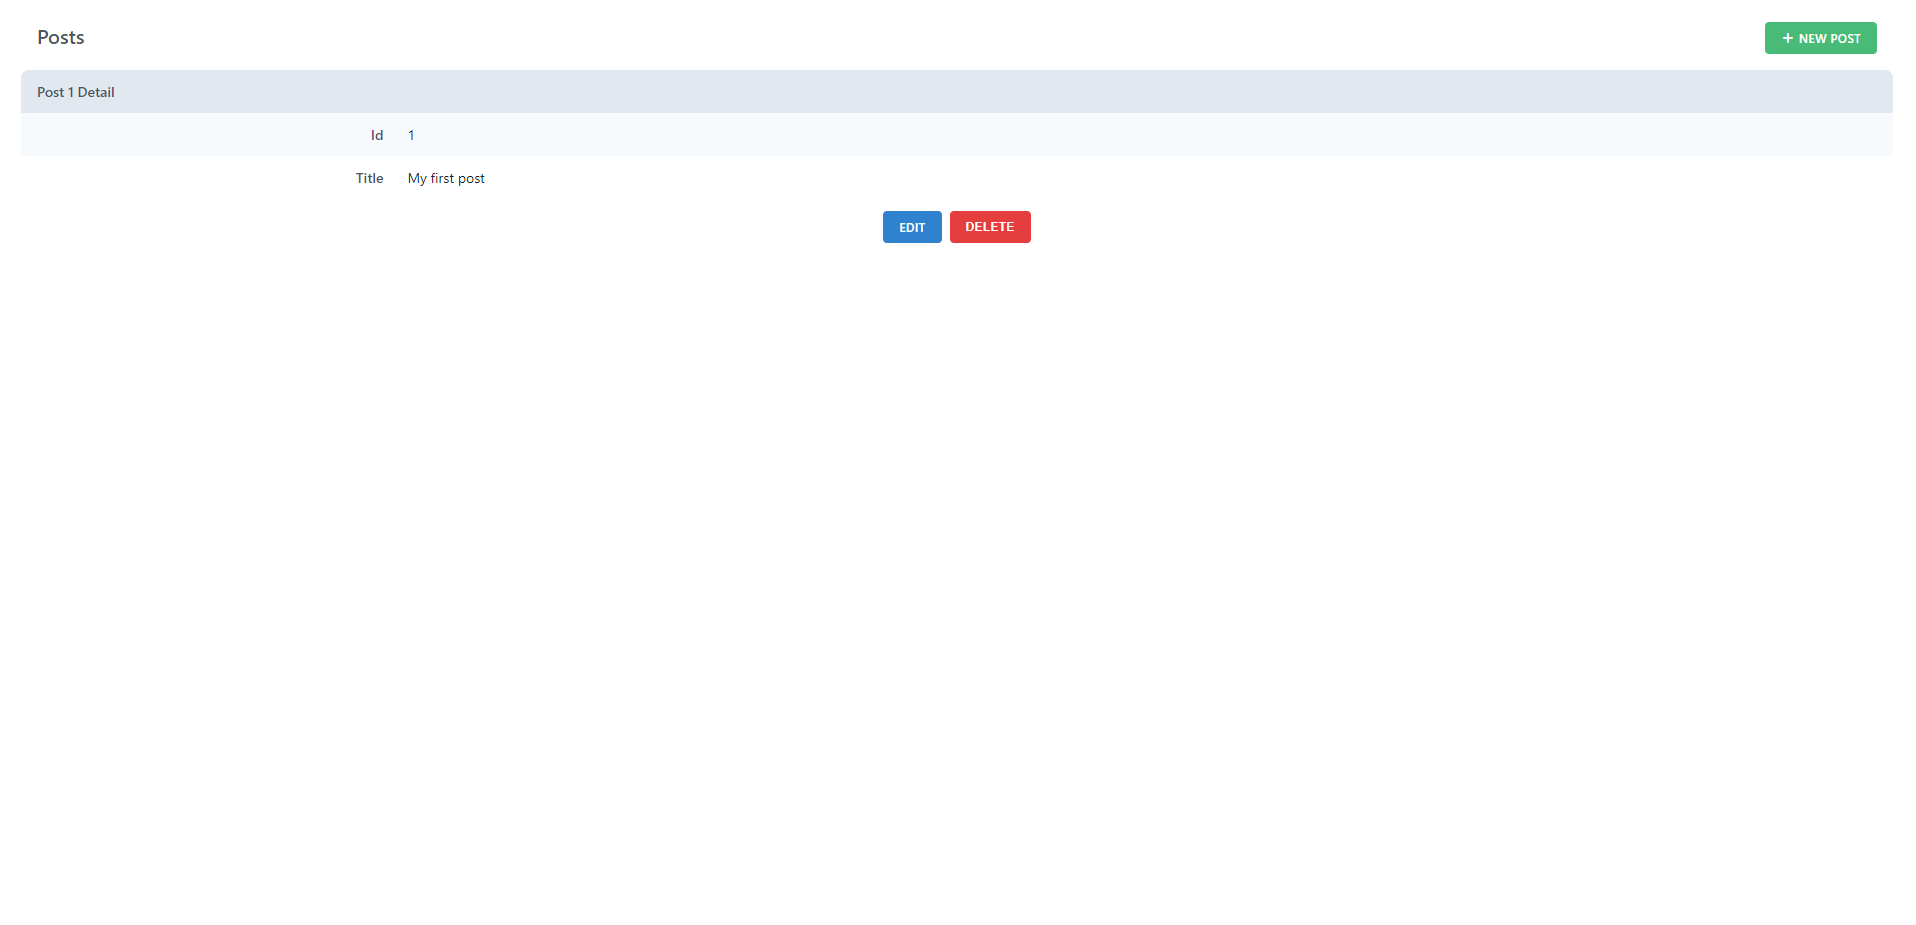
Now try to open any of the individual posts, via http://localhost:8910/posts/1, where the number after the last slash in the URL is the ID of the particular post.
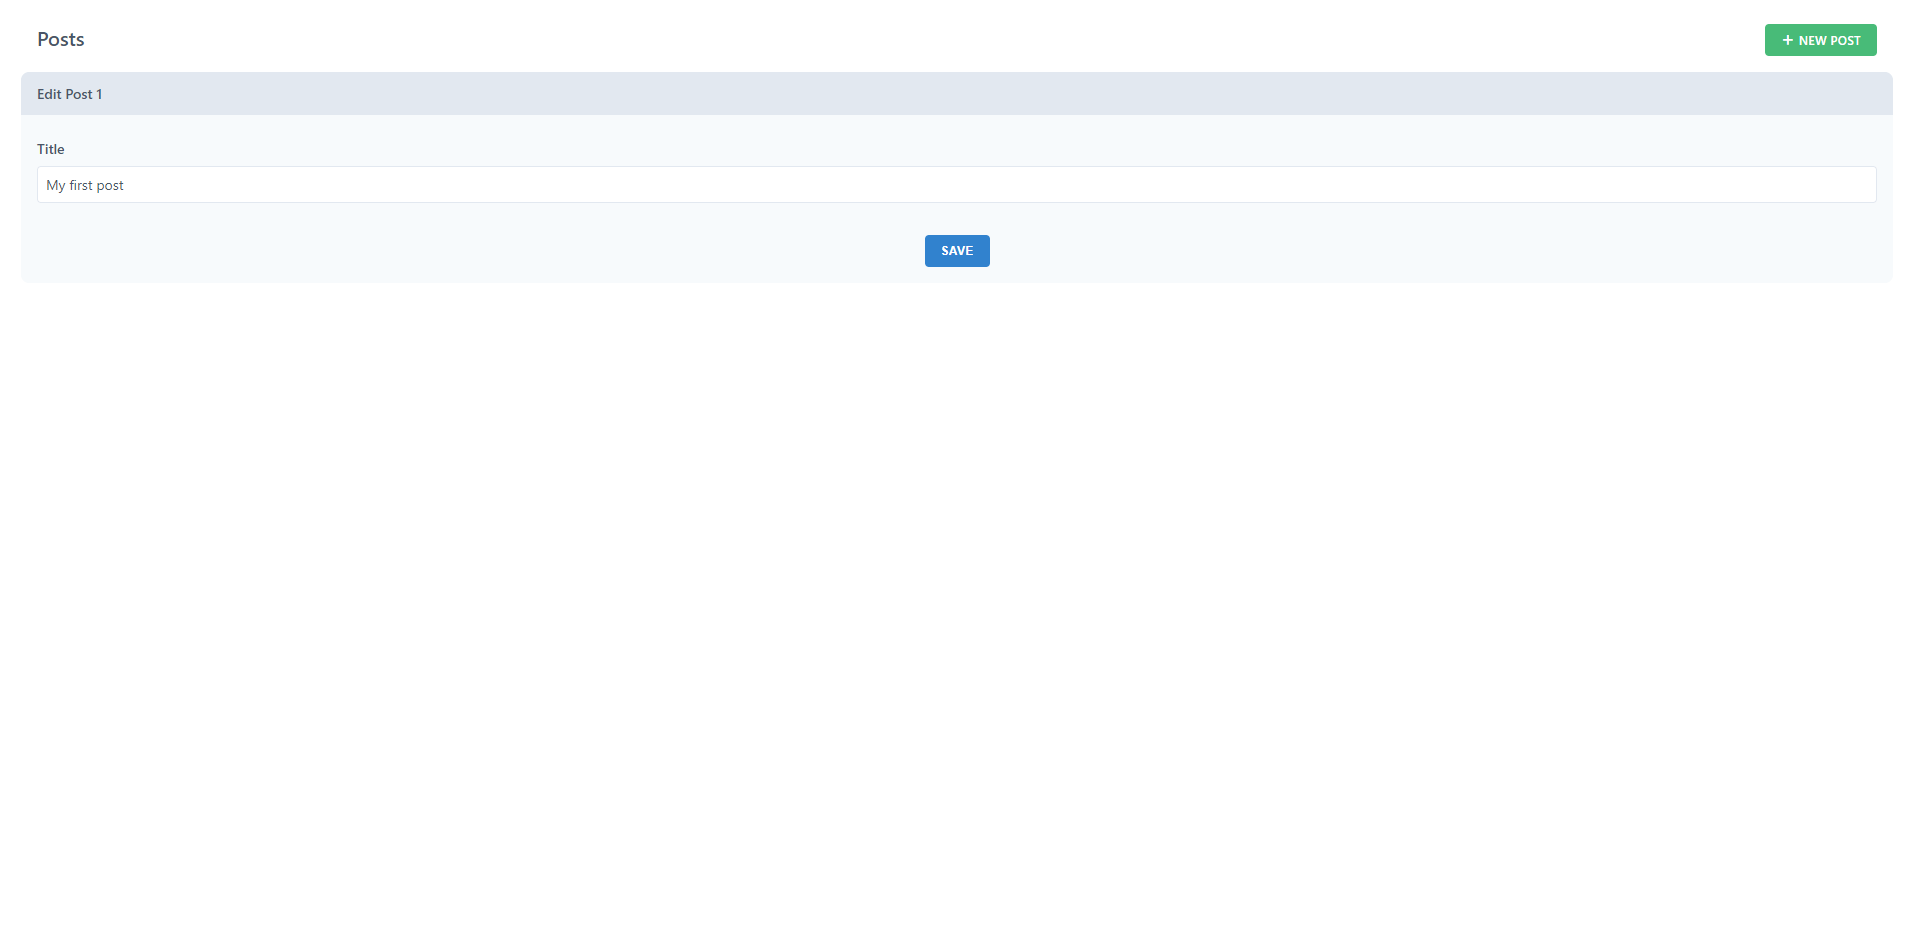
Similarly, you can edit any of the posts in the database via http://localhost:8910/posts/1/edit:
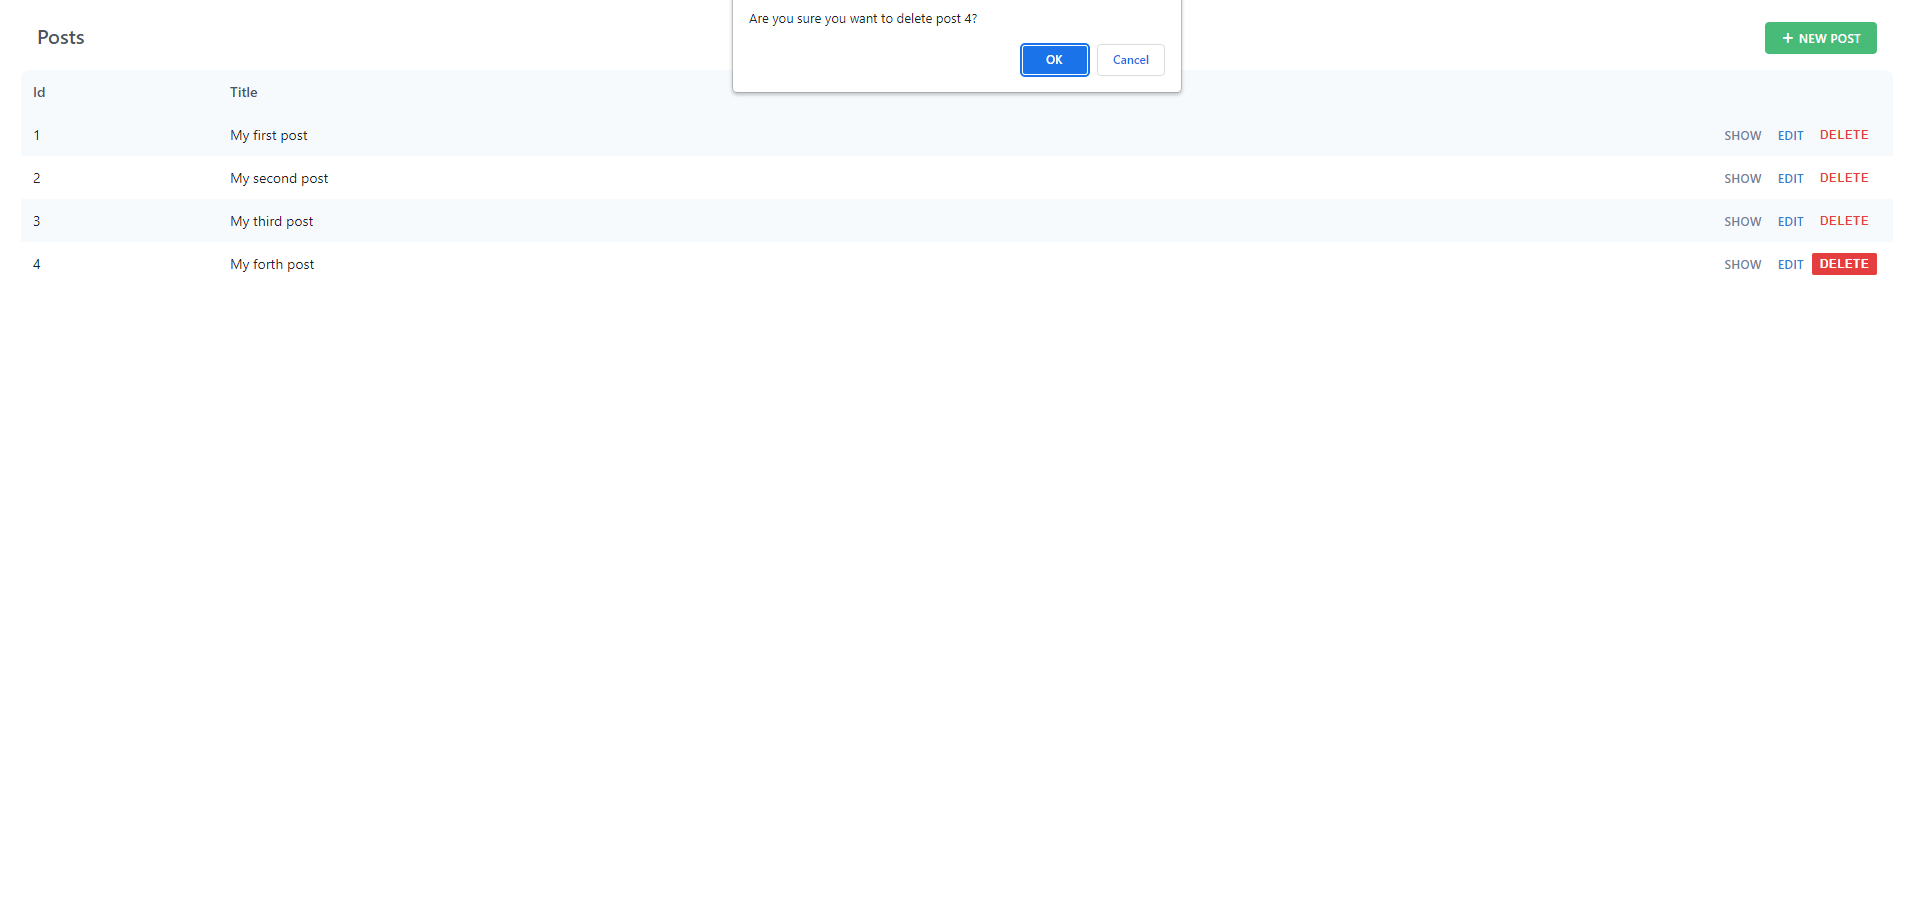
And, finally, the user is also able to delete any of the posts. Before the actual deletion, the user is presented with the alert asking to confirm the decision:
Authentication
Refine
We will use Auth0 provider to implement the authentication in our refine app.
First, we must install the required Auth0 package via the command
npm install @auth0/auth0-react.
For authentication to work, the whole app needs to be wrapped in the Auth0 provider. The most appropriate place for that is the index.tsx file in the src directory root. Change it to the following:
import React from "react";
import { createRoot } from "react-dom/client";

import { Auth0Provider } from "@auth0/auth0-react";

import App from "./App";

const container = document.getElementById("root");
const root = createRoot(container!);
root.render(
    <React.StrictMode>
        <Auth0Provider
            domain={process.env.REACT_APP_AUTH0_DOMAIN as string}
            clientId={process.env.REACT_APP_AUTH0_CLIENT_ID as string}
            redirectUri={window.location.origin}
        >
            <App />
        </Auth0Provider>
    </React.StrictMode>,
);
Now create a new account on Auth0.
Once logged in create a new application, by selecting Single page web application.
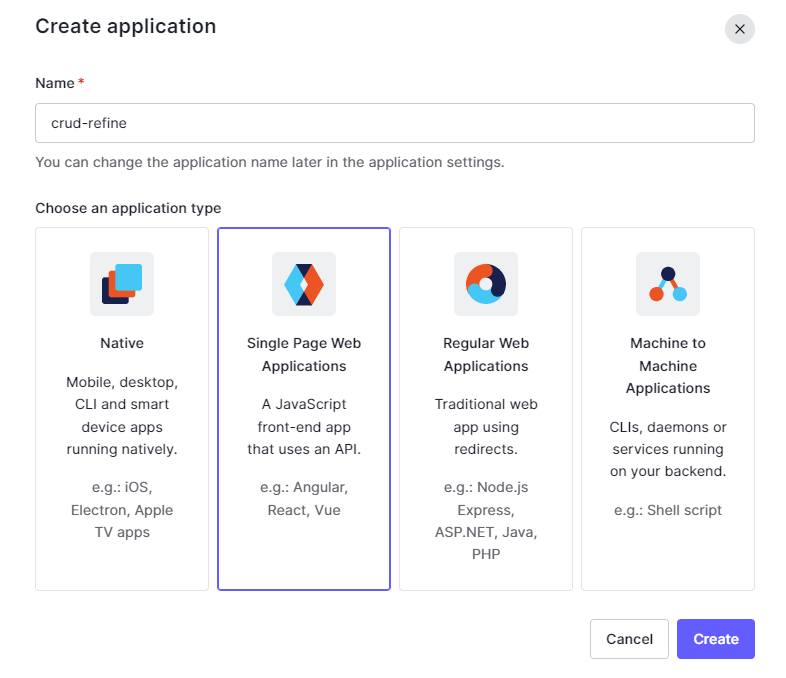
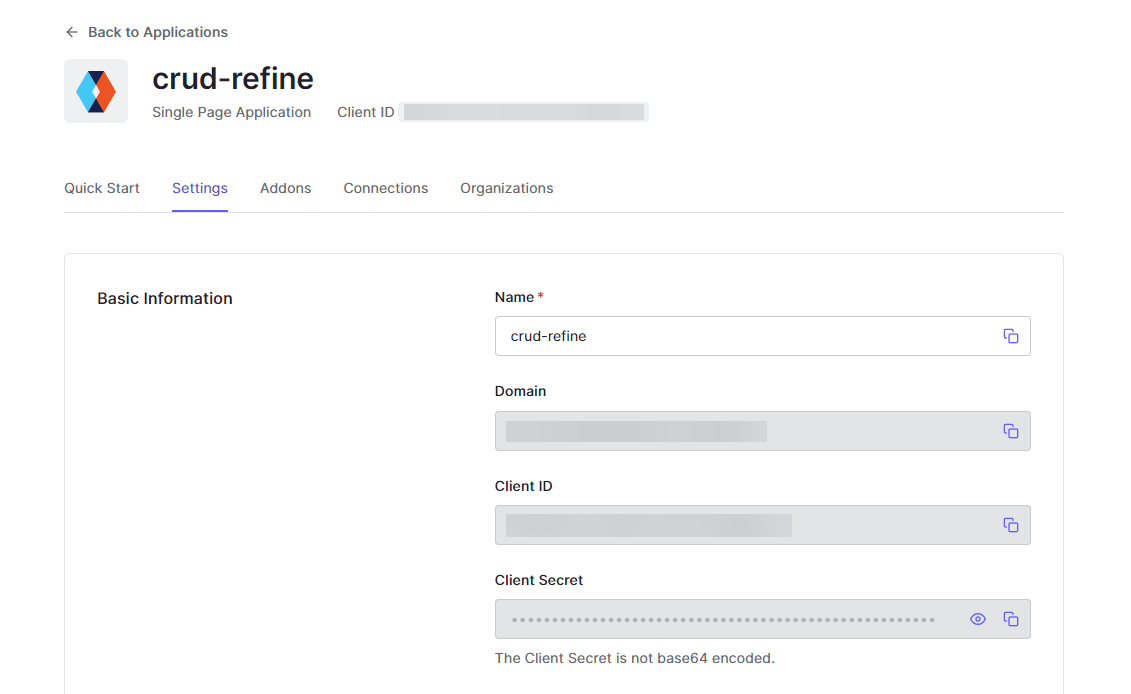
After that navigate to the Settings panel and you will get the keys for domain, client_id, and client secret.
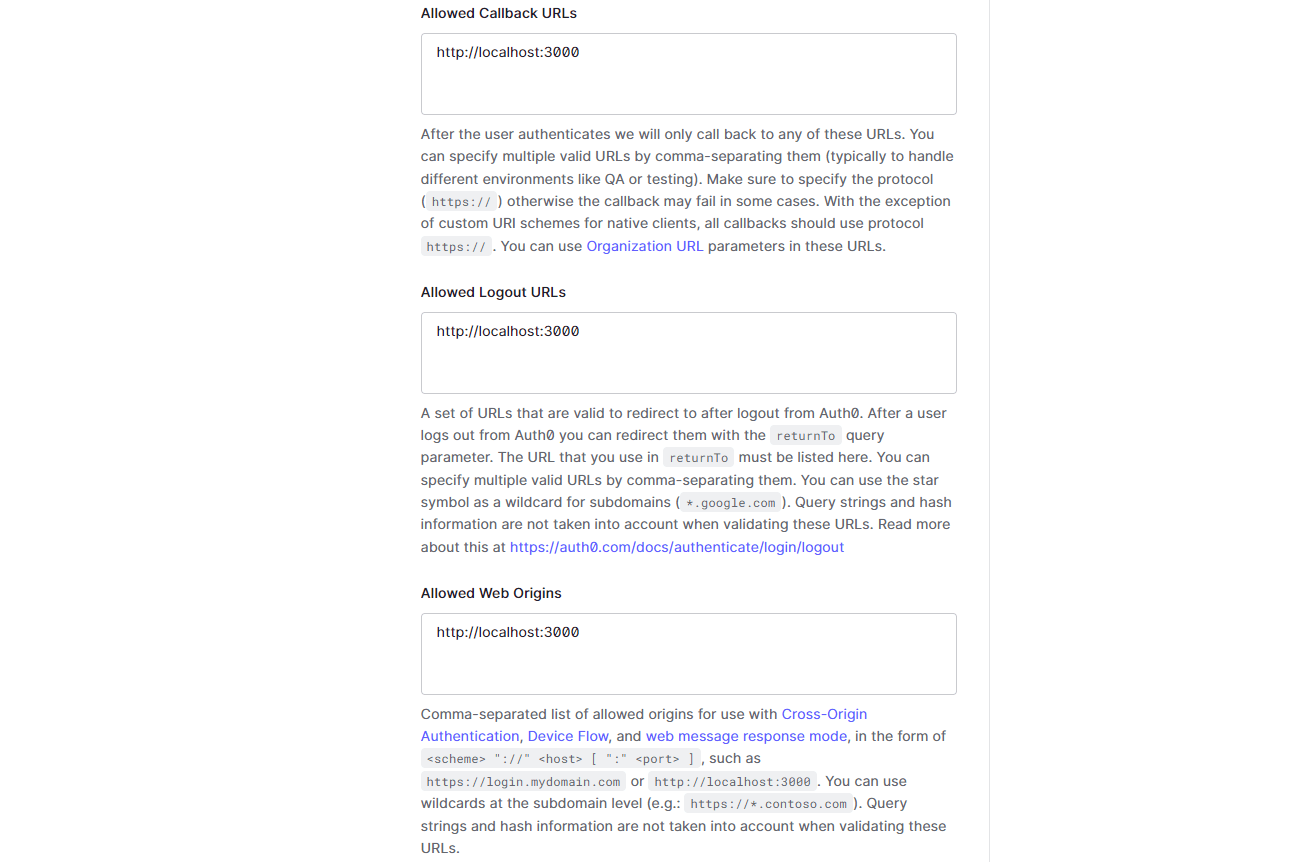
Now scroll down the settings and configure the callback, logout, and web origins URLs like shown below:
Go back to the refine app, create a file .env in the app root and paste the following environment values:

Now restart the developer server for the changes to take effect. Press Ctrl+C on your keyboard to close the server and run npm run dev to start it again.
Then create a new file login.tsx inside the src directory and include the following code:
import { AntdLayout, Button } from "@refinedev/antd";
import { useAuth0 } from "@auth0/auth0-react";

export const Login: React.FC = () => {
    const { loginWithRedirect } = useAuth0();

    return (
        <AntdLayout
            style={{
                backgroundSize: "cover",
            }}
        >
            <div style={{ height: "100vh", display: "flex" }}>
                <div style={{ maxWidth: "200px", margin: "auto" }}>
                    <Button
                        type="primary"
                        size="large"
                        block
                        onClick={() => loginWithRedirect()}
                    >
                        Sign in to refine app
                    </Button>
                </div>
            </div>
        </AntdLayout>
    );
};
Finally, open the Apx.tsx file and paste the following code:
import { Refine, AuthBindings } from "@refinedev/core";
import { notificationProvider, Layout, ErrorComponent } from "@refinedev/antd";
import dataProvider from "@refinedev/simple-rest";
import routerProvider from "@refinedev/react-router-v6";

import { useAuth0 } from "@auth0/auth0-react";
import axios from "axios";

import "@refinedev/antd/dist/reset.css";

import { PostList, PostCreate, PostEdit, PostShow } from "pages/posts";
import { Login } from "pages/login";

const API_URL = "https://api.fake-rest.refine.dev";

const App: React.FC = () => {
    const { isLoading, user, logout, getIdTokenClaims } = useAuth0();

    if (isLoading) {
        return <span>loading...</span>;
    }

    const authProvider: AuthBindings = {
        login: async () => {
            return {
                success: true,
                redirectTo: "/",
            };
        },
        logout: async () => {
            logout({ returnTo: window.location.origin });
            return {
                success: true,
                redirectTo: "/",
            };
        },
        onError: async (error) => {
            console.error(error);
            return { error };
        },
        check: async () => {
            try {
                const token = await getIdTokenClaims();
                if (token) {
                    axios.defaults.headers.common = {
                        Authorization: `Bearer ${token.__raw}`,
                    };
                    return {
                        authenticated: true,
                        redirectTo: "/",
                    };
                } else {
                    return {
                        authenticated: false,
                        redirectTo: "/login",
                        error: {
                            message: "Check failed",
                            name: "Token not found",
                        },
                    };
                }
            } catch (error) {
                return {
                    authenticated: false,
                    redirectTo: "/login",
                    error: error,
                };
            }
        },
        getPermissions: async () => null,
        getIdentity: async () => {
            if (user) {
                return {
                    ...user,
                    avatar: user.picture,
                };
            }
            return null;
        },
    };

    return (
        <Refine
            LoginPage={Login}
            authProvider={authProvider}
            dataProvider={dataProvider(API_URL, axios)}
            routerProvider={routerProvider}
            notificationProvider={notificationProvider}
            Layout={Layout}
            catchAll={<ErrorComponent />}
            resources={[
                {
                    name: "posts",
                    list: PostList,
                    create: PostCreate,
                    edit: PostEdit,
                    show: PostShow,
                },
            ]}
        />
    );
};

export default App;
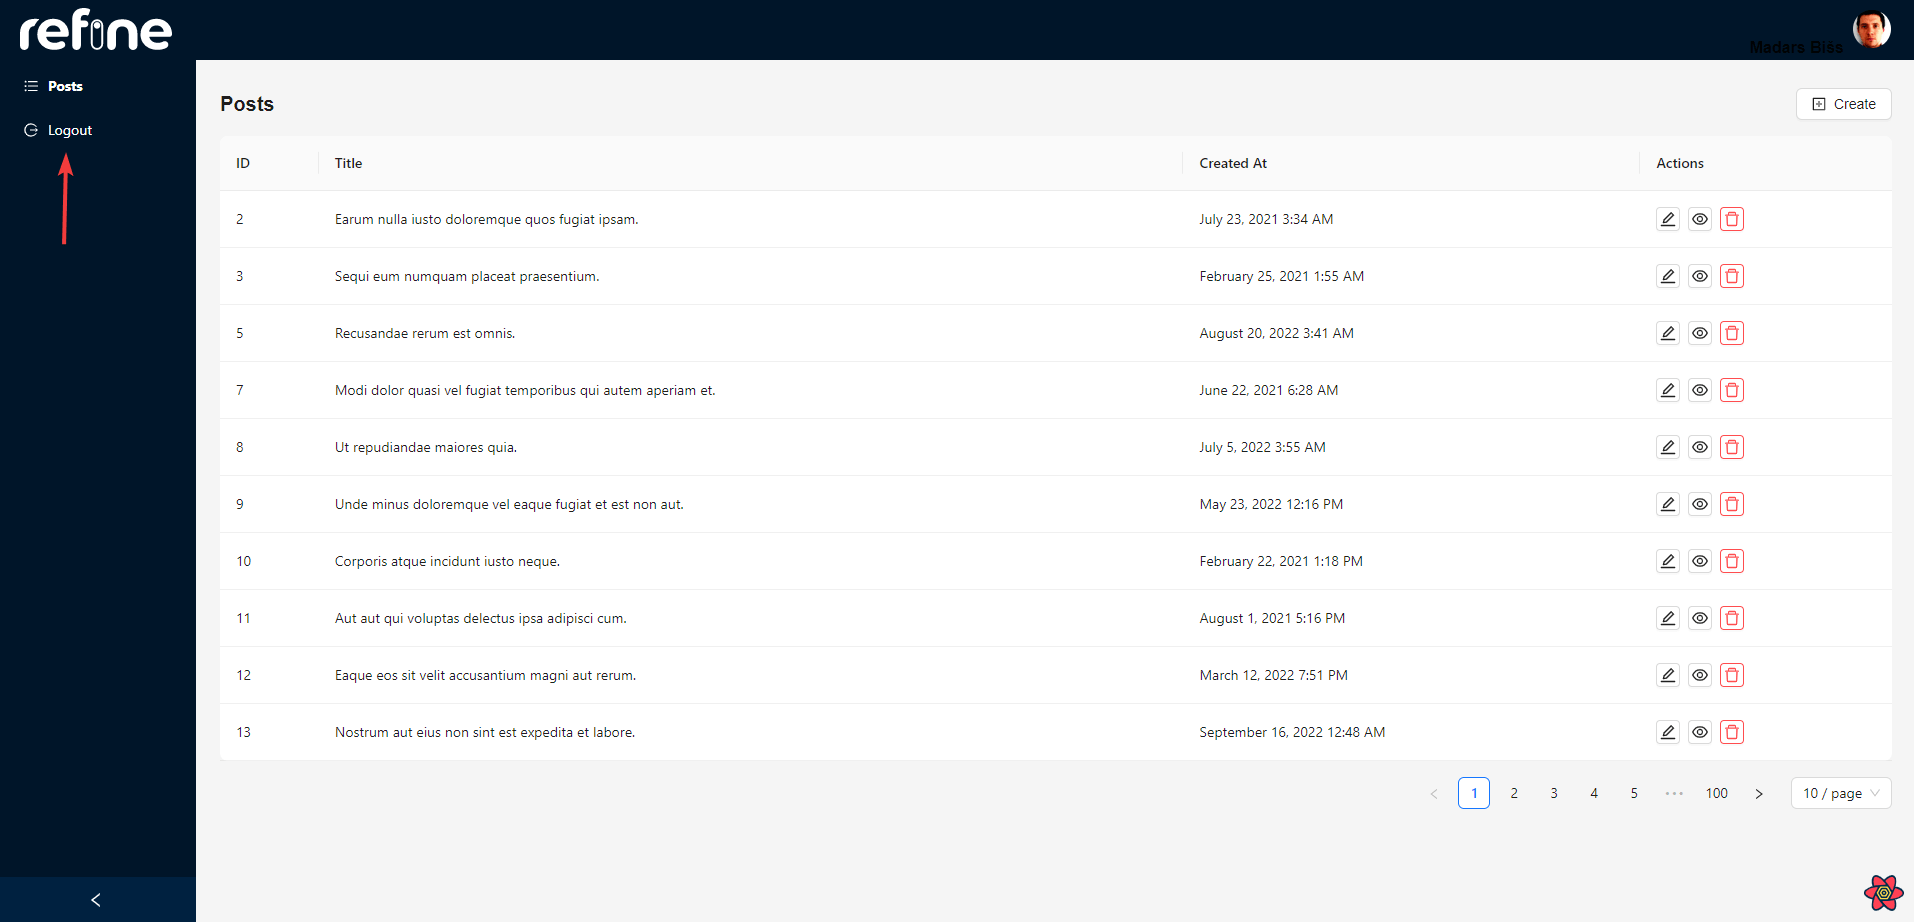
Now every time user wants to access the app, he/she will be asked to authenticate via the login screen.

And once the user is done, there will be an option to log out.
Redwood
We will use Auth0 to create an authentication example for our Redwood app.
Start by installing the required settings by running the following command in the terminal yarn rw setup auth auth0.
That will create an auth wrapper around the application in the App.tsx file, which should now look like this:
import { AuthProvider } from "@redwoodjs/auth";
import { Auth0Client } from "@auth0/auth0-spa-js";
import { FatalErrorBoundary, RedwoodProvider } from "@redwoodjs/web";
import { RedwoodApolloProvider } from "@redwoodjs/web/apollo";

import FatalErrorPage from "src/pages/FatalErrorPage";
import Routes from "src/Routes";

import "./scaffold.css";
import "./index.css";

const auth0 = new Auth0Client({
    domain: process.env.AUTH0_DOMAIN,
    client_id: process.env.AUTH0_CLIENT_ID,
    redirect_uri: process.env.AUTH0_REDIRECT_URI,
    cacheLocation: "localstorage",
    audience: process.env.AUTH0_AUDIENCE,
});

const App = () => (
    <FatalErrorBoundary page={FatalErrorPage}>
        <RedwoodProvider titleTemplate="%PageTitle | %AppTitle">
            <AuthProvider client={auth0} type="auth0">
                <RedwoodApolloProvider>
                    <Routes />
                </RedwoodApolloProvider>
            </AuthProvider>
        </RedwoodProvider>
    </FatalErrorBoundary>
);

export default App;
Now navigate to the layouts folder, find the file ScaffoldLayout.tsx, and replace the content with the following content:
import { Link, routes } from "@redwoodjs/router";
import { Toaster } from "@redwoodjs/web/toast";

import { useAuth } from "@redwoodjs/auth";

type LayoutProps = {
    title: string;
    titleTo: string;
    buttonLabel: string;
    buttonTo: string;
    children: React.ReactNode;
};

const ScaffoldLayout = ({
    title,
    titleTo,
    buttonLabel,
    buttonTo,
    children,
}: LayoutProps) => {
    const { logIn, logOut, isAuthenticated } = useAuth();

    return !isAuthenticated ? (
        <div style={{ height: "100vh", display: "grid", placeItems: "center" }}>
            <button
                style={{
                    padding: "10px 15px",
                    backgroundColor: "#0063D1",
                    border: "none",
                    borderRadius: "5px",
                    color: "white",
                    cursor: "pointer",
                }}
                onClick={logIn}
            >
                Sign In to Redwood app
            </button>
        </div>
    ) : (
        <div className="rw-scaffold">
            <Toaster toastOptions={{ className: "rw-toast", duration: 6000 }} />
            <header className="rw-header">
                <h1 className="rw-heading rw-heading-primary">
                    <Link to={routes[titleTo]()} className="rw-link">
                        {title}
                    </Link>
                </h1>

                <Link
                    to={routes[buttonTo]()}
                    className="rw-button rw-button-green"
                >
                    <div className="rw-button-icon">+</div> {buttonLabel}
                </Link>
                <button className="link-button" onClick={logOut}>
                    Log Out
                </button>
            </header>
            <main className="rw-main">{children}</main>
        </div>
    );
};

export default ScaffoldLayout;
Import the Layout for all the routes of the app. Open the Routes.tsx file and change its content to the following code:
import { Set, Router, Route } from "@redwoodjs/router";

import ScaffoldLayout from "src/layouts/ScaffoldLayout";

const Routes = () => {
    return (
        <Router>
            <Set
                wrap={ScaffoldLayout}
                title="Posts"
                titleTo="posts"
                buttonLabel="New Post"
                buttonTo="newPost"
            >
                <Route
                    path="/posts/new"
                    page={PostNewPostPage}
                    name="newPost"
                />
                <Route
                    path="/posts/{id:Int}/edit"
                    page={PostEditPostPage}
                    name="editPost"
                />
                <Route path="/posts/{id:Int}" page={PostPostPage} name="post" />
                <Route path="/posts" page={PostPostsPage} name="posts" />
                <Route path="/" page={PostPostsPage} name="posts" />
            </Set>
        </Router>
    );
};

export default Routes;
Next, create a new Auth0 account if you already do not have one.
Once logged in, create a new application by selecting Single page web application.
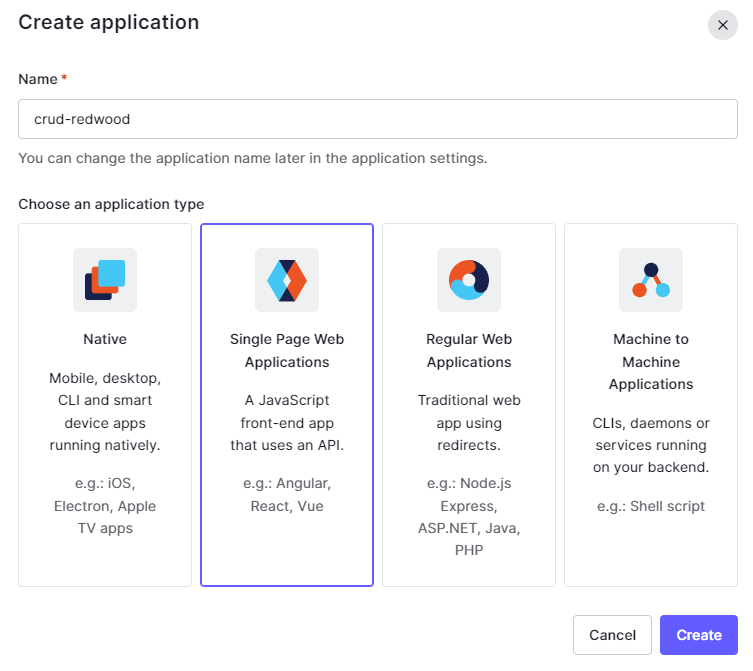
After that navigate to the Settings panel and you will get the keys for domain, client_iId, and client secret.

Scroll down the Settings and set the callback, logout, and web origins URLs as shown below:

Go back to the refine app, and paste those environmental variables into the .env file in the project root as shown below:

Now, restart the developer server for the changes to take effect. Press Ctrl+C on your keyboard to close the server and run yarn rw dev to start it again.
Now try to access the app via http://localhost:8910 and you will be asked to log in to view the content:

After successful login, you will be taken to the app, allowing access to all the content. There will also be an option to log out:

Deployment
refine
Deploying a refine app is as easy as it would be with any other React app.
First, make sure to push your code to GitHub.
Create a new account if you do not have one already, log in and create a new repository to host the code.
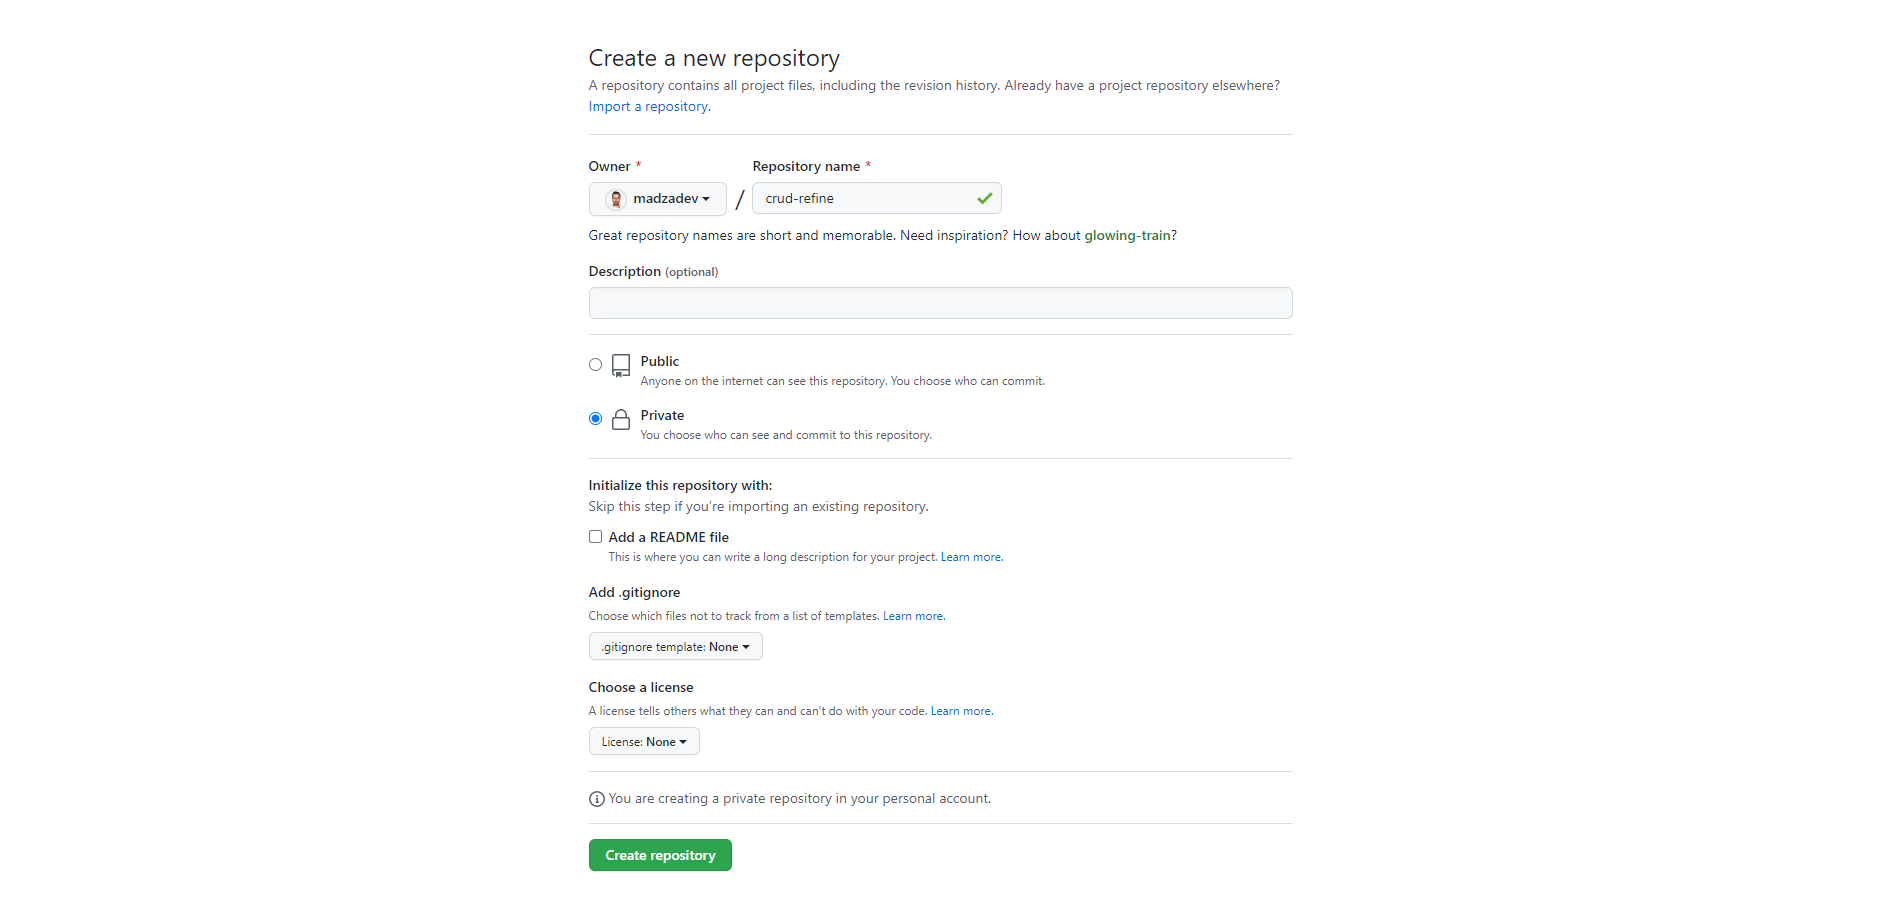
Switch back to the code editor and run the following commands on your terminal. Make sure to replace the GitHub user name with your own in the first command:
git remote add origin https://github.com/username/crud-refine.git
git branch -M main
git push -u origin main
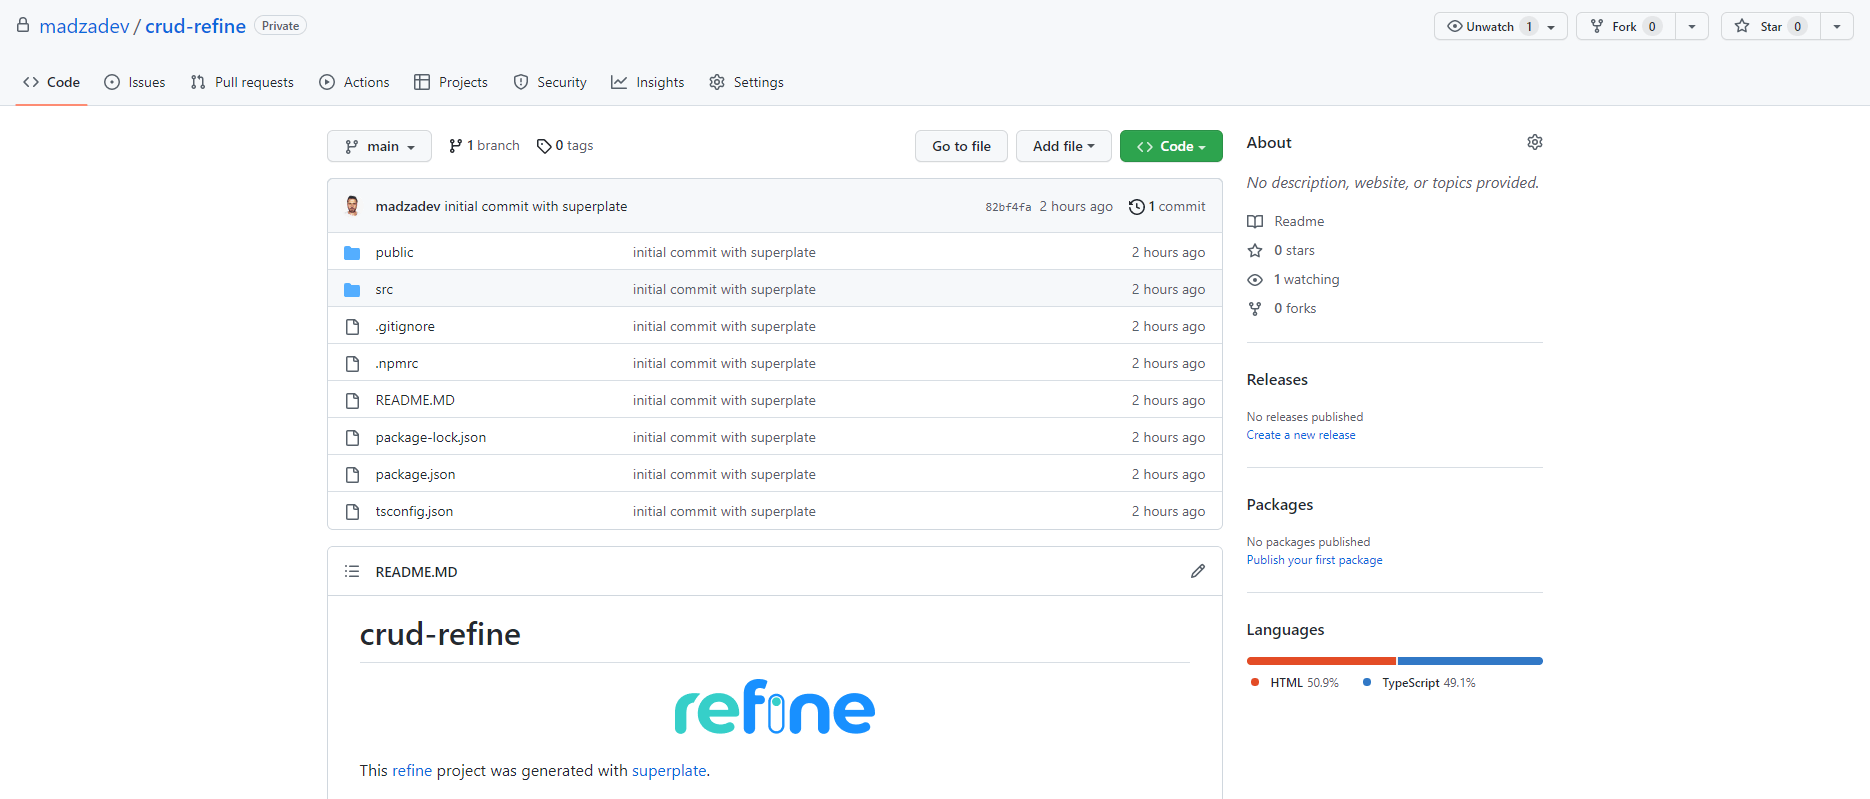
Once the code is successfully pushed, refresh your GitHub repository and you should see all of your project files.
Next, create a Vercel account if you do not have one.
Select Import from Git, which will let you set up the project from the GitHub that we just pushed.
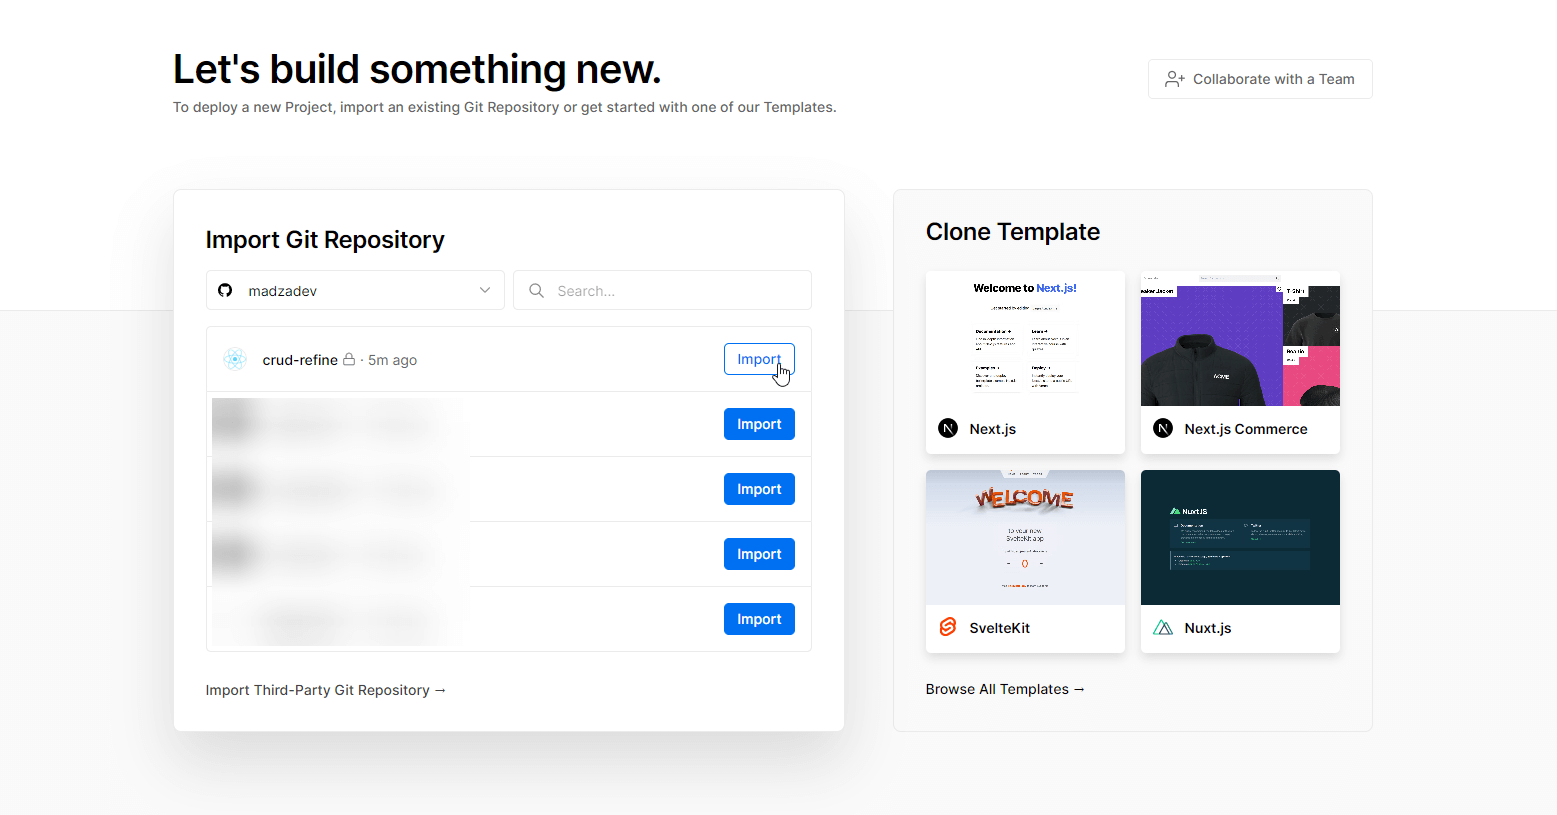
The only thing required for you to do is to provide the environmental keys, the same way you did in the local instance of the application. Once that's done, click on Deploy.
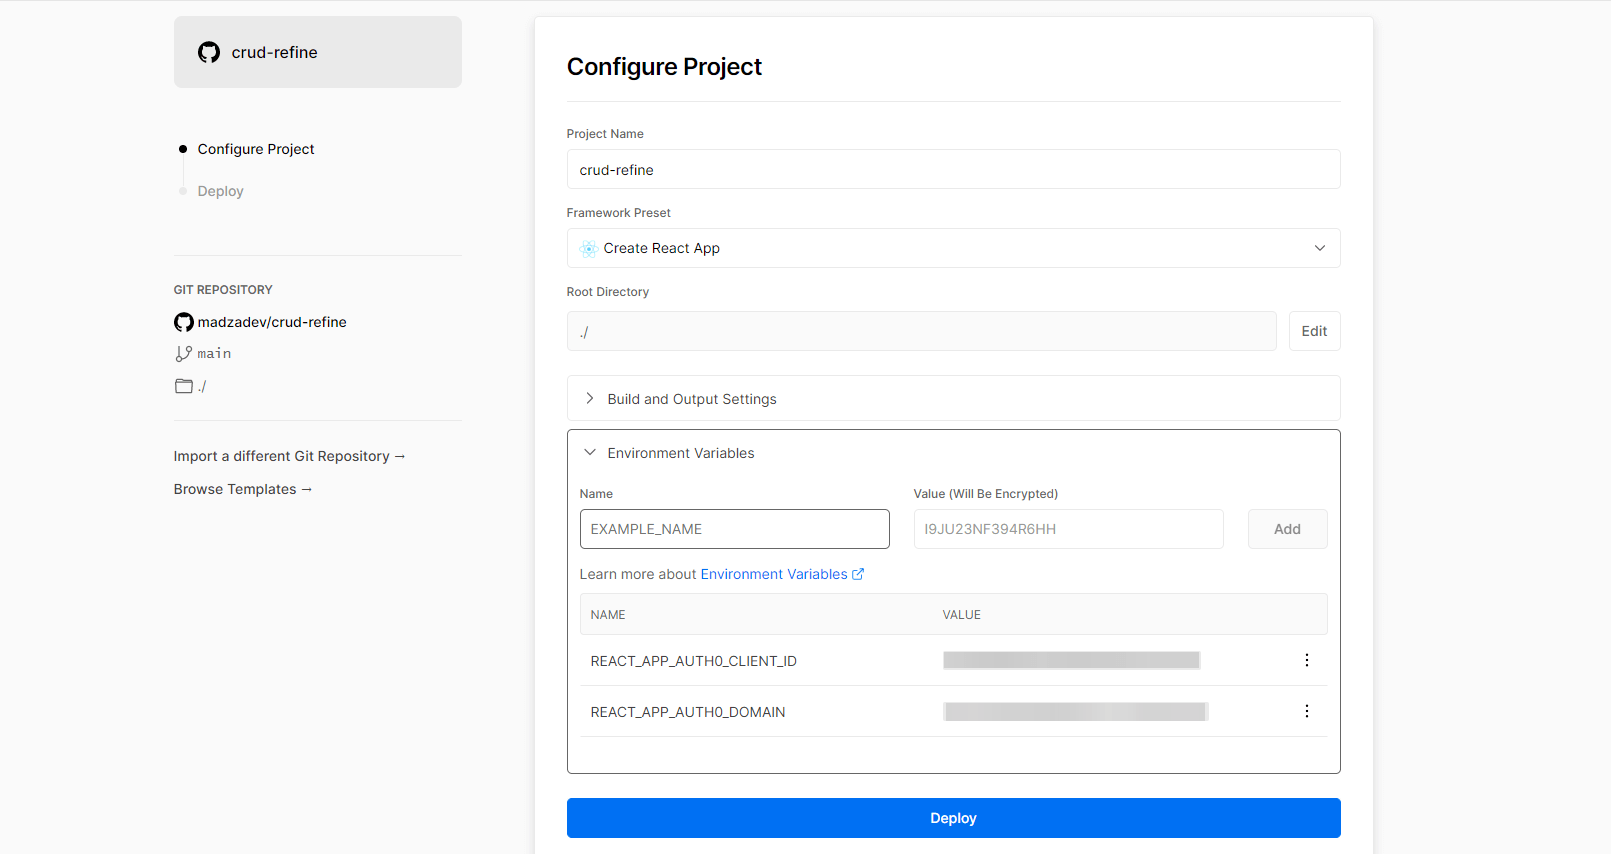
The deployment process is fully automatic and once everything is completed, you will receive a live link to your deployed project.
Congratulations, your site is now live, the live link will be provided by Vercel.

Before clicking on the link, make sure to visit Auth0, open the refine project, navigate to the Settings panel and change the domain URL for a callback, logout, and web origins given by Vercel (previously set to http://localhost:3000).
Redwood
Since we designed a separate database for our Redwood project we will first need to find an online provider that would support that. A great solution for this is Railway, which will allow us to spin up a free Postgres instance.
Create a new Railway account first if you do not have one already.
Then create a new project and pick a new Postgres instance.
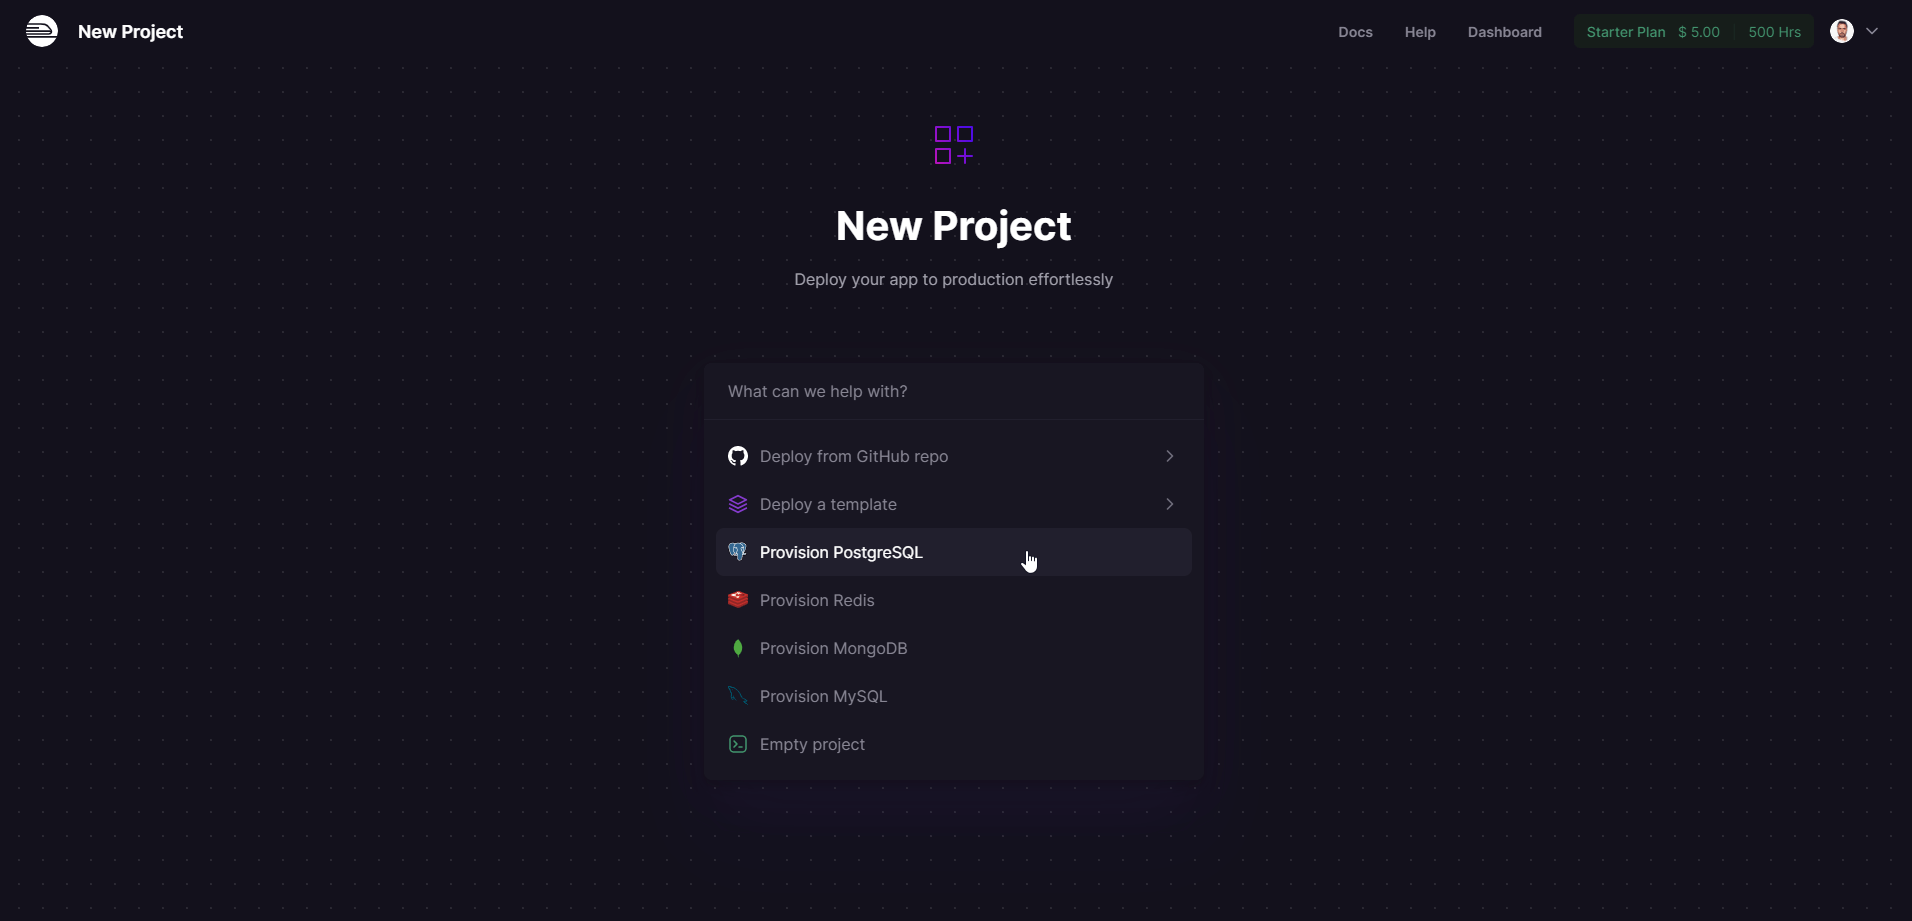
Open the newly created Postgres instance and select the Connect tab. Here you will access the database connection keys that we will need later.
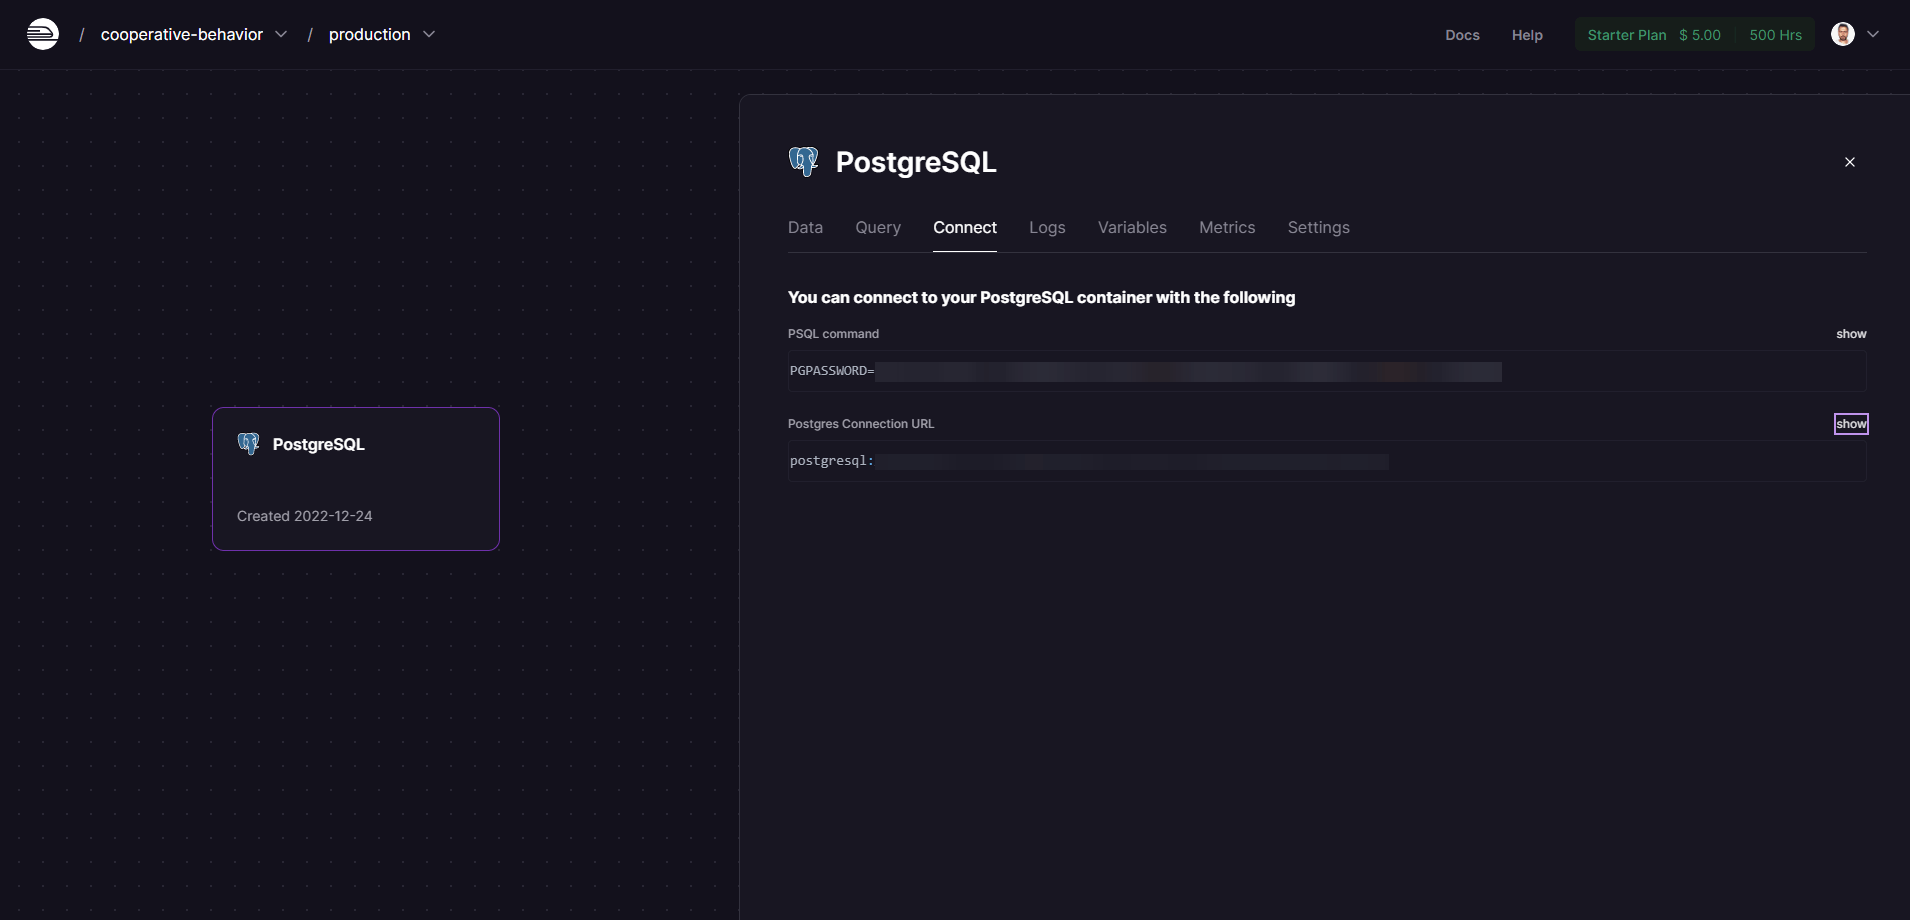
Now switch back to your local Redwood project and change the database type in the schema.prisma file to PostgreSQL. It should now look like this:
datasource db {
  provider = "postgresql"
  url      = env("DATABASE_URL")
}

generator client {
  provider      = "prisma-client-js"
  binaryTargets = "native"
}

model Post {
  id    Int   @id @default(autoincrement())
  title  String?
}
Now add the database connection string from Railway in the .env file, like this:

Next, remove the migrations folder inside the api directory.
Restart the development server by pressing Ctrl+C on your keyboard, start it again by running the command yarn rw dev, and run the database migration for the changes to take effect by the command yarn rw prisma migrate dev.
We will also need to add some configuration for the environmental values and the API path so the host can read them. Create a new file redwood.toml in the app root if you already do not have one and include the following code:
[web]
  title = "Redwood App"
  port = 8910
  apiUrl = "/api"
  includeEnvironmentVariables = ['AUTH0_DOMAIN', 'AUTH0_CLIENT_ID', 'AUTH0_CLIENT_SECRET', 'AUTH0_AUDIENCE', 'AUTH0_REDIRECT_URI', 'DATABASE_URL']
[api]
  port = 8911
[browser]
  open = true
Now it is time to push the code to GitHub.
Create a new account if you do not have one already and create a new repository.
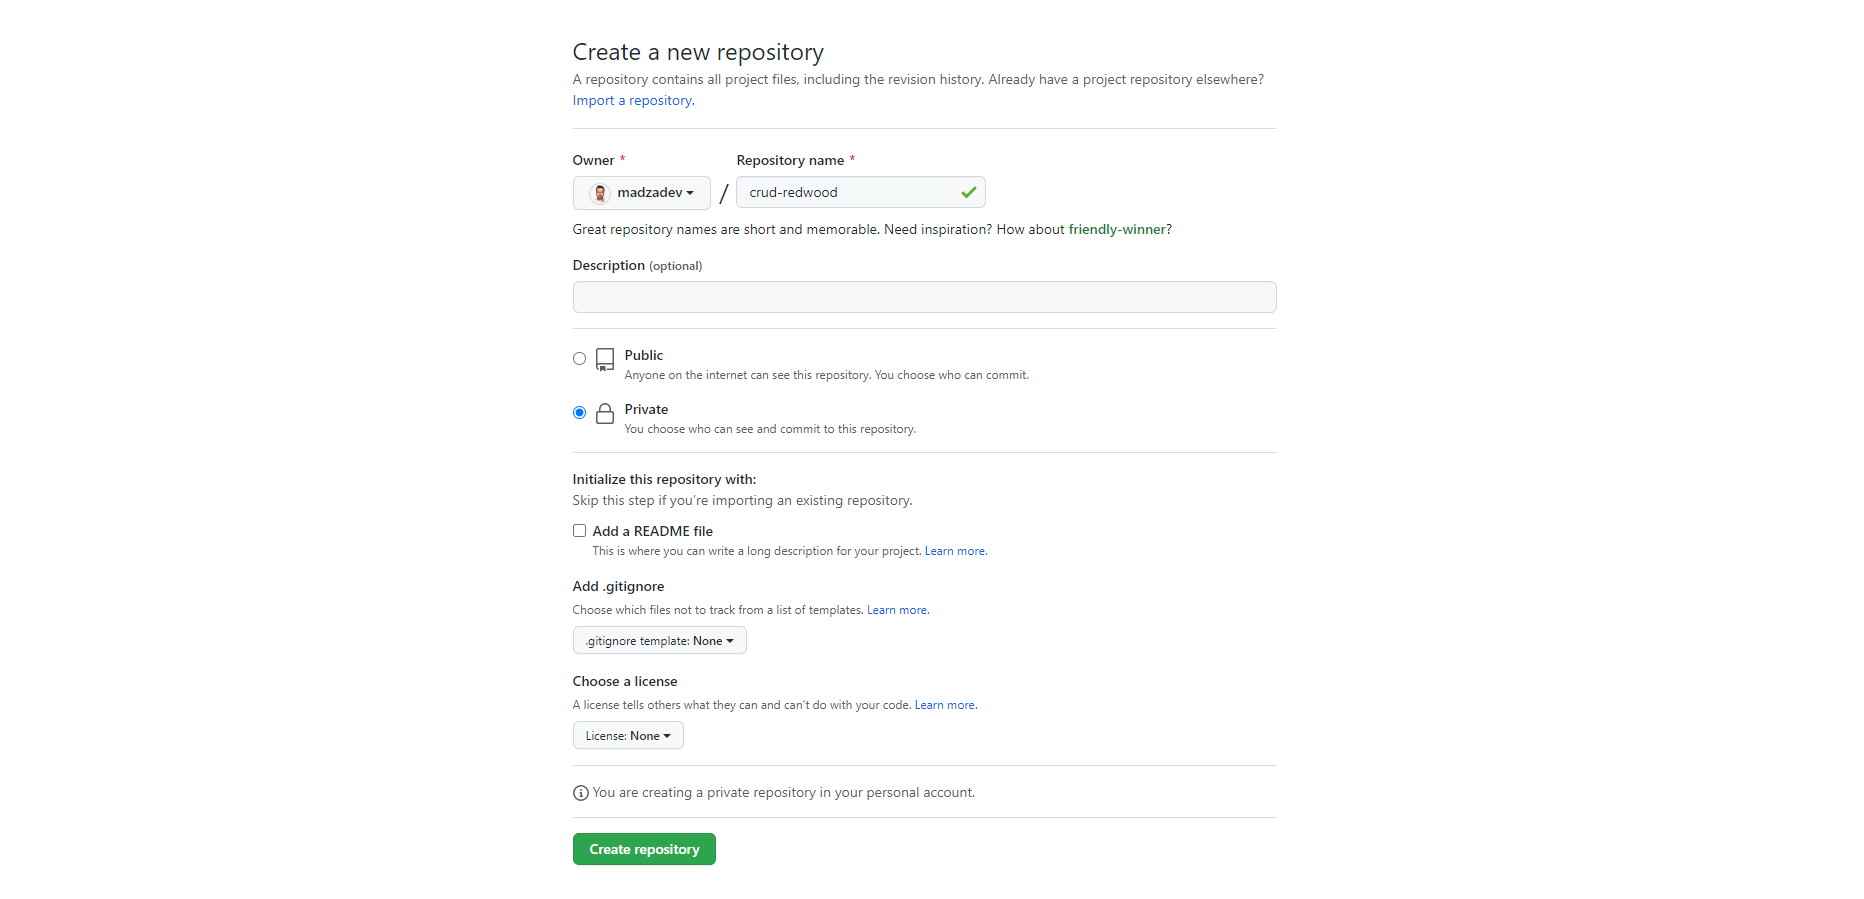
Run the following command on the terminal to push the code. Make sure to replace the GitHub user name with your own in the first command:
git remote add origin https://github.com/username/crud-redwood.git
git branch -M main
git push -u origin main
Once successfully pushed, you will have the project available on the repository.
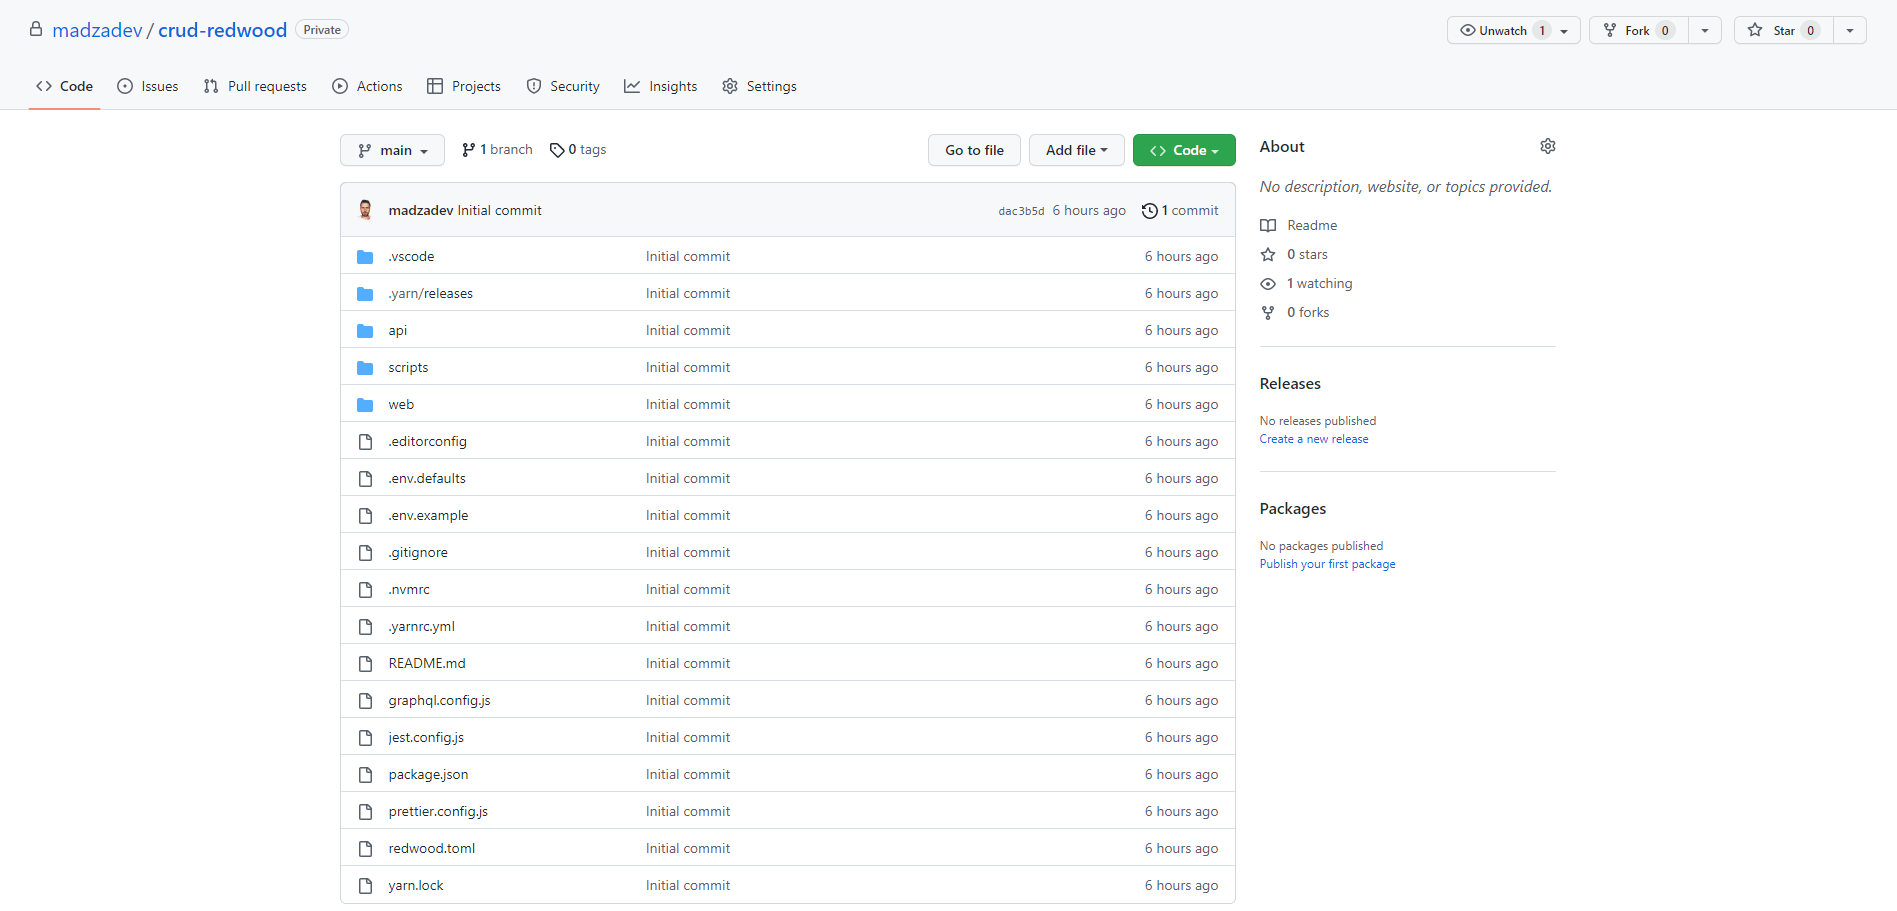
We will use Vercel to deploy the front end.
Create a new account if you already do not have one.
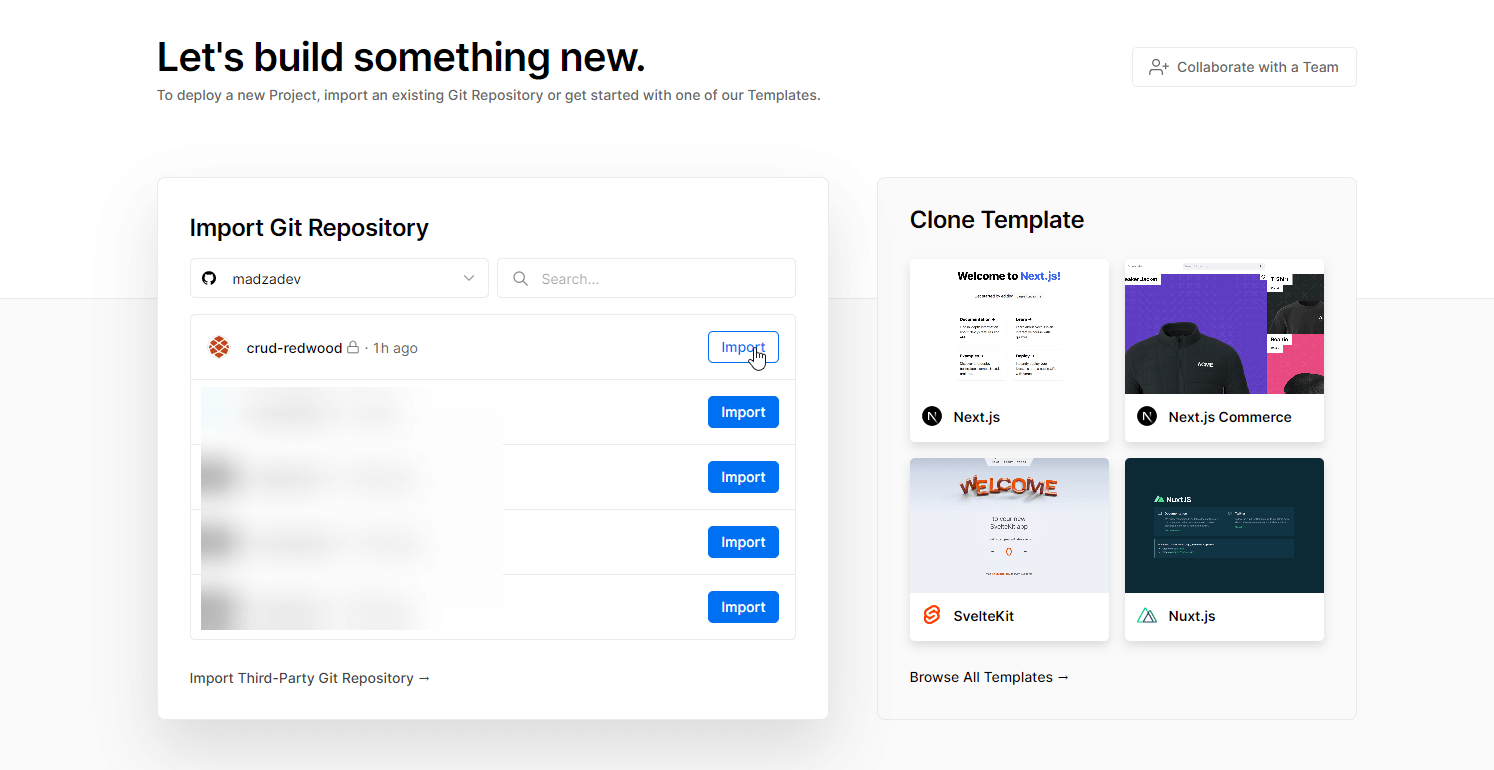
Select Import from Git, which will let you set up the project from the GitHub that we just pushed.
The only thing required for you to do is to provide the environmental keys, the same way you did in the local instance of the application.
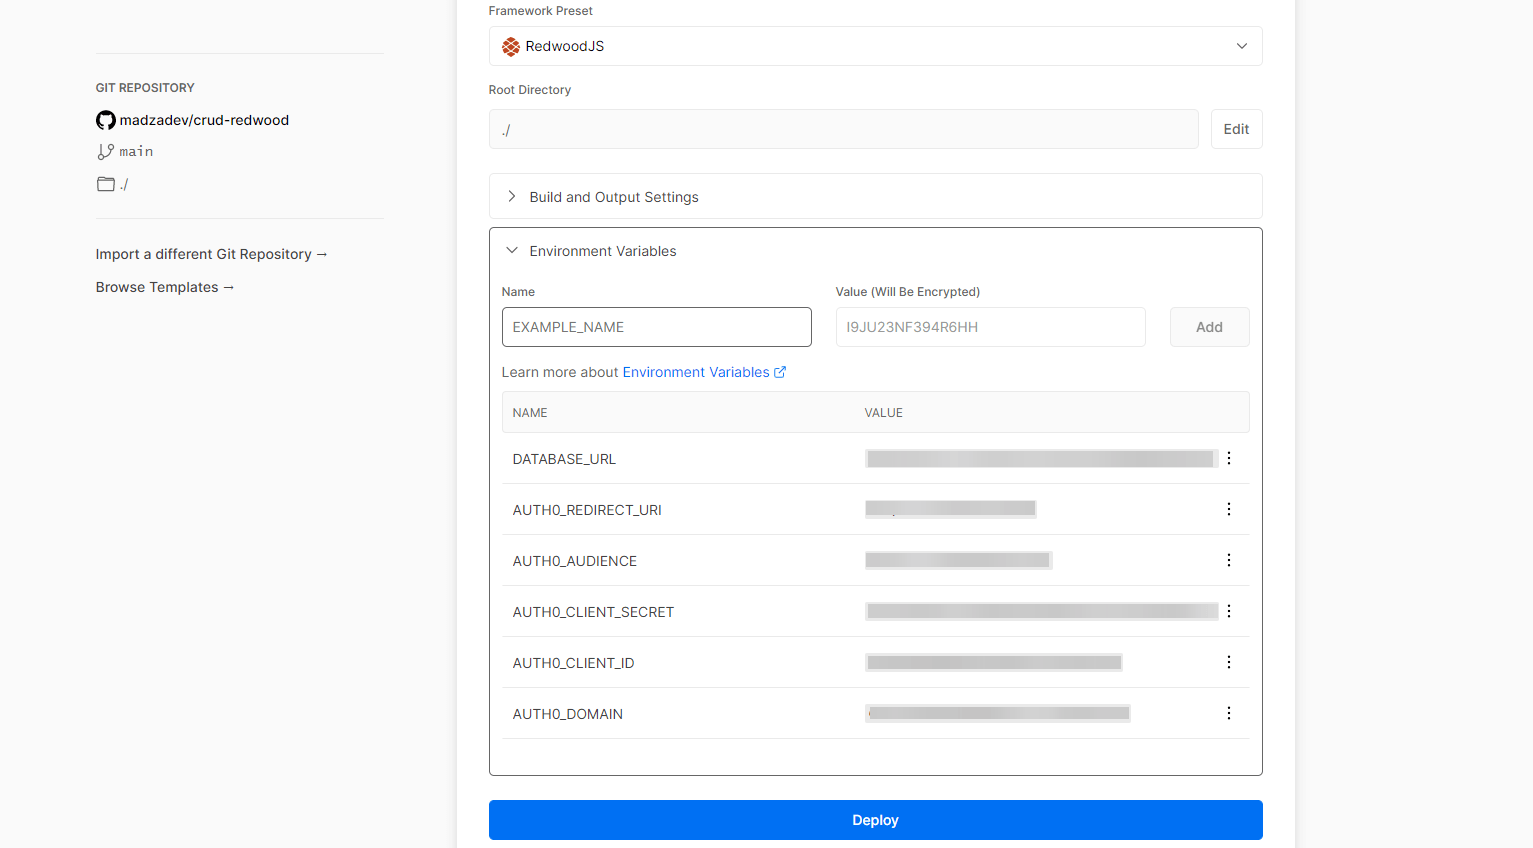
The deployment process is fully automatic and once everything is completed, you will receive a live link to your deployed project.
Congratulations, your site is now live. Vercel will provide you with the live link for the project.

Before clicking on the link, make sure to visit Auth0, open the refine project, navigate to the Settings panel and change the domain URL for a callback, logout, and web origins given by Vercel (previously set to http://localhost:8910).
Conclusion
Both frameworks can be efficiently used to create CRUD applications. Choosing any of them and getting proficient with them will definitely speed up the development progress for full-stack apps.
Both frameworks have terminal wizards to set them up, both provide the scaffolding commands to set up the routes and resources for the app, both support various styling solutions, authentication alternatives, and are easy to deploy.
The core differences are in the internal structure, the level of abstraction each provides after the initialization of the project, and the core tech stack each of them uses to achieve CRUD functionality.
I would recommend using refine for developers who are seeking full control and a higher level of customization. refine allows users to fully focus on business logic and the provided framework/project structure is minimal.
refine also has a data API that could be used to create a full-stack app example without relying on a database. With Redwood, you are expected to use Prisma and create a database schema to handle the CRUD operations on data.
Redwood provides a more complex framework structure and the user has less control over the file tree. Users are requested to work with GraphQL and the installation wizard sets support for tools like StoryBlock, Jest, and Pino.


