Introduction
Step into the world of web development, where loading server data, handling errors, and keeping clients and servers in sync are all part of the exciting puzzle. But wait, there's more! Picture a scenario where poor internet connections add another layer of complexity. It's enough to make any developer's head spin.
Now, imagine a solution that takes these challenges and turns them into a breeze. React Query as a solution helps in caching and server state management. Whether you're a seasoned developer or just starting your coding journey, React Query is a great option to try.
Article Objective
This beginner's guide aims to introduce you to React Query, its core concepts, and how to use it effectively in your projects. Whether you are new to React or an experienced developer looking to enhance your data fetching capabilities, this guide will provide you with a solid foundation to get started with React Query.
Prerequisite
Certain requirements must be met to follow up on this article;
- Comprehension of JavaScript syntax
- Basic knowledge of the React.js framework
- Understanding of APIs
- React Query and Axios Installed on your computer
In the course of this article, we used Jsonplaceholder as our API endpoint, React Query and Axios to fetch, and handle server state data; below is a demonstration of how to install and set up React Query.
Navigate to a React project and run the following in your terminal:
npm install react-query axios
Navigate to your index.js file and paste the code below:
import React from "react";
import ReactDOM from "react-dom";
import { QueryClient, QueryClientProvider } from "react-query";

import "./index.css";
import App from "./App";

const queryClient = new QueryClient();

ReactDOM.render(
    <QueryClientProvider client={queryClient}>
        <App />
    </QueryClientProvider>,
    document.getElementById("root")
);
With this, your application is set to go!
What is React Query?
Hey Google, what does refine.js do?
At this point, you will wonder what exactly Google has got to do with React Query. React Query's core functionality revolves around fetching and caching data from an API and handling state management, while search engines like Google allow us to query and retrieve relevant information from an extensive database. Both React Query and Google aim to optimize data retrieval and improve user experiences.
The analogy between Google and React Query helps us understand how React Query works. When we query Google for information, it retrieves the best available information from its database. Similarly, React Query fetches data from an API endpoint like Google fetches information from its database.
React Query manages the state of this fetched data, similar to how Google handles the information it retrieves. React Query caches API responses, which stores the fetched data locally to reduce the need for subsequent fetches.
Likewise, search engines like Google cache web pages to reduce latency when displaying search results. This caching mechanism improves performance and reduces the time to display the requested information.
Querying Data
This refers to the process of requesting specific information from a database or dataset using a query language. Queries are used to extract, filter, and manipulate data based on specific conditions and criteria.
By submitting a query, you can search for data that meets certain requirements. Now we see why there is a "Query" in "React Query" because this library is in charge of handling and making queries a breeze. Since we know what querying data means, let us perform basic data fetch with React Query.
Why use React Query?
The dominance of React Query over traditional state management tools like useEffect and others is that React Query comes with built-in query caching, which means, once data is fetched, it can be stored in a cache and reused later without making redundant API calls.
React Query also handles the state management of queries automatically, reducing the need for developers to write and maintain complex state management logic. It provides built-in error-handling capabilities, allowing developers to handle API errors gracefully.
Since we now know why we should use React Query we can go further to know how to perform a basic data fetch with this library.
Performing basic data fetching
React Query has a way of handling server states, and it does that using the useQuery hook. This useQuery hook is used to fetch data from your API. It returns an object that contains the status of the query (loading, error, or success), the data returned from the query, and functions to refetch the data.
To see how this works we will be fetching a list of post titles from Jsonplaceholder API. Here's a basic example of how you might use React Query to fetch and manage server data:
import React from "react";
import { useQuery } from "react-query";
import axios from "axios";

const retrievePosts = async () => {
    const response = await axios.get(
        "https://jsonplaceholder.typicode.com/posts"
    );
    return response.data;
};

const DisplayPosts = () => {
    const {
        data: posts,
        error,
        isLoading,
    } = useQuery("postsData", retrievePosts);

    if (isLoading) return <div>Fetching posts...</div>;
    if (error) return <div>An error occurred: {error.message}</div>;

    return (
        <ul>
            {posts.map((post) => (
                <li key={post.id}>{post.title}</li>
            ))}
        </ul>
    );
};

export default DisplayPosts;
In this example, useQuery fetches the posts. The useQuery hook is used to fetch data and handle loading and error states. The retrievePosts function fetches the data using Axios. If data is loading or an error occurs, a message is displayed. Otherwise, the posts are rendered as a list.
We can also notice caching is handled by the useQuery hook. When you call useQuery and pass it a key (in this case, 'postsData') and a fetch function (retrievePosts), React Query performs the fetch and then stores the result in a cache.
The key you provide ('postsData') is used as the identifier for this cache. If useQuery is called again with the same key while the data is still in the cache, React Query will return the cached data instead of performing a new fetch.
When you run this on your browser you will get the list of post titles displayed.

Mutating Data
Mutating data simply means we are changing something in the database, we could be posting, creating, or deleting something, whatever we choose to do we are still mutating.
This is what makes React Query a beautiful tool as it can be used to perform CRUD( Create, Read, Update, and Delete) operations. While the useQuery hook is used for "read" operations (fetching data), React Query provides the useMutation hook for "write" operations (creating, updating, and deleting data).
Using the useMutation hook for CRUD operation we need to note that the Json placeholder API doesn't actually store the created, updated, or deleted data. But to be sure the operation were made, it will either return a success statement or an error statement.
Create
To Create a post using useMutation. Create a component and name it CreatePost() then you can paste the code below:
import React, { useState } from "react";
import { useMutation } from "react-query";
import axios from "axios";

const CreatePost = () => {
    const [title, setTitle] = useState("");
    const [body, setBody] = useState("");

    const mutation = useMutation((newPost) =>
        axios.post("https://jsonplaceholder.typicode.com/posts", newPost)
    );

    const submitData = () => {
        mutation.mutate({ title, body });
    };

    if (mutation.isLoading) {
        return <span>Submitting...</span>;
    }

    if (mutation.isError) {
        return <span>Error: {mutation.error.message}</span>;
    }

    if (mutation.isSuccess) {
        return <span>Post submitted!</span>;
    }

    return (
        <div>
            <input
                type="text"
                value={title}
                onChange={(e) => setTitle(e.target.value)}
                placeholder="Title"
            />
            <input
                type="text"
                value={body}
                onChange={(e) => setBody(e.target.value)}
                placeholder="Body"
            />
            <button onClick={submitData}>Submit</button>
        </div>
    );
};
export default CreatePost;
In the code above, useMutation is used to post new data to the Json Placeholder API. The function passed to useMutation is the mutation function. When mutation.mutate is called with the new post data, the mutation is performed.
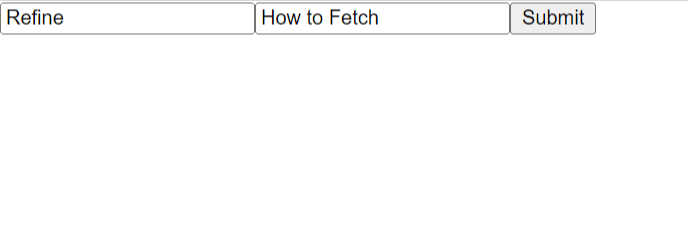
This is what it looks like in a Chrome browser:

After feeling the options, click submit and wait for the response:

Response:

Update
We can go further to update posts. To do that, create a component named UpdatePost(), then paste the code below:
import React, { useState } from "react";
import { useMutation } from "react-query";
import axios from "axios";

const UpdatePost = () => {
    const [title, setTitle] = useState("");
    const [body, setBody] = useState("");

    const mutation = useMutation((updatedPost) =>
        axios.put("https://jsonplaceholder.typicode.com/posts/1", updatedPost)
    );

    const submitData = () => {
        mutation.mutate({ title, body });
    };

    if (mutation.isLoading) {
        return <span>Updating...</span>;
    }

    if (mutation.isError) {
        return <span>Error: {mutation.error.message}</span>;
    }

    if (mutation.isSuccess) {
        return <span>Post updated!</span>;
    }

    return (
        <div>
            <input
                type="text"
                value={title}
                onChange={(e) => setTitle(e.target.value)}
                placeholder="Title"
            />
            <input
                type="text"
                value={body}
                onChange={(e) => setBody(e.target.value)}
                placeholder="Body"
            />
            <button onClick={submitData}>Update</button>
        </div>
    );
};

export default UpdatePost;
In this code, We changed the axios.post call in the useMutation hook to axios.put to make a PUT request instead of a POST request.
We have also changed the URL to include the ID of the post to update ("https://jsonplaceholder.typicode.com/posts/1"). The rest of the code stays the same, and with this, we were able to update a post.
Delete
To be able to delete an already created post, a component named DeletePost() needs to be created. Fill free to copy the code below:
import React from "react";
import { useMutation } from "react-query";
import axios from "axios";

const DeletePost = () => {
    const mutation = useMutation(() =>
        axios.delete("https://jsonplaceholder.typicode.com/posts/1")
    );

    const deleteData = () => {
        mutation.mutate();
    };

    if (mutation.isLoading) {
        return <span>Deleting...</span>;
    }

    if (mutation.isError) {
        return <span>Error: {mutation.error.message}</span>;
    }

    if (mutation.isSuccess) {
        return <span>Post deleted!</span>;
    }

    return (
        <div>
            <button onClick={deleteData}>Delete Post</button>
        </div>
    );
};

export default DeletePost;
In order to delete a post we changed the axios.post call in the useMutation hook to axios.delete to make a DELETE request instead of a POST request.
We also changed the URL to include the ID of the post to delete ("https://jsonplaceholder.typicode.com/posts/1").
Following the steps above illustrates how best to use the useMutation hook and we can agree it makes the job much easier.
React Query and Frameworks
React-based framework like refine has extended versions of the hooks provided by React Query. refine extends the functionality of React Query's hooks, adding extra features and customization options to better suit data-intensive applications. These hooks include useUpdate and useList.
The useUpdate hook in refine is an extended version of the useMutation hook from React Query. This hook is used when you want to update a record. It uses the update method as the mutation function from the dataProvider that is passed to refine.
On the other hand, the useList hook in refine is an extended version of the useQuery hook from React Query. It is used when you need to fetch data according to sort, filter, pagination, etc., from a resource.
If you are in search of a framework that utilizes the power React query has got, refine is an absolutely great choice as it solves issues concerning data querying and server state management complexity.
Conclusion
In this beginner's guide, we explored the world of React Query and its core concepts. We learned that React Query is a powerful tool for handling data fetching, caching, and state management in React applications.
Frameworks like refine extend the capabilities of React Query, offering a comprehensive solution for data-intensive applications. By leveraging React Query, developers can enhance the efficiency and user experience of their React projects. Thank you for reading!

