React is a popular library for creating dynamic and interactive user interfaces. Many frameworks have emerged from React to avoid the repetitive process of creating CRUD operations and other features for full-stack applications.
In this article, we will review two common solutions - refine and Blitz. By providing an advanced set of tools and features, both aim to speed up and simplify the process of developing React apps.
We will take a closer look at how to set both up, what are their internal builds, how they handle the data sources, how to implement the CRUD functionality, add authentication, and how to deploy them to production.
About frameworks
refine
refine is a React-based framework, that is specifically designed to speed up the creation of data-intensive applications. It is an open-source project, meaning everyone can access and contribute the code.
By its core nature, it is a headless framework that is based on a collection of hooks, components, and providers. The core is fully decoupled from the UI and business logic, meaning users have a fully flexible environment.
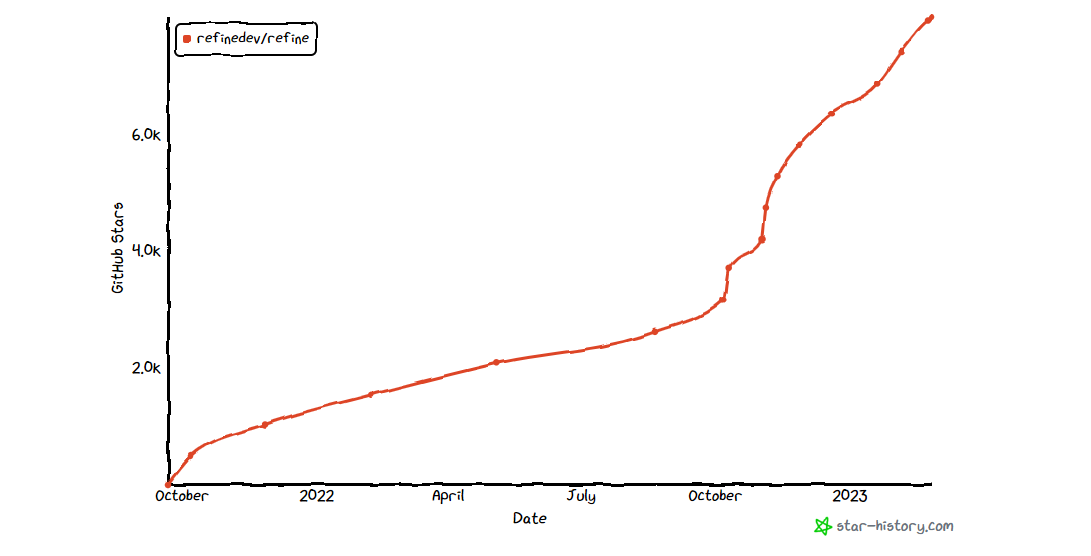
The refine framework was created in 2021 and has witnessed rapid growth and attracted an active community around it since then. As of the time of the writing, the framework has already reached around 8K GitHub stars.
Blitz
Blitz is is a full-stack web framework built on top of NextJS, which means it preserves many of the core features like server-side rendering, static site generation, and automatic code splitting.
Furthermore, it is the NextJS toolkit that provides the necessary pieces to create feature-rich applications, adding features like authentication, a type-safe API layer, and many more.
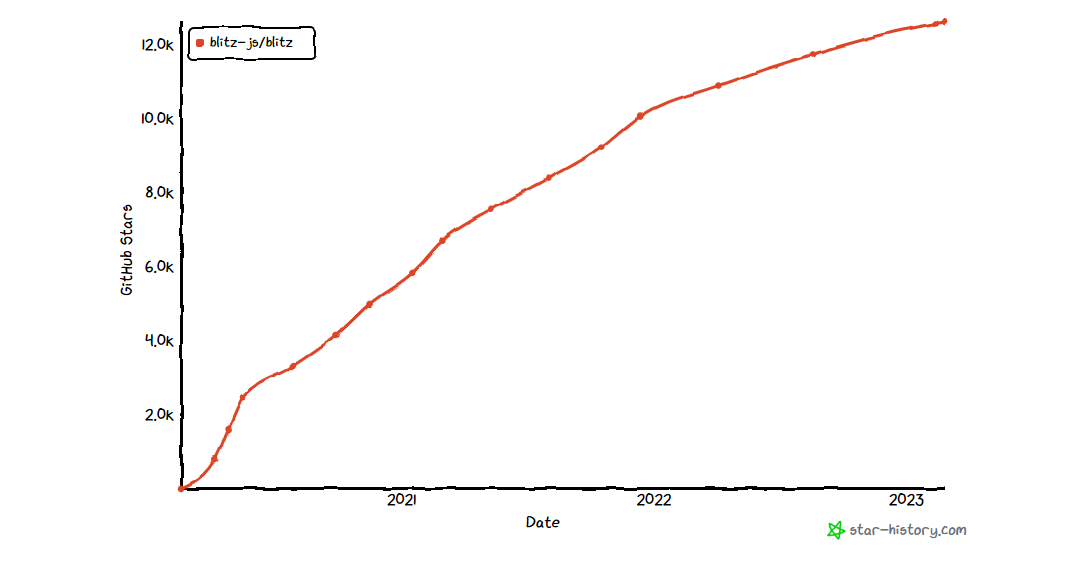
Blitz is also an open-source project that allows users to access the code and allows to contribute. Their community has generated a lot of impact as well, and has grown rapidly over time since the creation in 2020:
Installation guide
refine
refine comes with the project starter tool, which allows users to set up a fully working environment in minutes.
Run the command npm create refine-app@latest crud-refine. That will start the CLI wizard that will ask you to configure the project. For the purpose of this tutorial, pick the values as shown below:

The installation process should not take more than a minute.
Once it's done change the working directory to the newly created project by cd crud-refine and run npm run dev to start up the developer server.
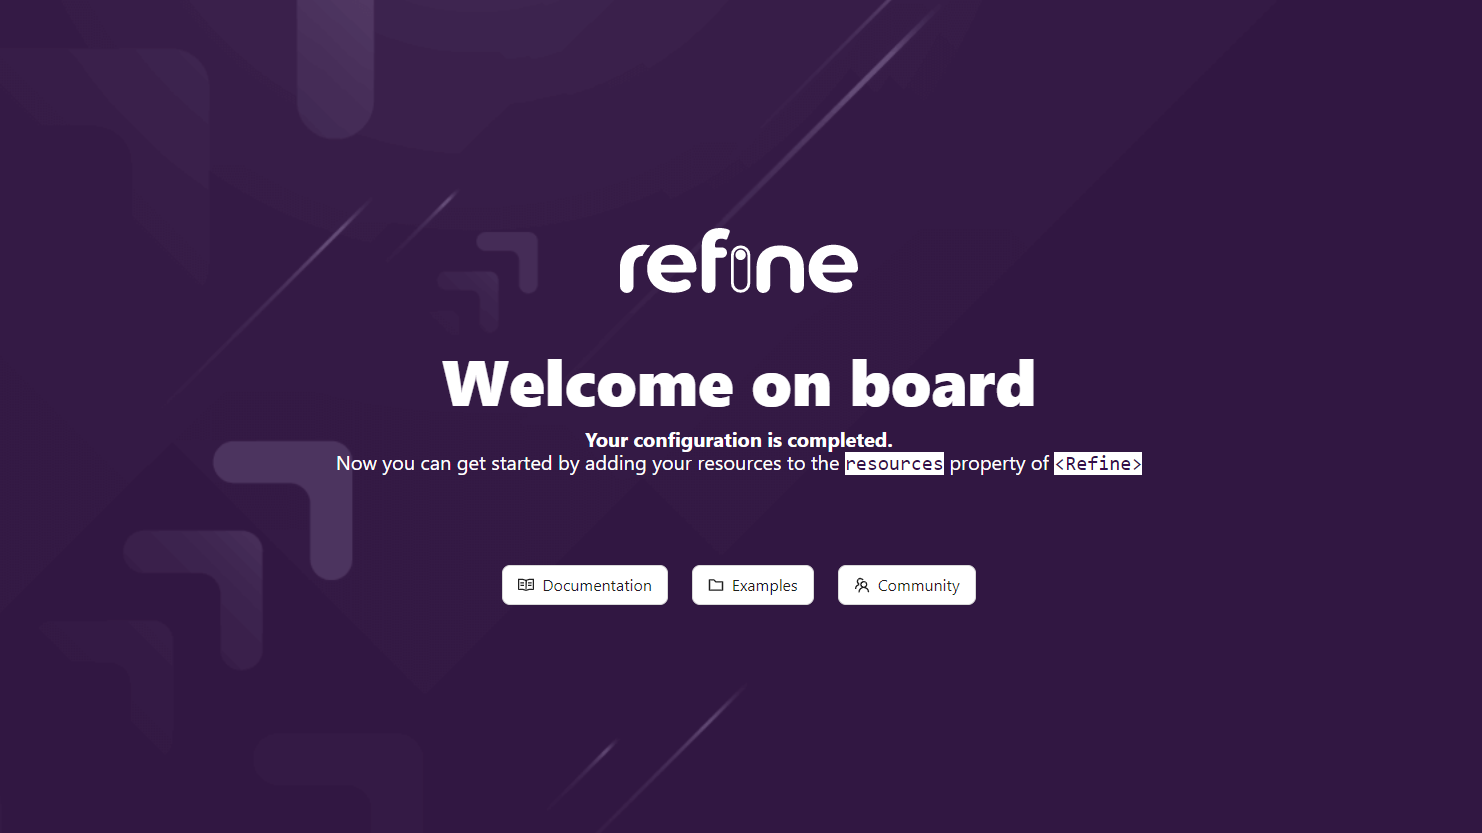
That should automatically open up a new browser window. If it's not, navigate to localhost:3000 manually and you will be presented with the refine welcome screen:
Blitz
To set up the Blitz app, the user must first install the Blitz CLI. You can do this by executing the command npm install -g blitz or yarn global add blitz in your terminal.
Next, run the command blitz new crud-blitz. This will start the terminal CLI wizard asking you to configure the project. For the purpose of this tutorial pick the values as shown below:

After that change the working directory to the newly created project by running cd crud-blitz and start the development server by running blitz dev.
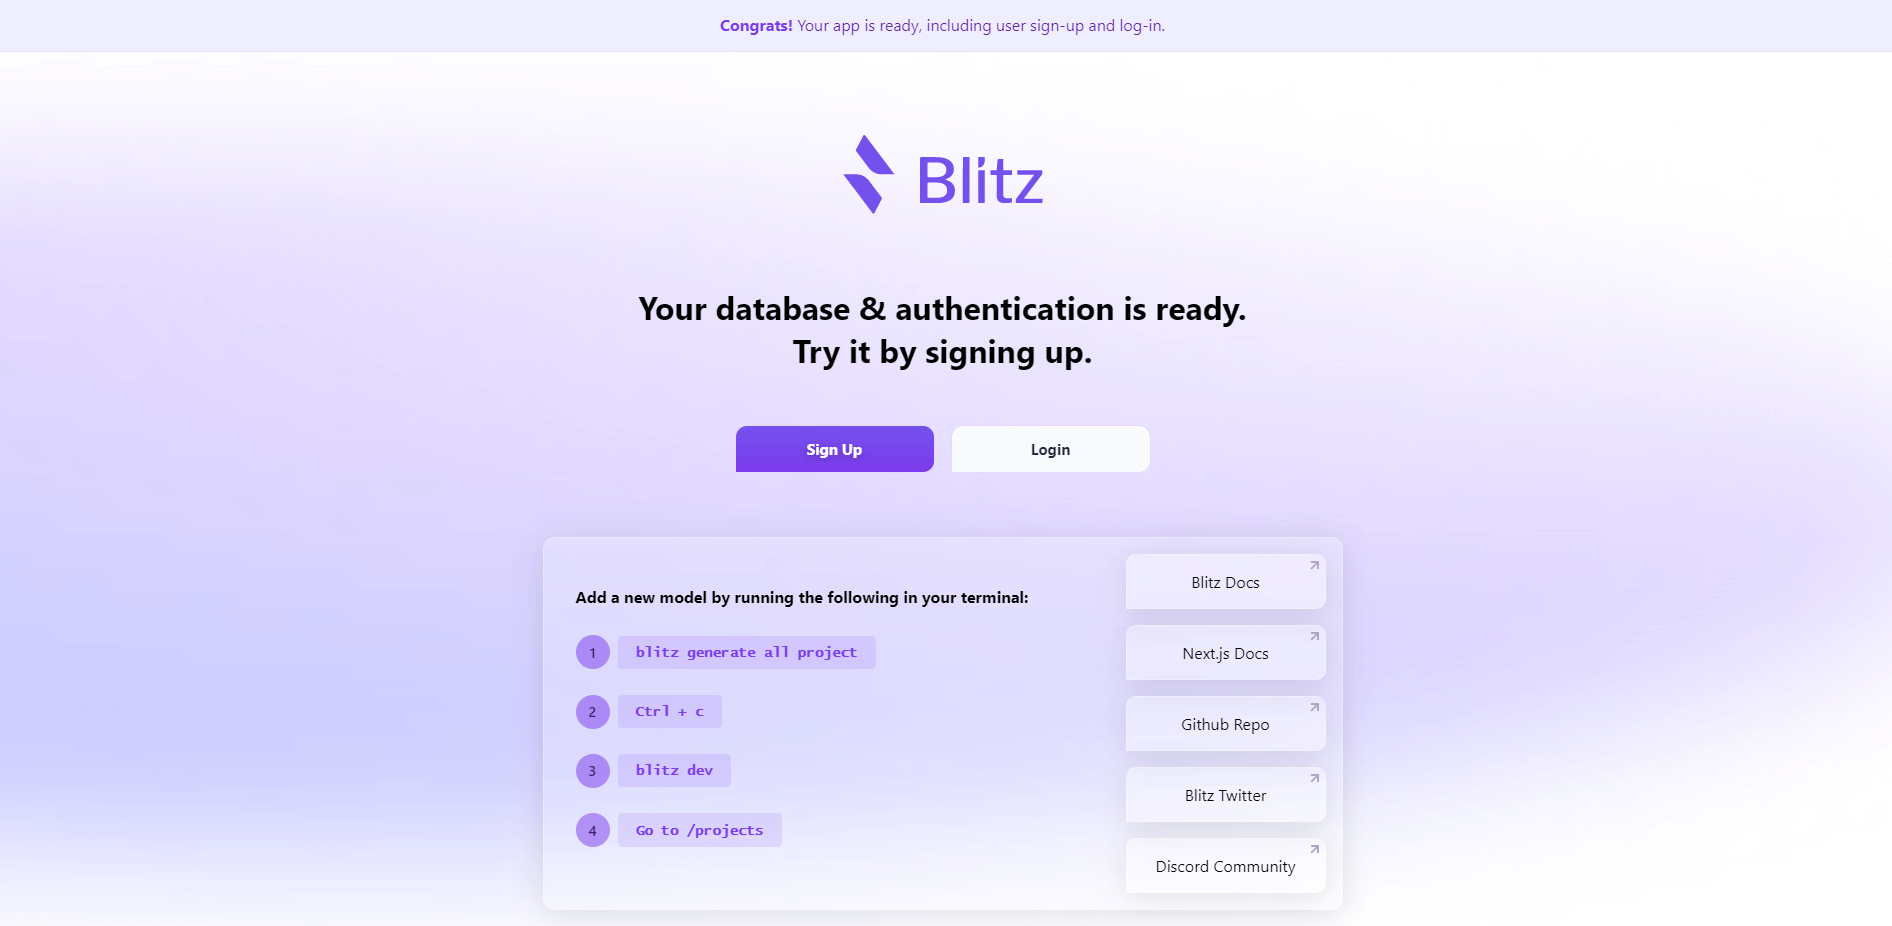
Finally, open your browser and navigate to localhost:3000. This should present you with a Blitz welcome screen:
Internal structure
refine
refine file structure is as simple as it gets and they provide users with all the flexibility they would want to build upon. The main building block for the whole app is the src folder.
It comes with the App.tsx file with the following code:
import {  Refine } from "@refinedev/core";
import { notificationProvider } from "@refinedev/antd";
import "@refinedev/antd/dist/reset.css";

import { useAuth0 } from "@auth0/auth0-react";
import routerBindings, {
  UnsavedChangesNotifier,
} from "@refinedev/react-router-v6";
import dataProvider from "@refinedev/simple-rest";
import axios from "axios";
import { BrowserRouter } from "react-router-dom";


function App() {
  const { isLoading, user, logout, getIdTokenClaims } = useAuth0();

  if (isLoading) {
    return <span>loading...</span>;
  }

  const authProvider: AuthBindings = {
    login: async () => {
      return {
        success: true,
      };
    },
    logout: async () => {
      logout({ returnTo: window.location.origin });
      return {
        success: true,
      };
    },
    onError: async (error) => {
      console.error(error);
      return { error };
    },
    check: async () => {
      try {
        const token = await getIdTokenClaims();
        if (token) {
          axios.defaults.headers.common = {
            Authorization: `Bearer ${token.__raw}`,
          };
          return {
            authenticated: true,
          };
        } else {
          return {
            authenticated: false,
            error: {
                message: "Check failed",
                name: "Token not found",
            },
            redirectTo: "/login",
            logout: true,
          };
        }
      } catch (error: any) {
        return {
          authenticated: false,
          error: new Error(error),
          redirectTo: "/login",
          logout: true,
        };
      }
    },
    getPermissions: async () => null,
    getIdentity: async () => {
      if (user) {
        return {
          ...user,
          avatar: user.picture,
        };
      }
      return null;
    },
  };

  return (
    <Refine
      dataProvider={dataProvider("https://api.fake-rest.refine.dev")}
      notificationProvider={notificationProvider}
      Layout={Layout}
      ReadyPage={ReadyPage}
      catchAll={<ErrorComponent />}
      routerProvider={routerProvider}
      authProvider={authProvider}
      LoginPage={Login}
    />
  );
}

export default App;
First, the main Refine component and the necessary helper components like Layout, ReadyPage and ErrorComponent are imported. Then the style sheet file, providers for data and router, and auth components are imported.
In the App function first the auth logic is handled, and then in the render block, all of the imported helper components and providers are passed to the main Refine component as props.
To display the result on the screen, all of the exported content from App.tsx is imported and rendered to the DOM in the index.tsx file:
import React from "react";
import { createRoot } from "react-dom/client";
import { Auth0Provider } from "@auth0/auth0-react";

import reportWebVitals from "./reportWebVitals";
import App from "./App";

const container = document.getElementById("root") as HTMLElement;
const root = createRoot(container);

root.render(
  <React.StrictMode>
    <Auth0Provider
      domain="your-auth0-domain-address"
      clientId="your-auth0-clientId"
      redirectUri={window.location.origin}
    >
      <App />
    </Auth0Provider>
  </React.StrictMode>
);
Notice, that the App component is wrapped into Auth0Provider so that the authentication could be accessed throughout the whole app.
Blitz
Blitz offers a more complicated, framework-like file structure, where there are already pre-defined ways how to handle and separate common concepts related to full-stack applications.
The file structure looks as follows:
├── src/
│   ├── auth/
│   │   ├── components/
│   │   │   ├── LoginForm.tsx
│   │   │   └── SignupForm.tsx
│   │   ├── mutations/
│   │   │   ├── changePassword.ts
│   │   │   ├── forgotPassword.test.ts
│   │   │   ├── forgotPassword.ts
│   │   │   ├── login.ts
│   │   │   ├── logout.ts
│   │   │   ├── resetPassword.test.ts
│   │   │   ├── resetPassword.ts
│   │   │   └── signup.ts
│   │   └── validations.ts
│   ├── core/
│   │   ├── components/
│   │   │   ├── Form.tsx
│   │   │   └── LabeledTextField.tsx
│   │   └── layouts/
│   │       └── Layout.tsx
│   ├── users/
│   │   ├── hooks/
│   │   │   └── useCurrentUser.ts
│   │   └── queries/
│   │       └── getCurrentUser.ts
│   ├── pages/
│   │   ├── api/
│   │   │   └── rpc/
│   │   │       └── [[...blitz]].ts
│   │   ├── auth/
│   │   │   ├── forgot-password.tsx
│   │   │   ├── login.tsx
│   │   │   └── signup.tsx
│   │   ├── _app.tsx
│   │   ├── _document.tsx
│   │   ├── 404.tsx
│   │   └── index.tsx
│   ├── blitz-client.ts
│   └── blitz-server.ts
├── db/
│   ├── migrations/
│   ├── index.ts
│   ├── schema.prisma
│   └── seeds.ts
├── integrations/
├── public/
│   ├── favicon.ico*
│   └── logo.png
├── test/
    └── setup.ts
    └── utils.tsx
The project structure is divided into multiple main blocks - src, db, integrations, public and test.
The core app code is featured in src, which is further divided in auth consisting of the components and mutations for authentication, core for form and layout components, users for hooks and queries to handle the users and pages, where all the new API and routes would be created.
The db folder includes all the necessary configuration, schema, and migration files for the database of your project.
If you use some third-party libraries or code, it's a great practice to separate them from the rest of the code. Blitz has reserved the integrations folder for that purpose.
The public folder is for all the media assets and files that are served statically from the app's root URL.
There is also a dedicated test folder for tests that comes with setup and utility files to help you get started.
Data providers
refine
refine comes with a fake data provider that is perfect for testing or creating some pages where you would need some placeholder data.
It is a simple REST API endpoint that contains sample data about users, posts, products, categories, etc., and can be accessed via api.fake-rest.refine.dev.
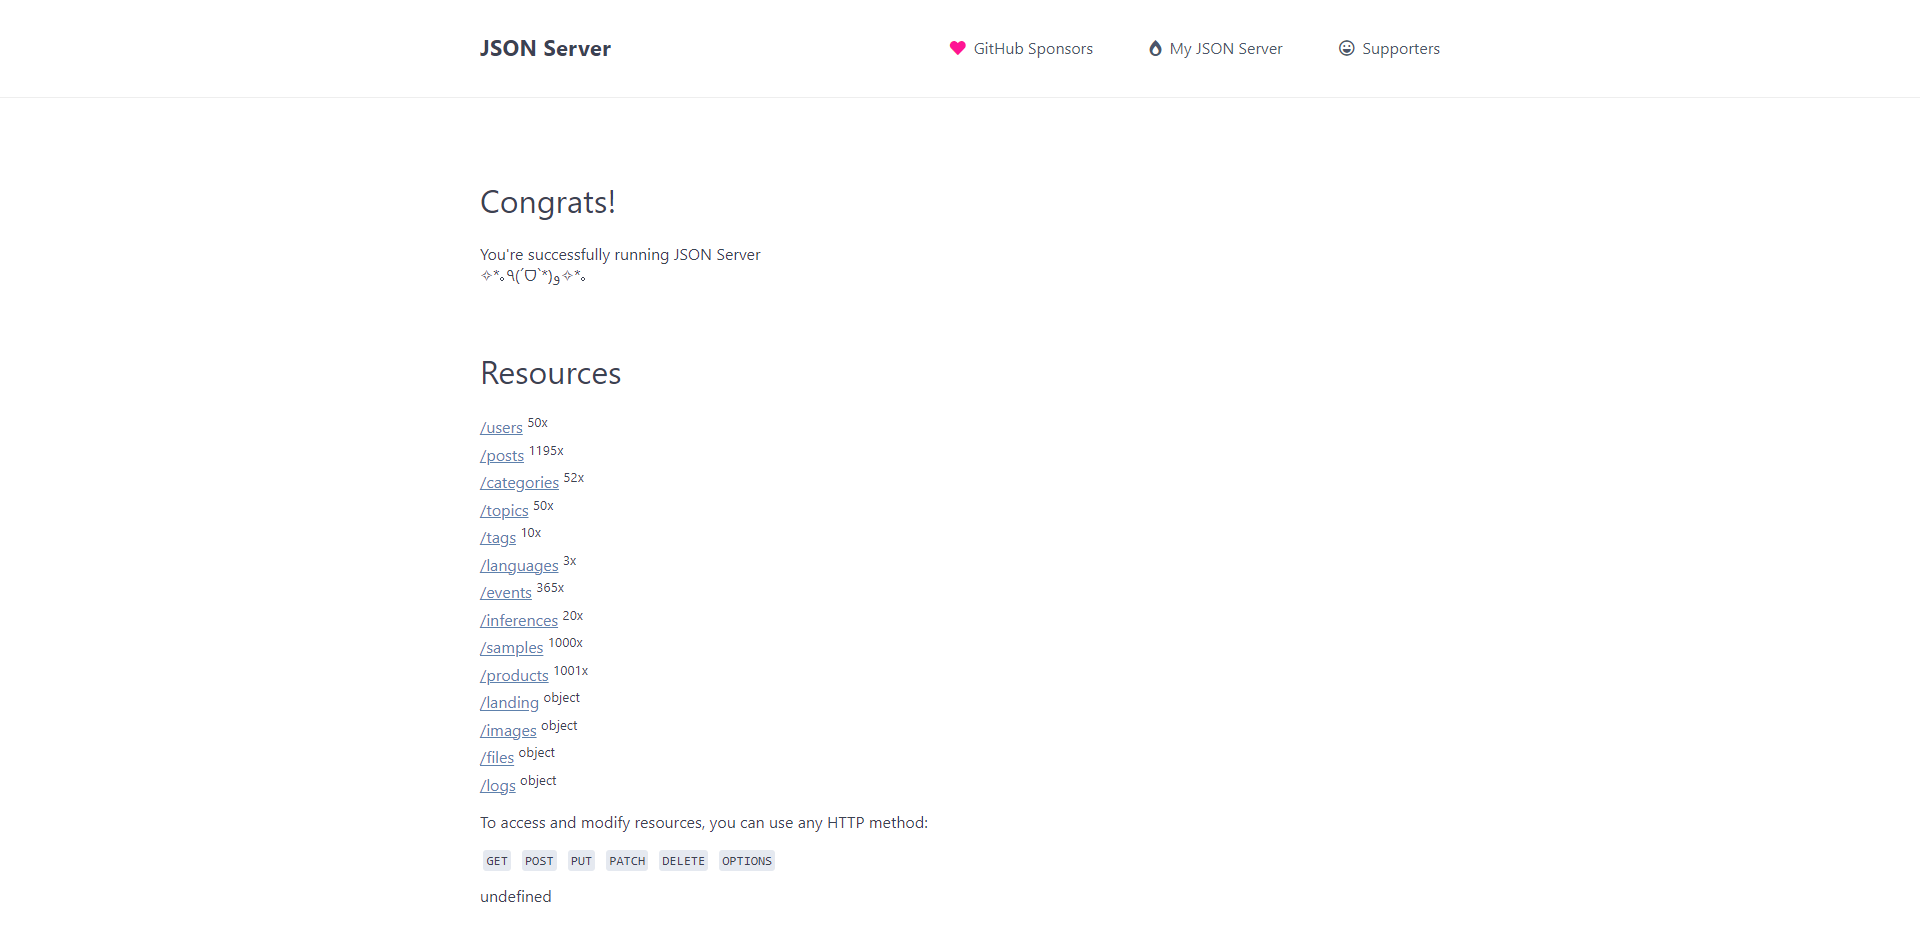
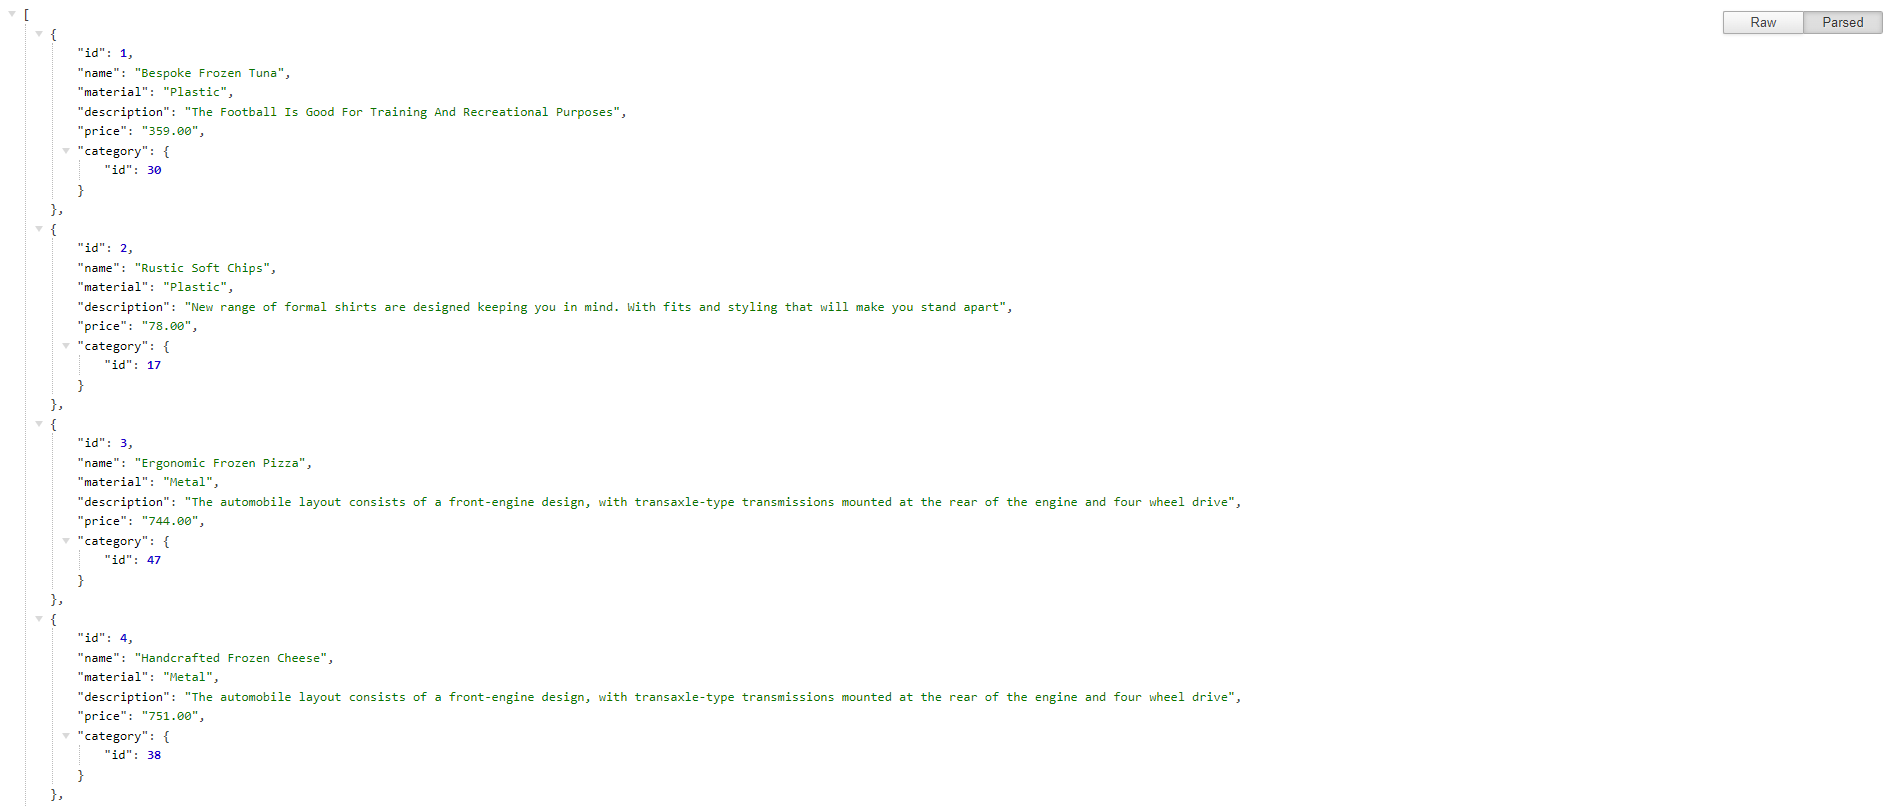
If we click on any of the routes in the user interface, we can see that each of them contains JSON data. For example, the /products endpoint holds samples in the following format:
In order to use the data provider in the refine project, the user needs to pass it to the Refine component in App.tsx like this:
<Refine
  dataProvider={dataProvider("https://api.fake-rest.refine.dev")}
  // ...
/>
If you followed the instructions for the installation wizard, it should already be set up by refine automatically.
Blitz
Blitz framework does not come with its own data provider, but the great thing is that during the installation it configures the SQLite database, which is more than enough for testing and experimentation.
The database configuration is available in the schema.prisma file. You will find it in the db folder in the app root. It includes the database configuration and models used in the app:
datasource db {
  provider = "sqlite"
  url      = env("DATABASE_URL")
}

generator client {
  provider = "prisma-client-js"
}

model User {
  id             Int      @id @default(autoincrement())
  createdAt      DateTime @default(now()
  name           String?
  email          String   @unique
}

// ...
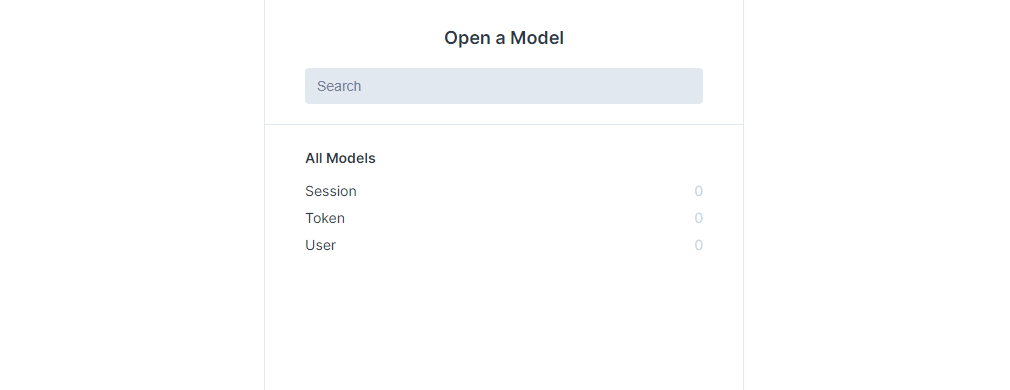
Another great thing is that with Blitz you can run blitz prisma studio to open the web interface in the browser and see all the data in your database.
If the UI does not open automatically, navigate to localhost:5555:
Authentication
refine
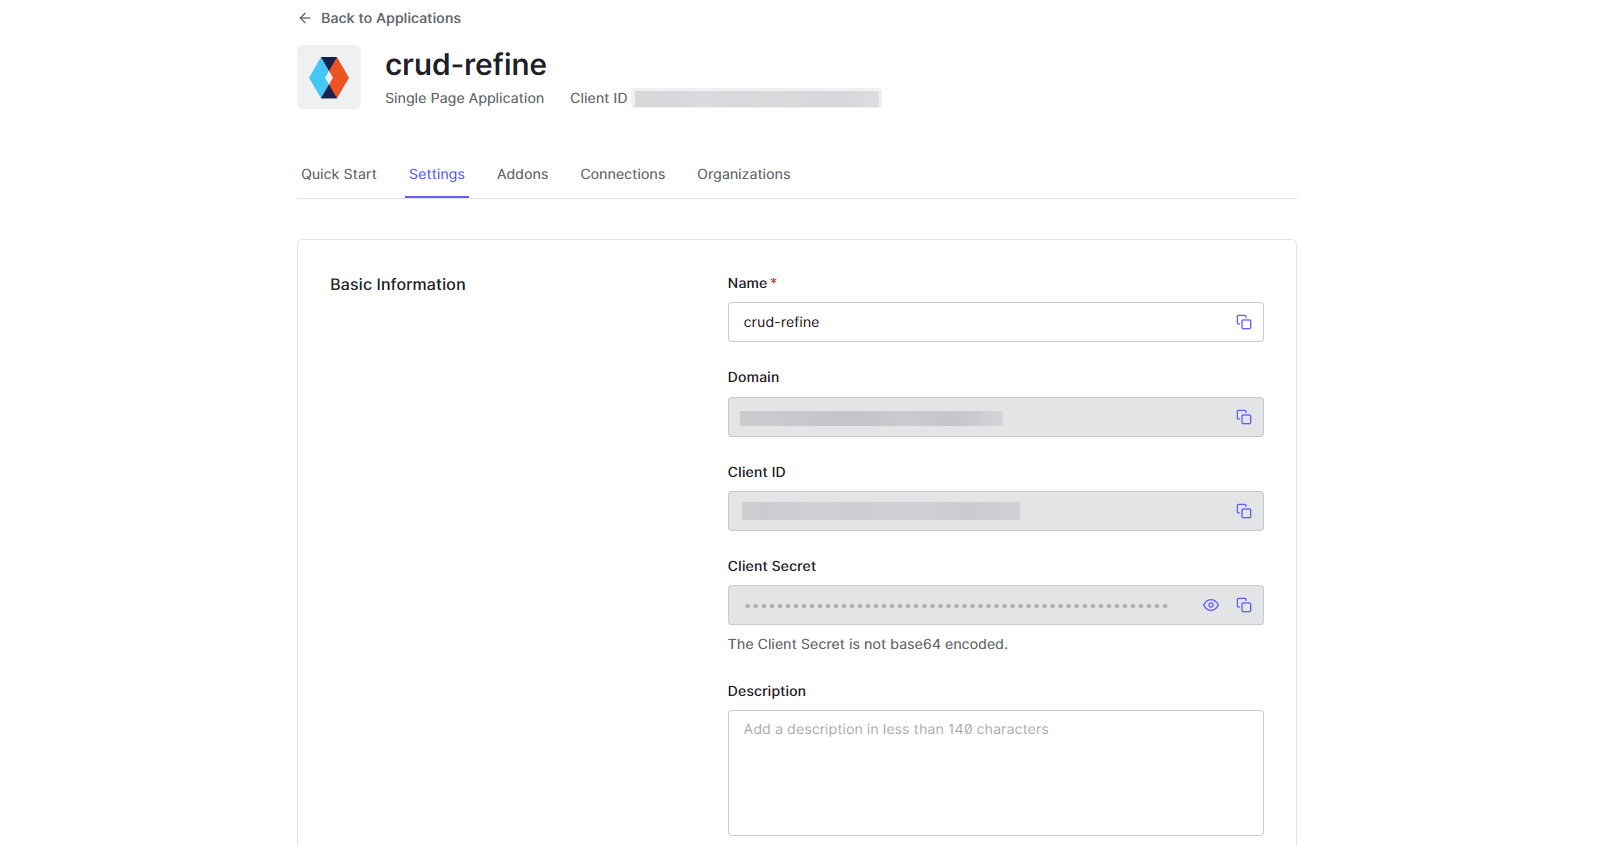
Create a new free Auth0 account and log in.
Create a new web application.
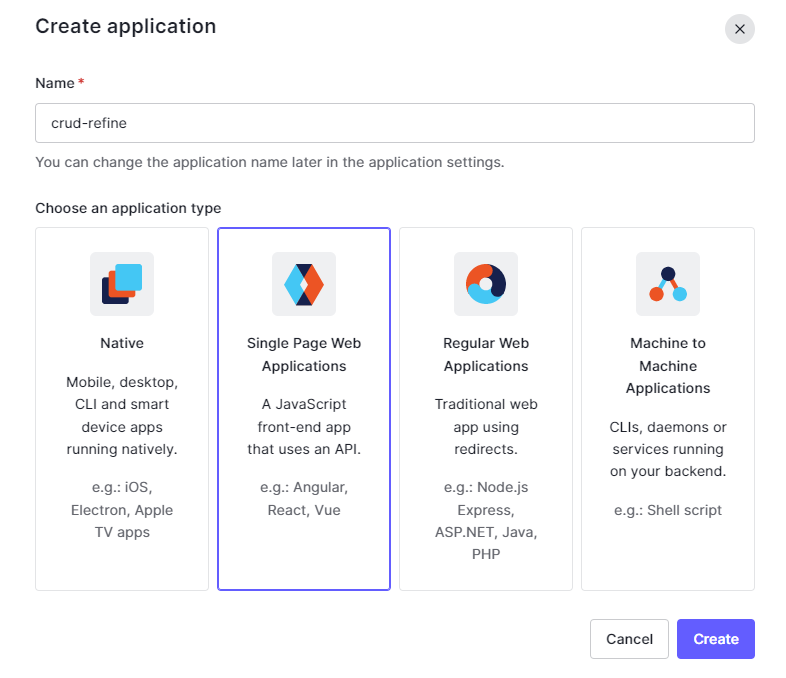
It will give you domain, client ID, and secret ID information.
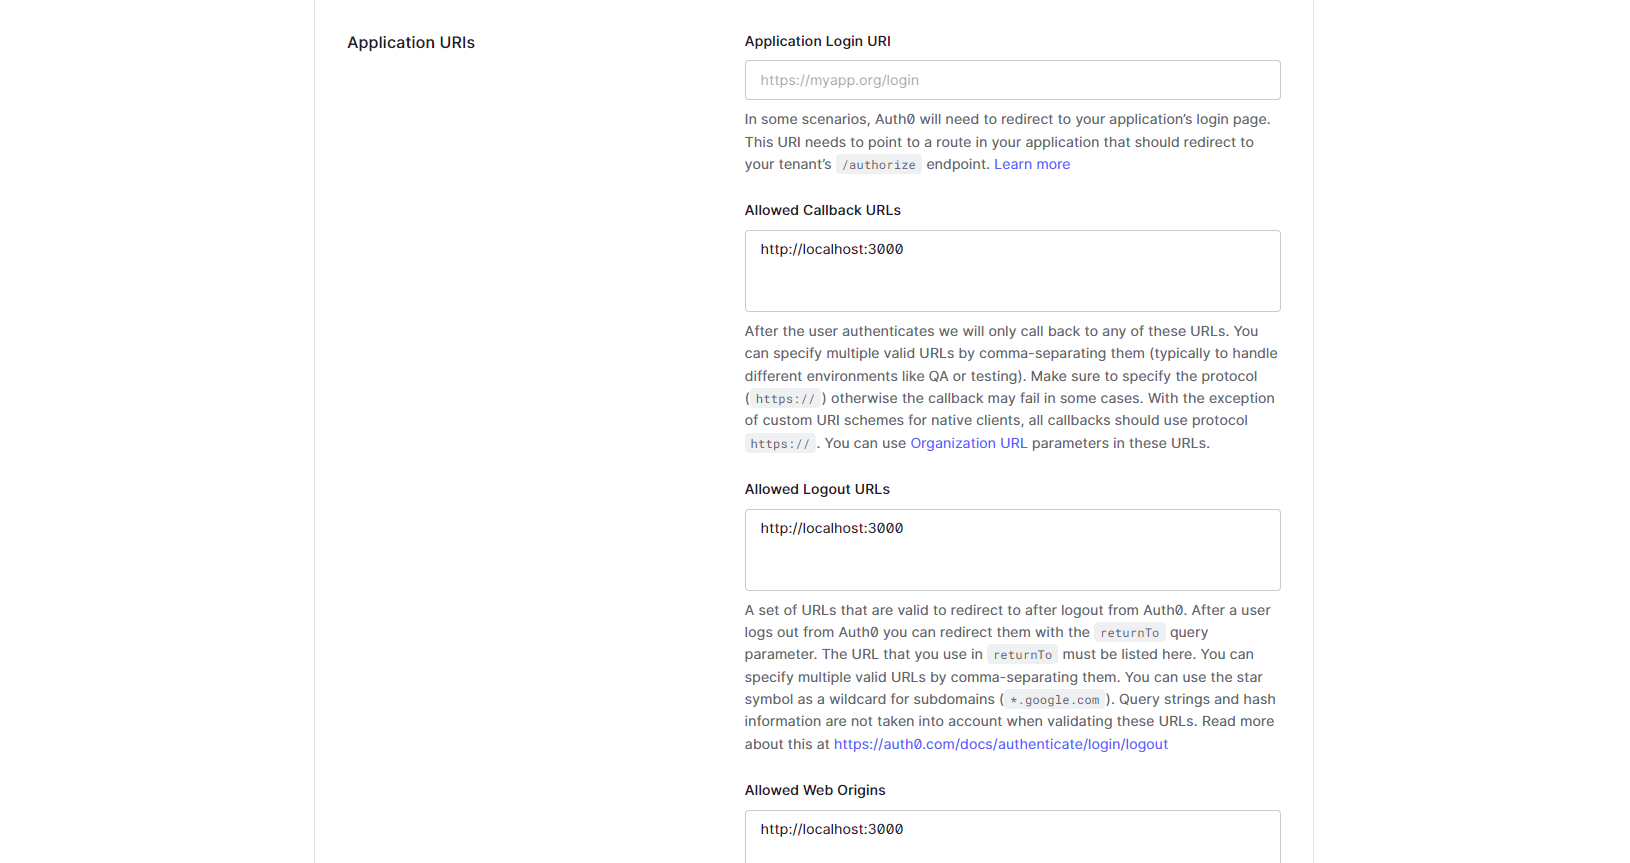
Scroll down and add localhost:3000 to the allowed URLs list.
Next, switch back to your code editor and create a new file .env in your project root, add the variables REACT_APP_AUTH0_DOMAIN and REACT_APP_AUTH0_CLIENT_ID and assign the values from the Auth0 dashboard.
Next, edit the index.tsx file in the src folder so it now looks like this:
import React from "react";
import { createRoot } from "react-dom/client";
import { Auth0Provider } from "@auth0/auth0-react";

import App from "./App";

const container = document.getElementById("root") as HTMLElement;
const root = createRoot(container);

root.render(
  <React.StrictMode>
    <Auth0Provider
      domain={process.env.REACT_APP_AUTH0_DOMAIN as string}
      clientId={process.env.REACT_APP_AUTH0_CLIENT_ID as string}
      redirectUri={window.location.origin}
    >
      <App />
    </Auth0Provider>
  </React.StrictMode>
);
Now reset the developer server by pressing Ctrl + C on your keyboard and run the command npm run dev to start it again. This way the new environment values will take effect.
Now open your browser and navigate to localhost:3000 and you should be presented with the login screen:

Blitz
The great thing about Blitz is it already has the authentication views for signup and login. It has also configured the database for it, so you don't have to worry about creating separate models and running migrations for that.
The signup page should be available at localhost:3000/auth/signup:

The login page should be available at localhost:3000/auth/login:

Create a new account and sign up, so we have a user record in the SQLite database and you can log in to access the pages we will build further.
Creating pages
refine
Creating new pages in refine is really simple thanks to its built-in command create-resource. Since it's targeted at CRUD apps, the user is allowed to choose what type of pages to generate via flags list, create, edit and show.
To get an overall insight into how the new pages are created in refine, we will first create a page that lists the content. Run the command npm run refine create-resource products -- --actions list in your terminal.
Navigate back to your project file tree and you will notice that a new folder pages was created. Inside it, there is a route-specific folder products that includes files index.ts and list.tsx.
Open up the list.tsx file and you will notice refine has even designed the Inferencer component that will automatically help you to design the views for resources based on the data structure:
import { IResourceComponentsProps, GetListResponse } from "@pankod/refine-core";
import { AntdInferencer } from "@pankod/refine-inferencer/antd";

export const ProductsList: React.FC<
  IResourceComponentsProps<GetListResponse<{}>>
> = () => {
  return <AntdInferencer />;
};
Also notice the newly created list page was automatically imported and passed in as resource prop in the Refine component in App.tsx:
<Refine
  dataProvider={dataProvider("https://api.fake-rest.refine.dev")}
  notificationProvider={notificationProvider}
  Layout={Layout}
  ReadyPage={ReadyPage}
  catchAll={<ErrorComponent />}
  routerProvider={routerProvider}
  authProvider={authProvider}
  LoginPage={Login}
  resources={[
    {
      name: "products",
      list: ProductsList,
    },
  ]}
/>
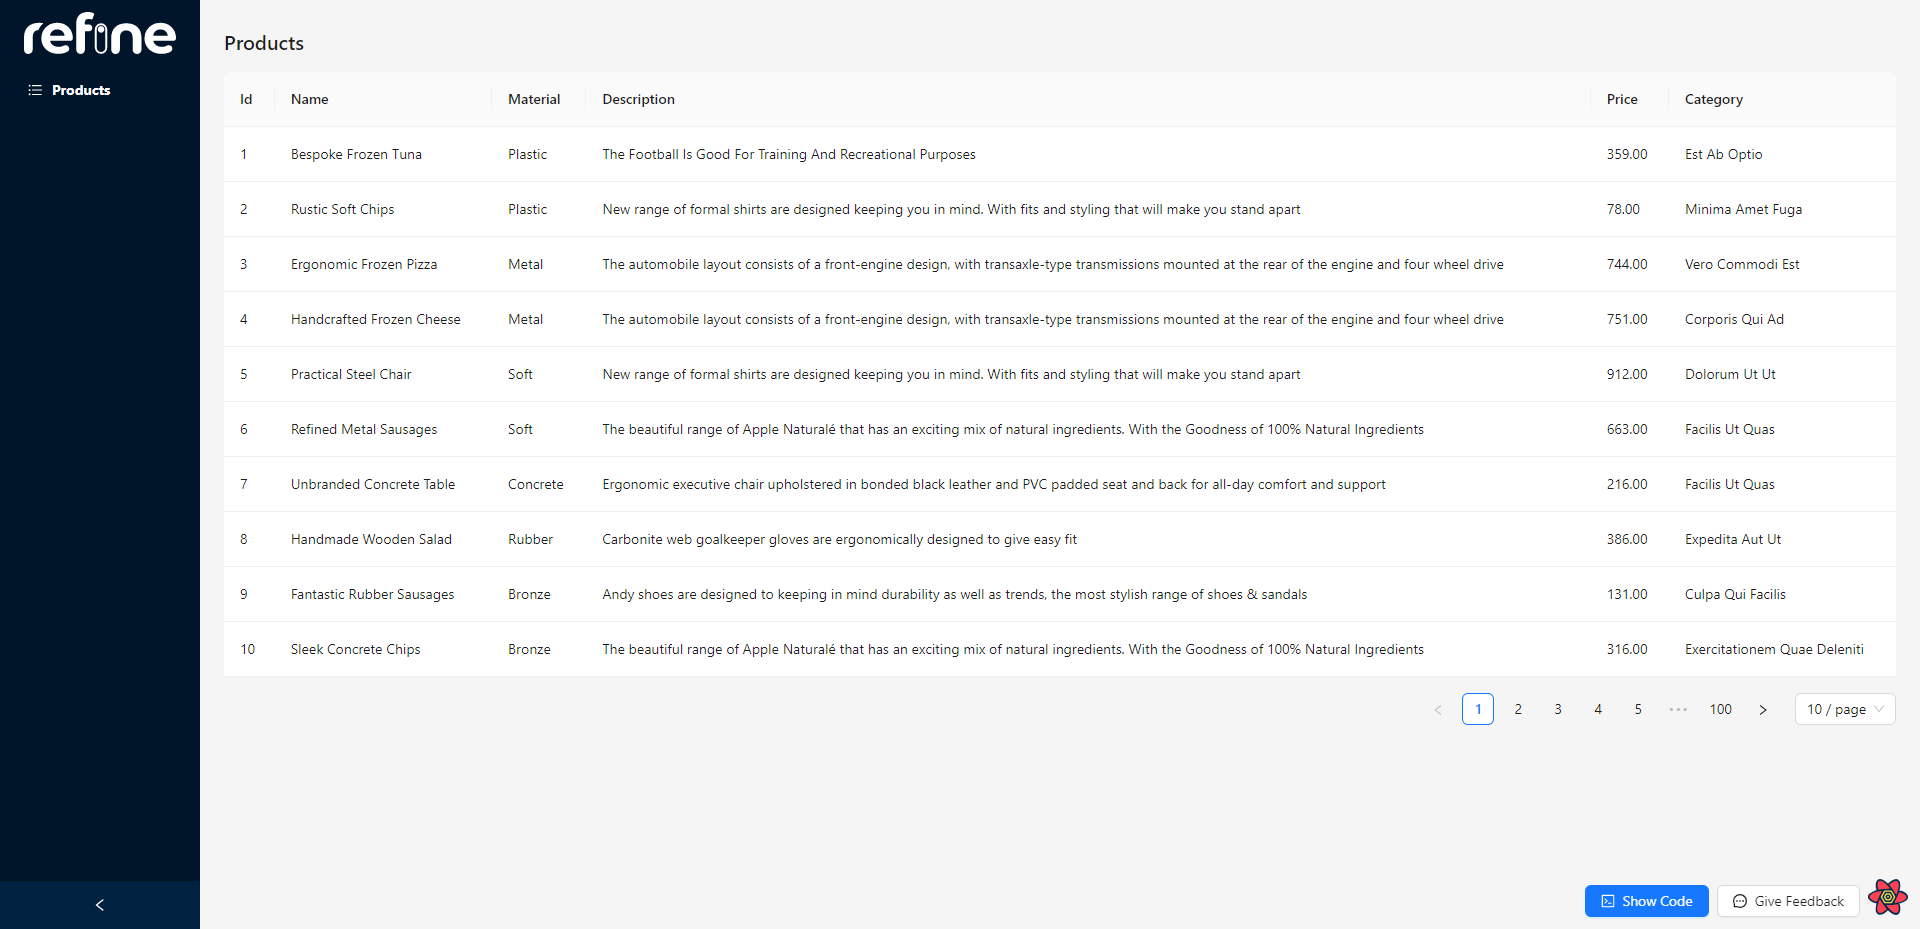
Now open your browser and navigate to localhost:3000/products. You should be presented with the page that lists data from the /products route from the refine's built-in data provider:
Blitz
Blitz does not come with the Inferencer component that would create a default view to display the data, so we will create a custom page.
If you have previously worked with NextJS, you will notice that the page system is the same. For a new page, you need to create a new .tsx file inside the pages folder and it will become a new route.
To test it out, create a new file greet.tsx and include the following code:
const Greet = () => {
  return (
    <div>
      <h1>Hello from Blitz!</h1>
      <p>This is a custom Greetings page!</p>
    </div>
  );
};

export default Greet;
Now open your browser and navigate to localhost:3000/greet and you should be presented with the rendered content of the newly created page:

CRUD functionality
refine
refine has thought out how to make the CRUD operations as easy as possible. Run the command npm run refine create-resource posts.
This will create a new page for the /posts route from the data provider, but since we did not provide any flags of what specific operations to support, all of the CRUD operations will be available.
This means that after running the command refine created a new folder inside pages called posts and populated it with files index.ts, list.tsx, create.tsx, edit.tsx and show.tsx.
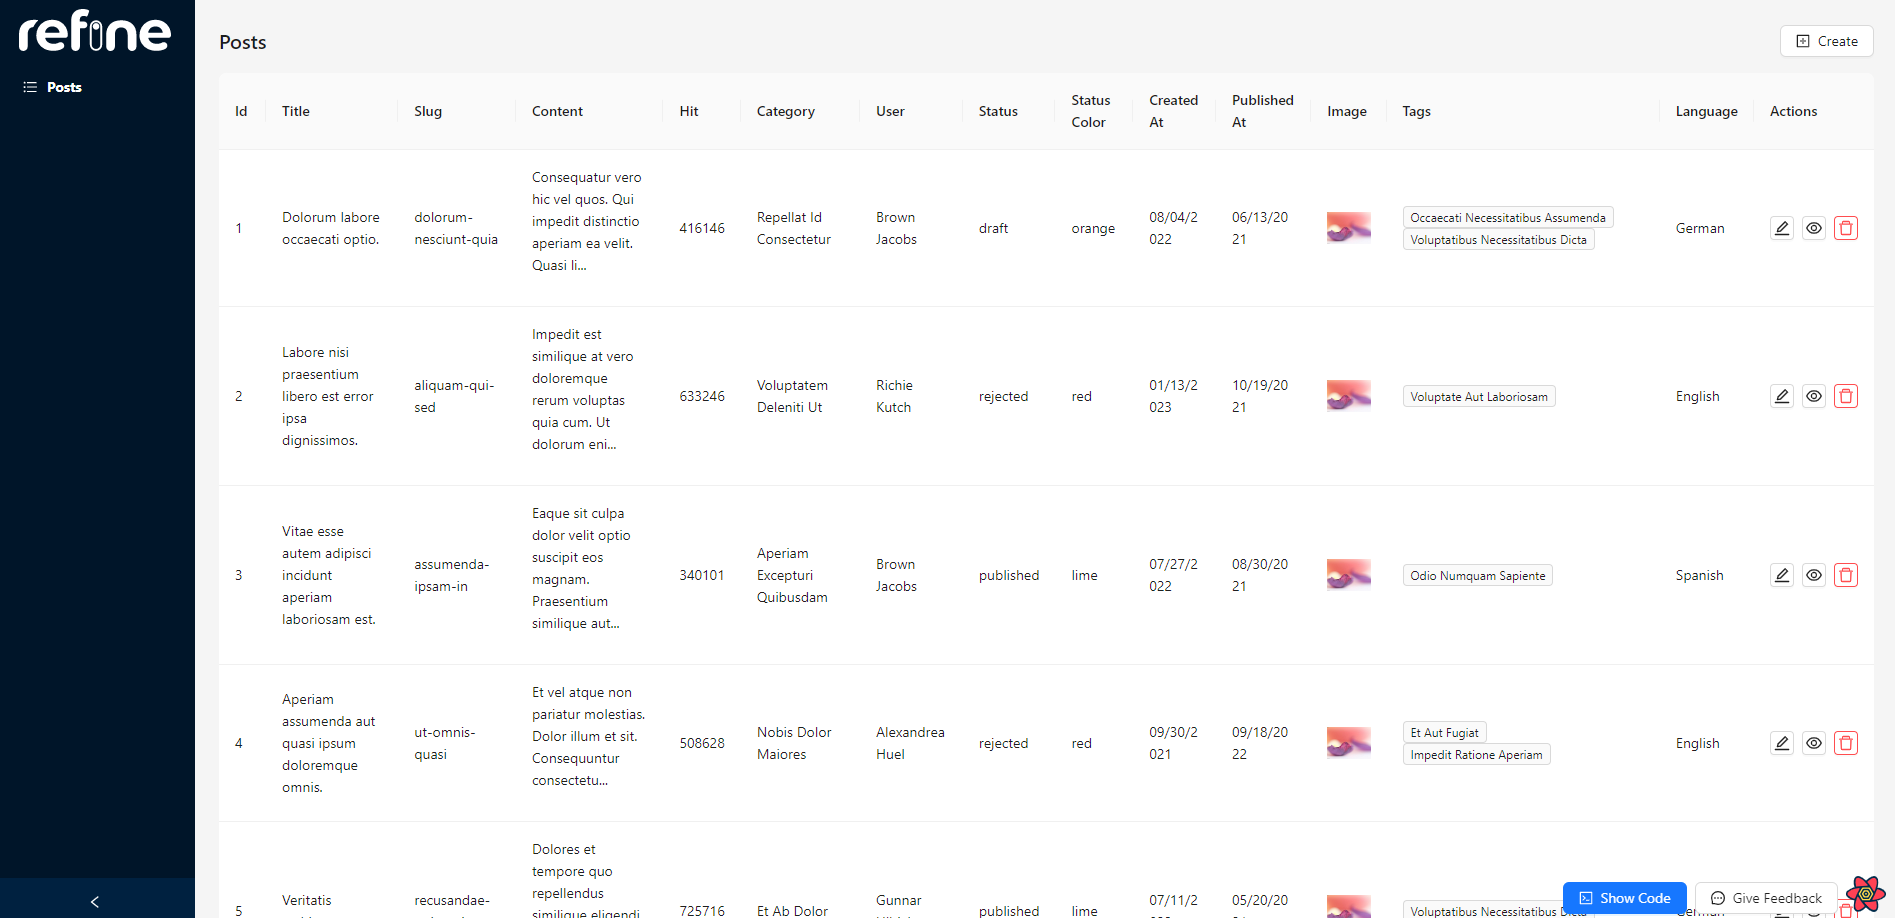
Now, open up your browser and navigate to localhost:3000/posts.
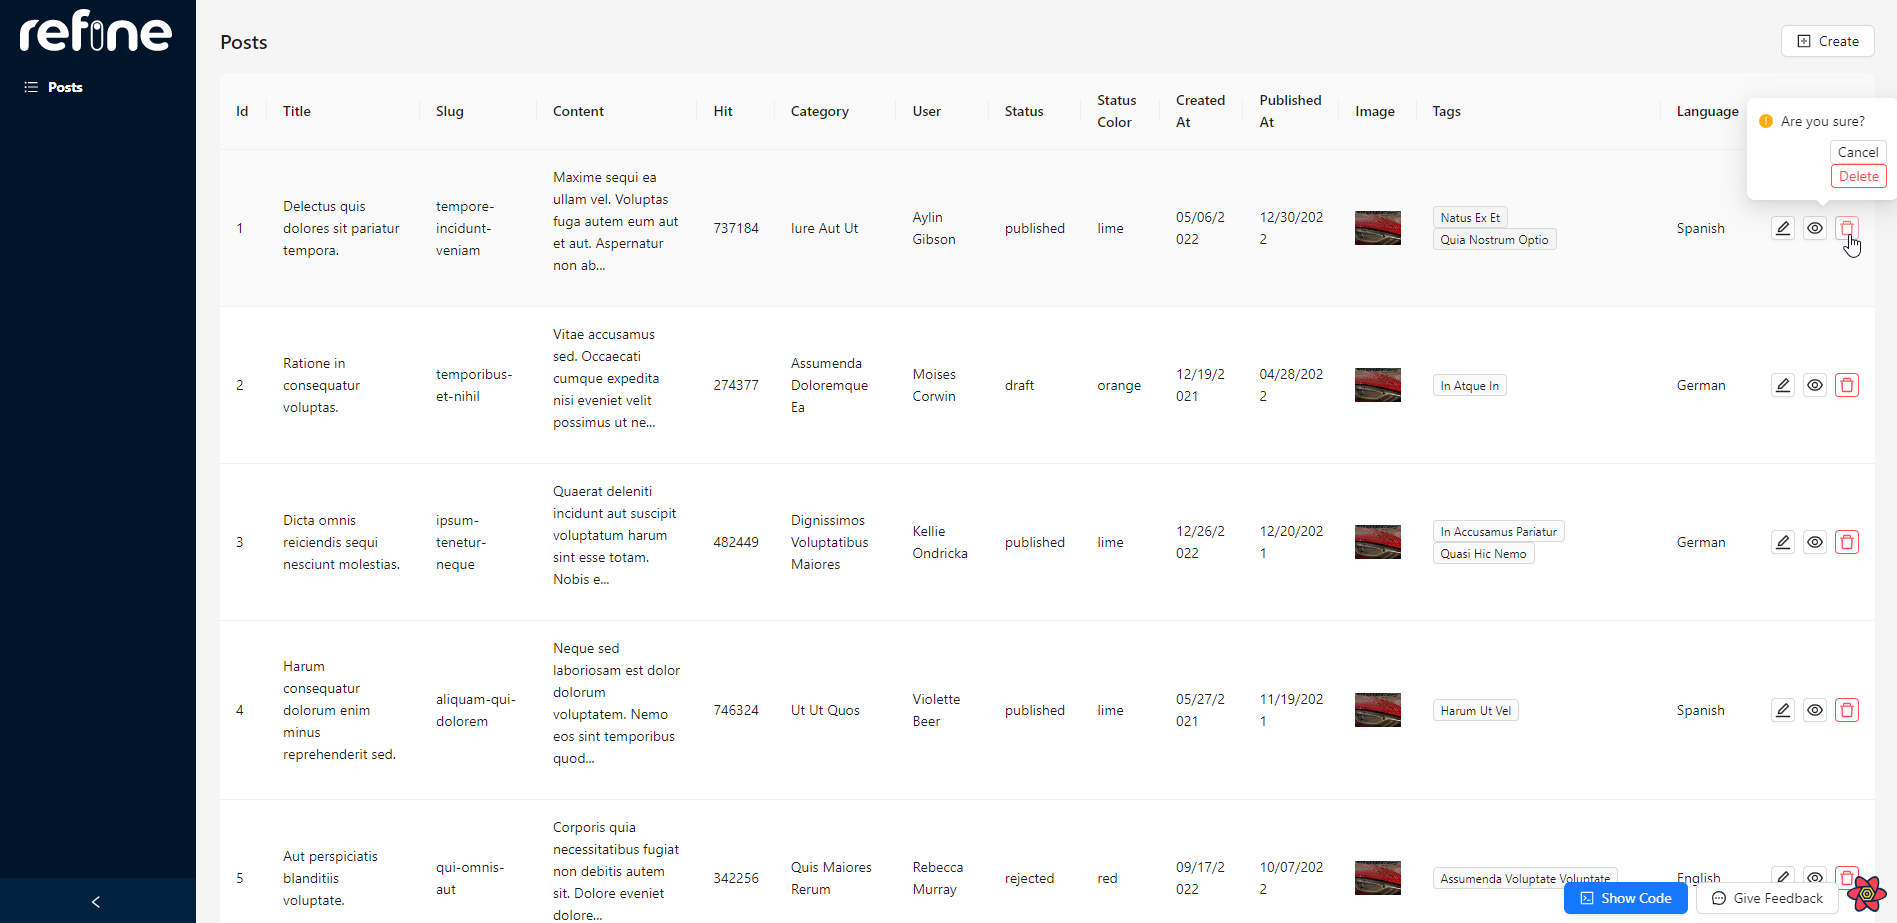
You should be able to see all of the data coming from the /posts route, but this time you will notice there are action buttons to create, read, update, and delete the records:
Blitz
To demonstrate the CRUD functionality and how simple it is to implement one in the Blitz, we will be building a to-do application that will allow us to create, read, update, and delete daily tasks.
Run the command blitz generate all todo name:string. That will create the necessary model, query, mutations, and page routes. We also passed in the string type for the to-do task values.
Similarly to the refine scaffold, Blitz took care of creating separate files for the create, read, update, and delete operations for the to-do tasks.
To test it out, restart your developer server by pressing Ctrl + C on your keyboard and then run blitz dev. Then open your browser and navigate to localhost:3000/todos.
This will display the landing of the crud page asking you to create the first task since we currently do not have any data in our database:

Testing CRUD
refine
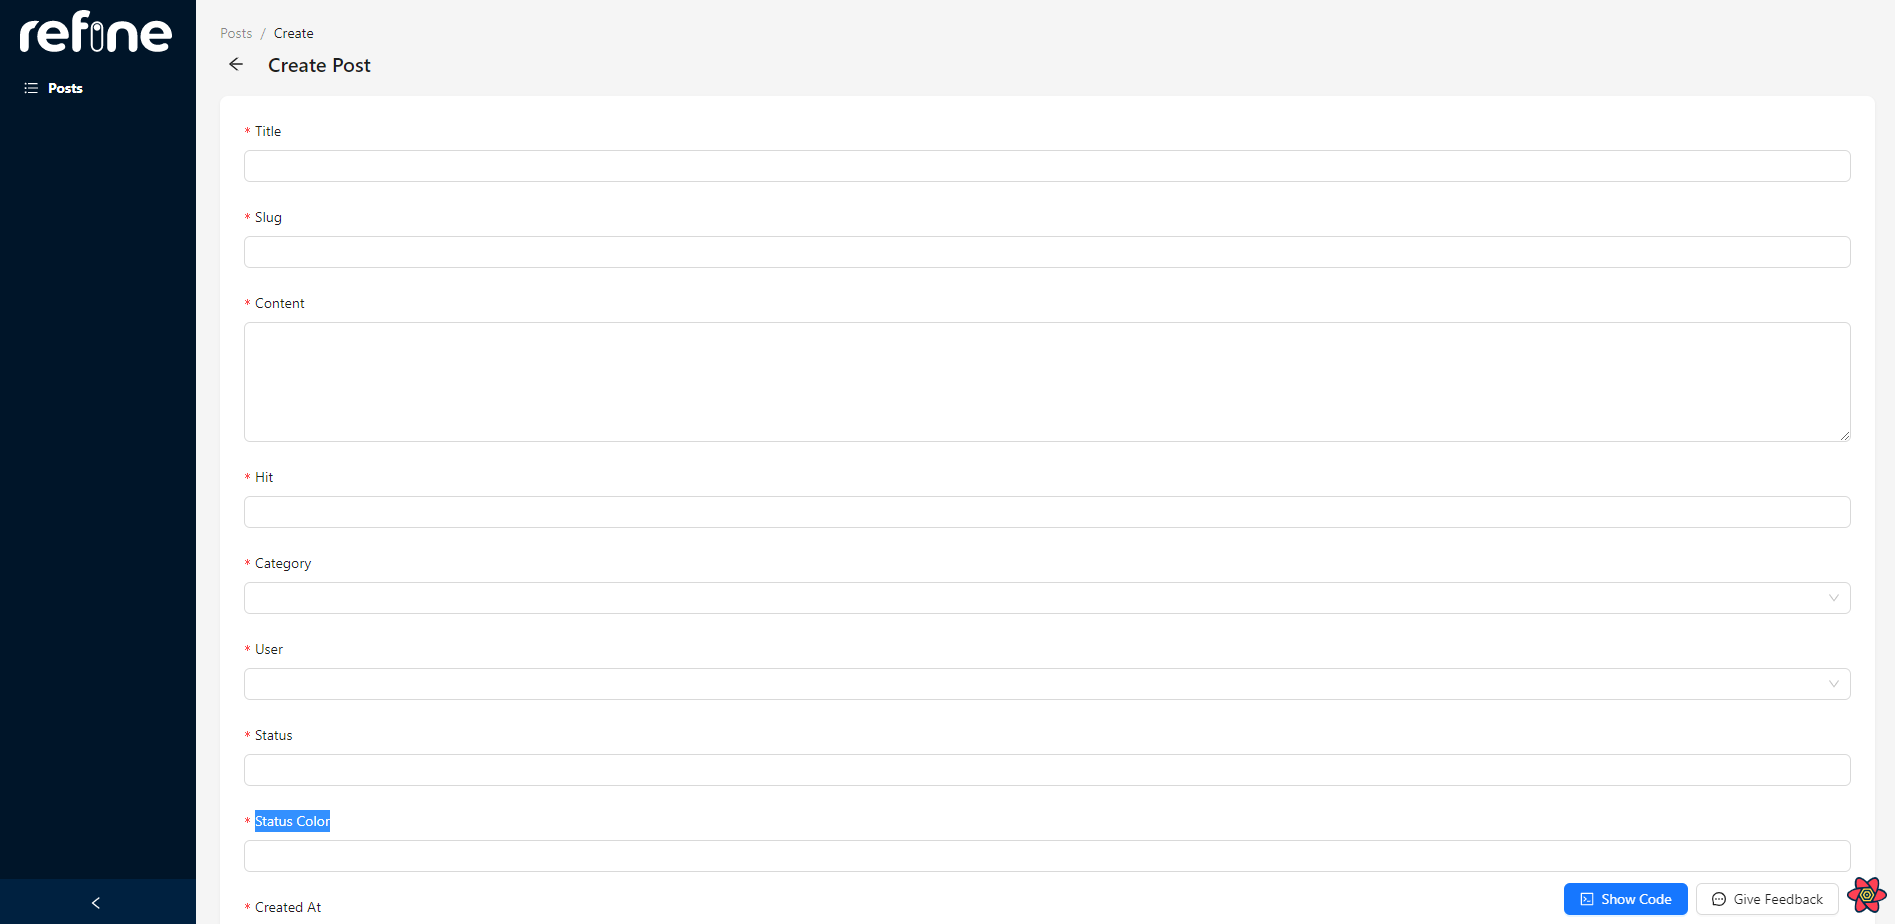
To create a record click on the "Create" button in the top right corner.
This will open up a form with empty fields, allowing you to enter the values and save a new record.
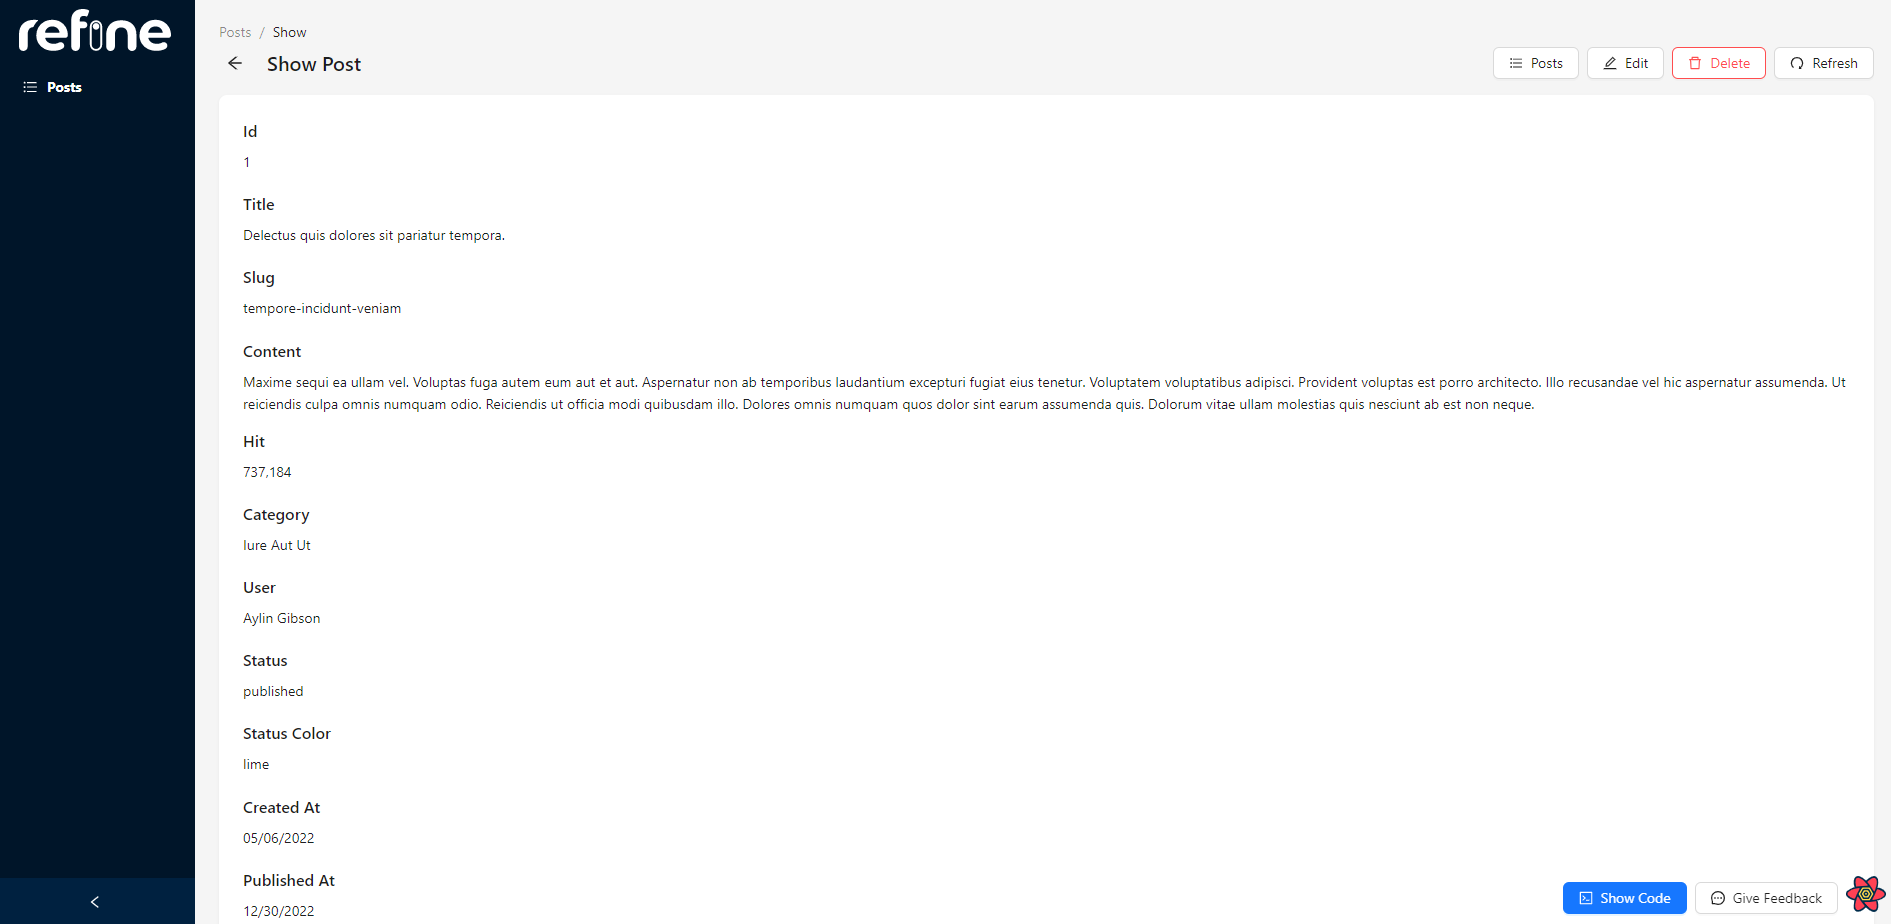
To read an already existing record click on the eye icon on the right of each record.
It will open up the record with all the values in read-only mode.
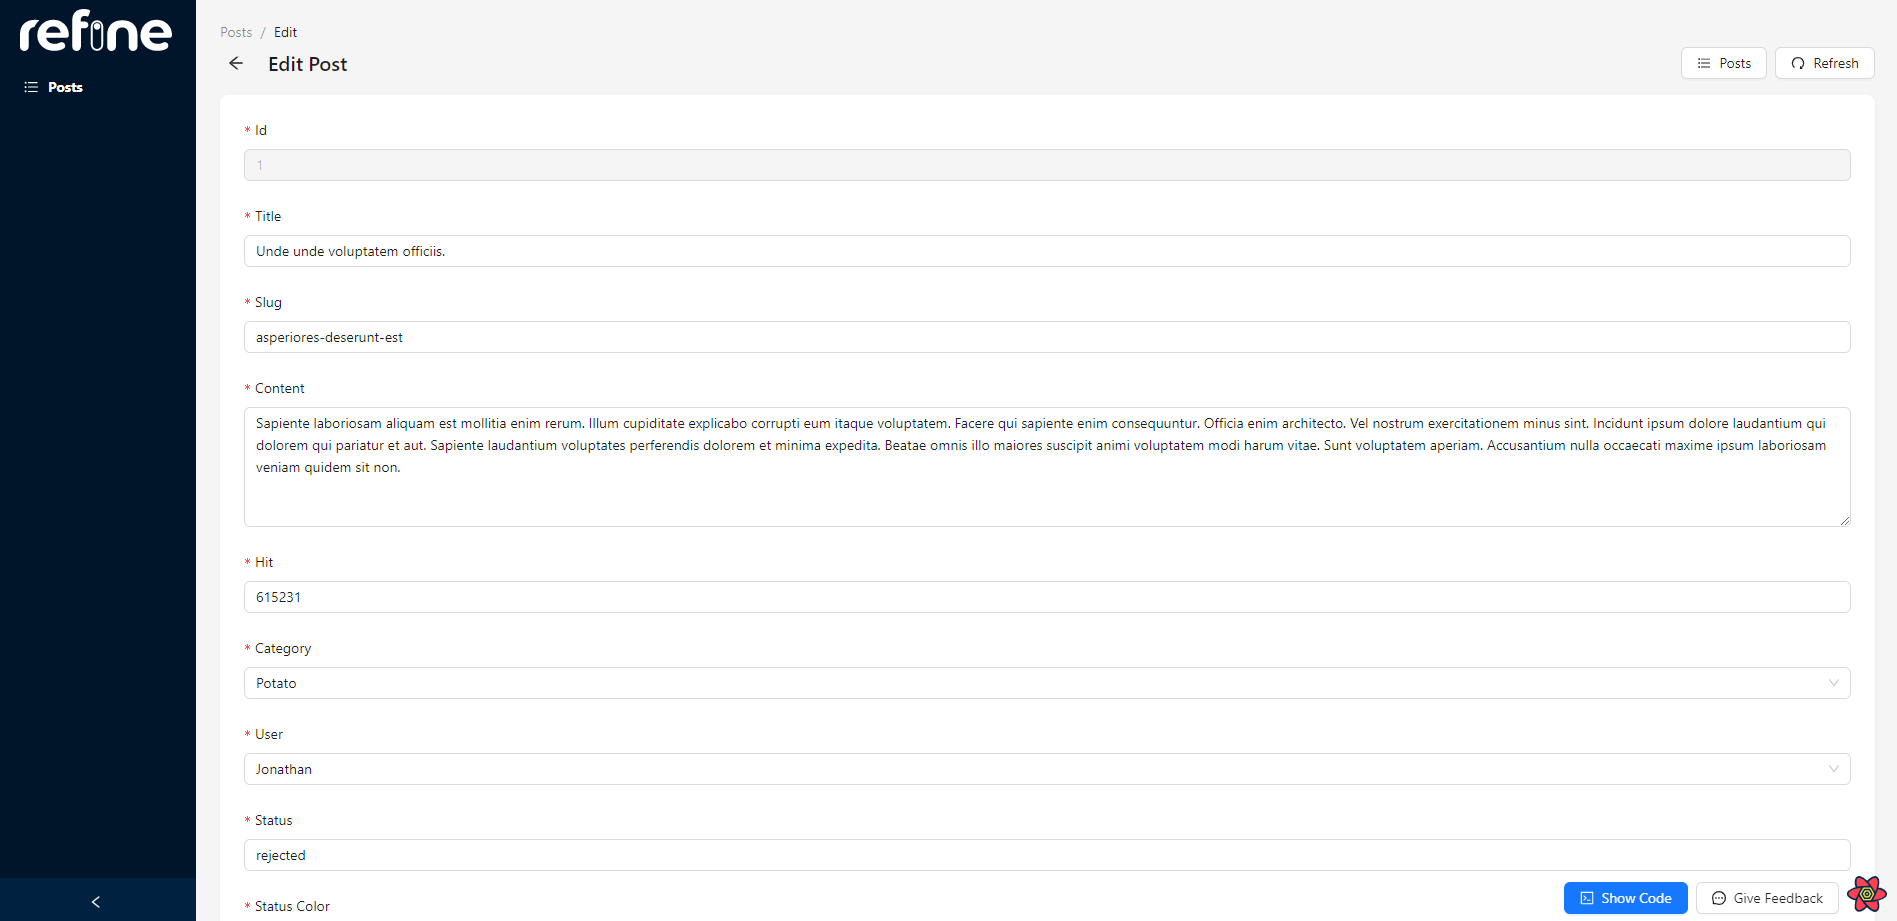
In order to update an existing record, click on the pencil icon next to the eye icon.
This will open up the form with all the values editable.
To delete the post, click on the bin icon next to the eye icon. It will also display a confirmation popup to make sure you are not deleting the record by mistake.
Blitz
To create a new task click on "Create Todo". It will open up an empty form, where you can give the name of the task.

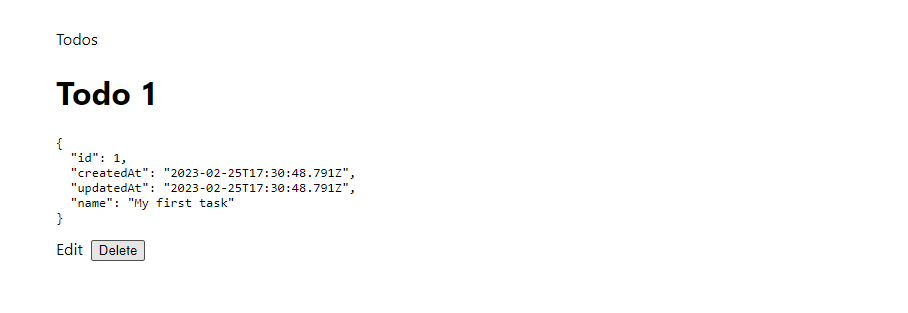
To read the created record navigate to the tasks list and click on the specific task. This will open up the selected record in read-only mode.
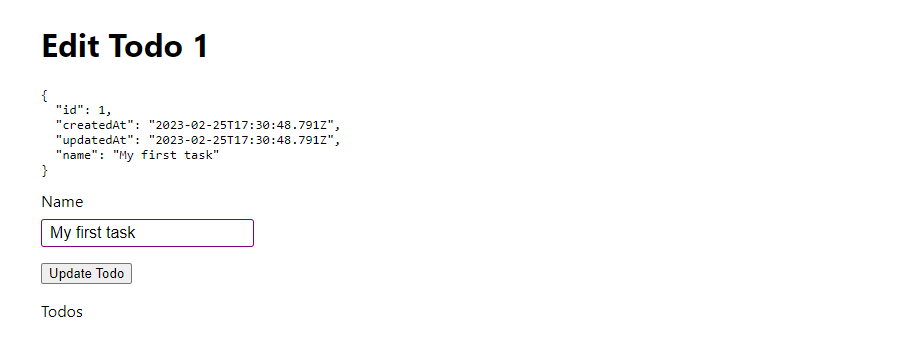
In order to edit the existing record open it and click on the "Edit" button. That will allow you to change the title of the created to-do task.
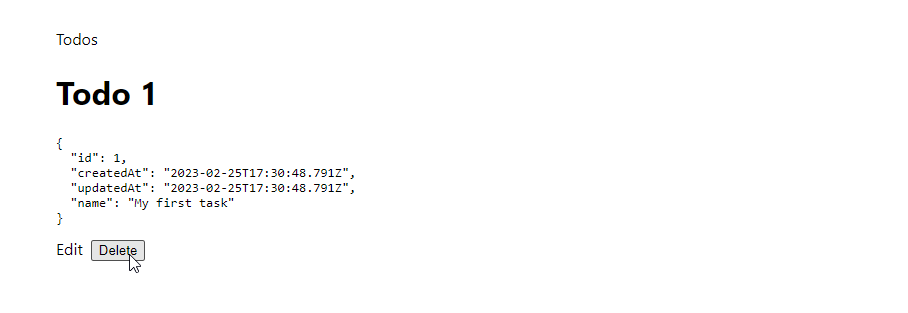
To delete the task open it and click on the "Delete" button.
Deployment
refine
First, make sure you have a GitHub account. If you do not have one, make sure to create one for free.
Next, sign in and create a new repository.
Now switch back to your code editor and run the following commands to push the code to the newly created repository:
git remote add origin https://github.com/username/crud-refine.git
git branch -M main
git push -u origin main
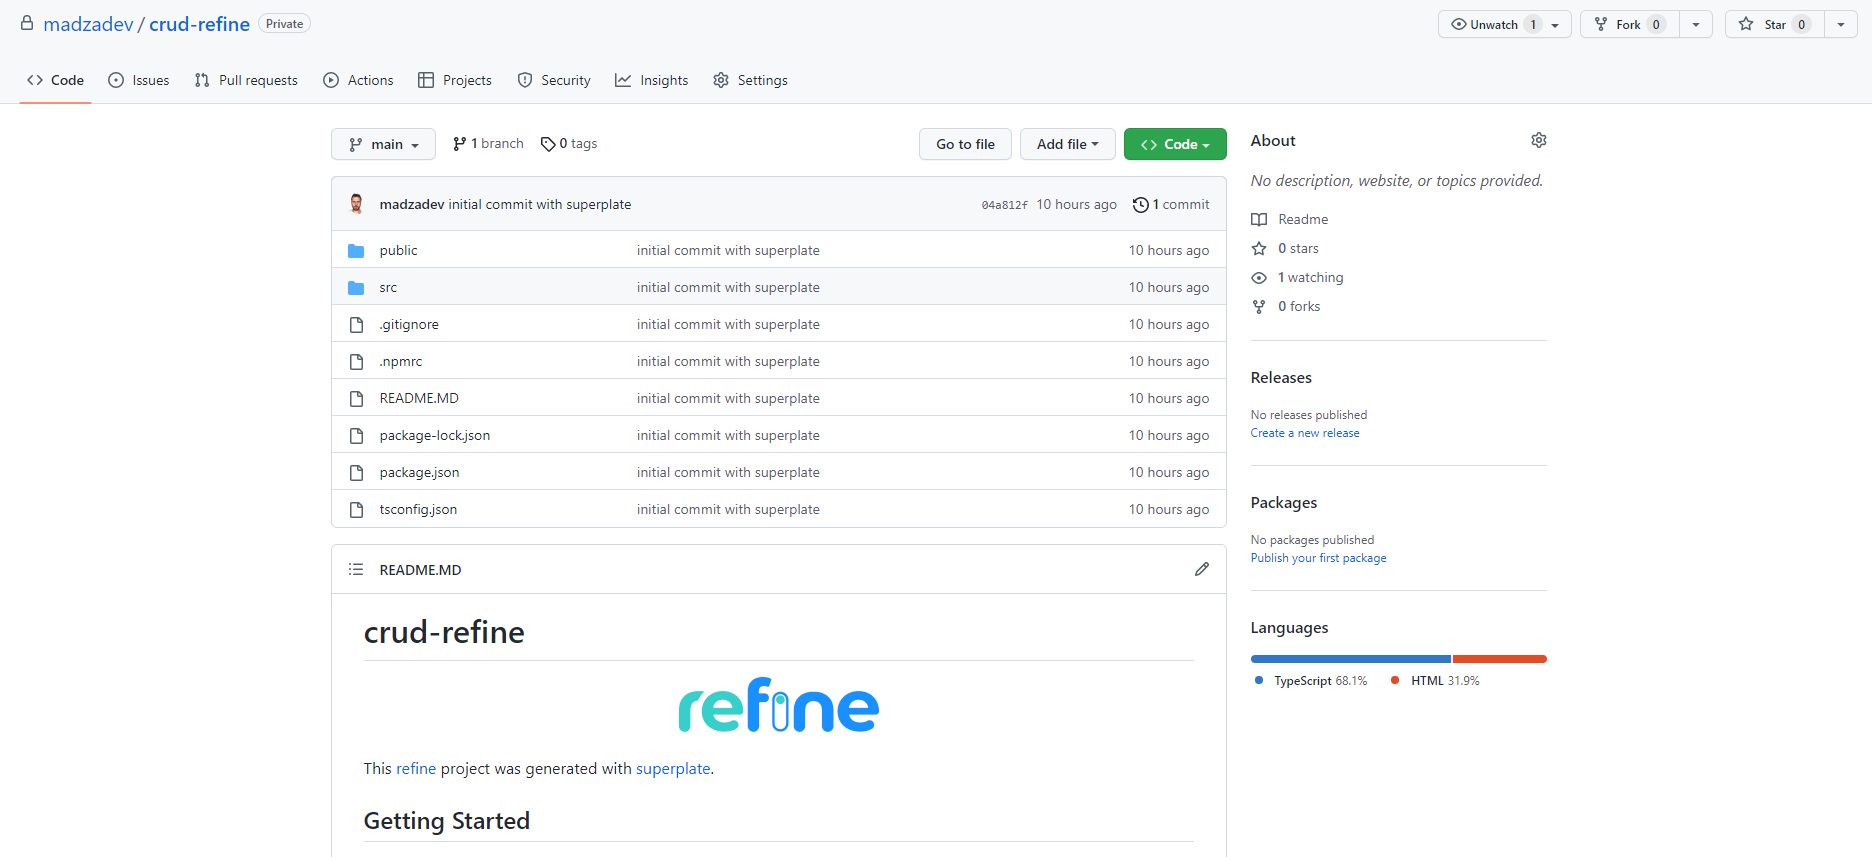
After the code is pushed switch back to the GitHub repository and you should see all the code being pushed:
To make sure your app is deployed in production and accessible online you will also have to deploy it to some hosting provider like Vercel.
First, create a new free account if you already do not have one and log in.
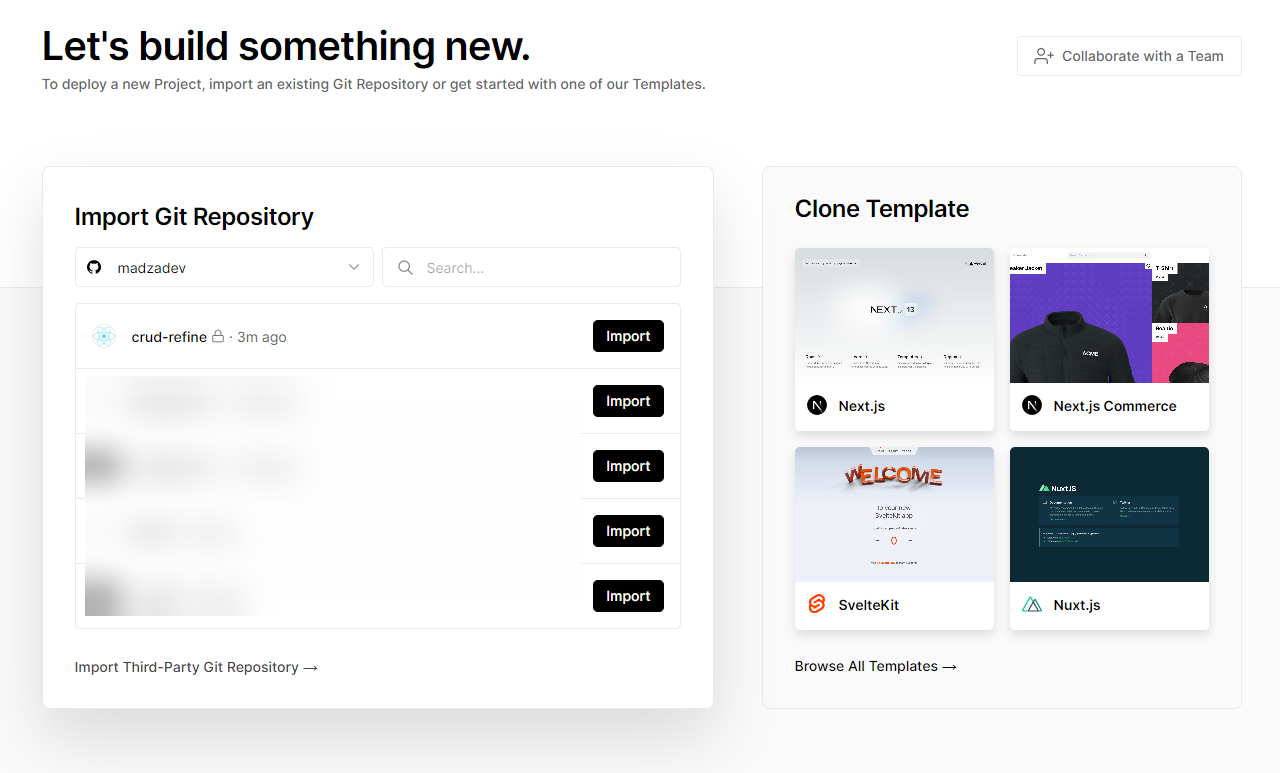
Then create a new project by selecting the option Import from Git. Find your GitHub project in the list and click "Import".
Vercel will automatically configure everything for you, all you have to do is manually add the environmental keys and values from the .env file:
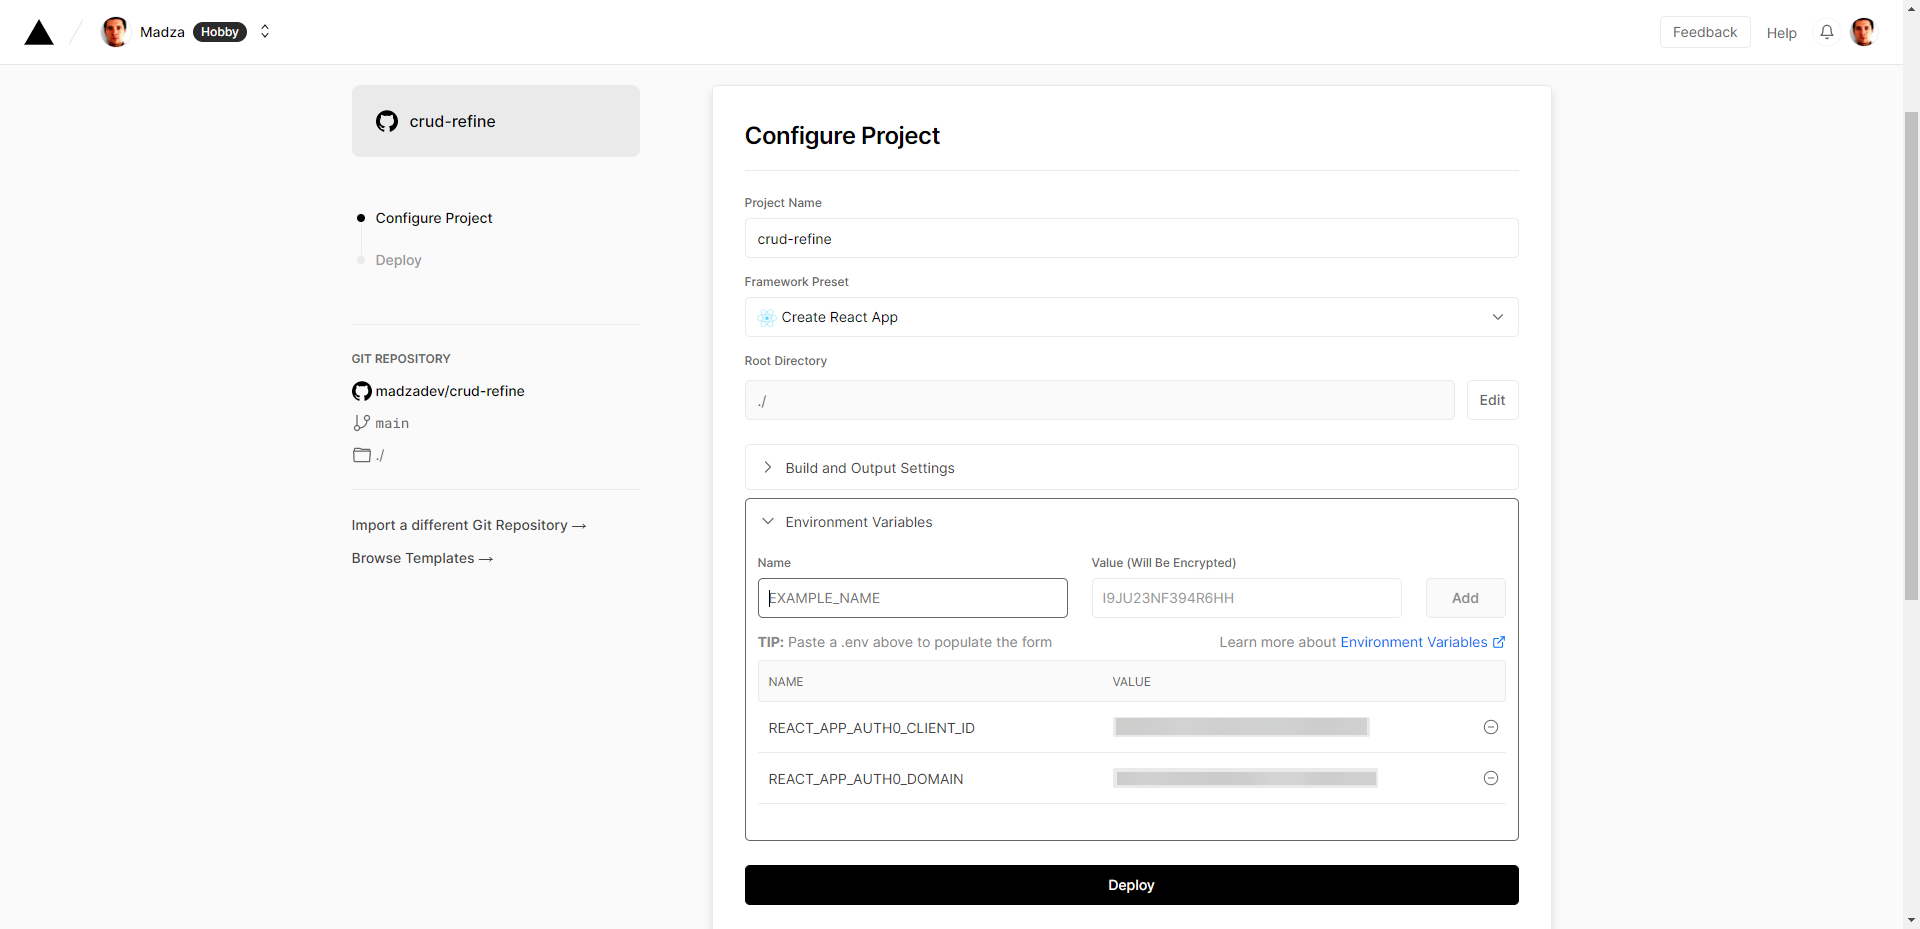
Once that's done, click on Deploy and after the deployment process is done you will be given a live access link to your project.
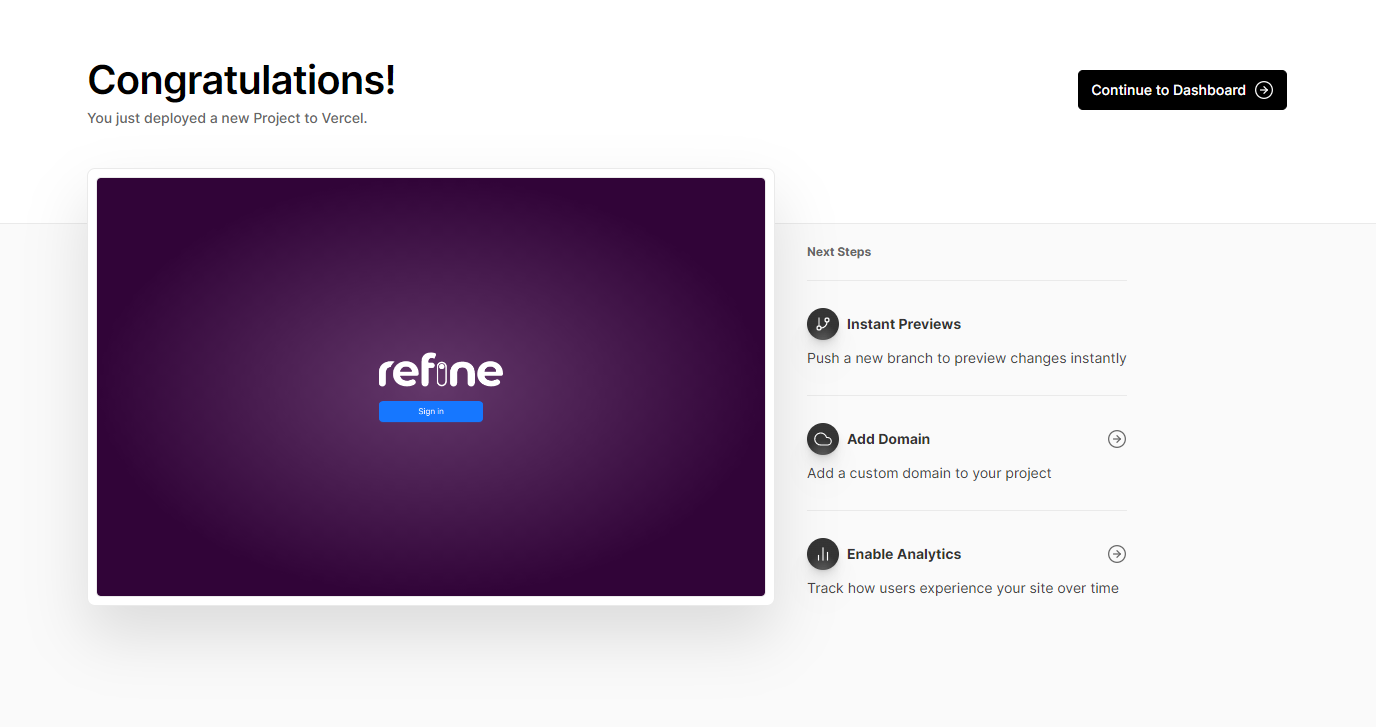
The last thing for you to do is to switch back to Auth0 and change the allowed URLs to the deployment URL given by the Vercel (previously those values were set to localhost:3000).
Blitz
We will use Render, which will allow us to deploy the app and the database.
First, change the database provider to PostgreSQL. To do that open schema.prisma file and change the data source as shown below:
datasource db {
  provider = "postgres"
  url      = env("DATABASE_URL")
}

// ...
Then delete the db/migrations folder so there is no previous migration history and no .lock file for the database type.
Then, create a new file render.yaml in your project root and include the following configuration settings:
services:
  - type: web
    name: crud-blitz
    env: node
    plan: free
    buildCommand: npm i --prod=false &&
      blitz prisma generate &&
      blitz build &&
      blitz prisma migrate deploy

    startCommand: blitz start -p ${PORT}
    envVars:
      - key: NODE_ENV
        value: production
      - key: DATABASE_URL
        fromDatabase:
          name: crud-blitz-db
          property: connectionString
      - key: SESSION_SECRET_KEY
        generateValue: true

databases:
  - name: crud-blitz-db
    plan: free
Now push the code to GitHub.
Create a free account if you already do not have one and log in.
Next, create a new repository.
Switch back to your code editor and run the following commands in your terminal:
git remote add origin https://github.com/username/crud-blitz.git
git branch -M main
git push -u origin main
Then switch back to GitHub and you will find everything synced up.
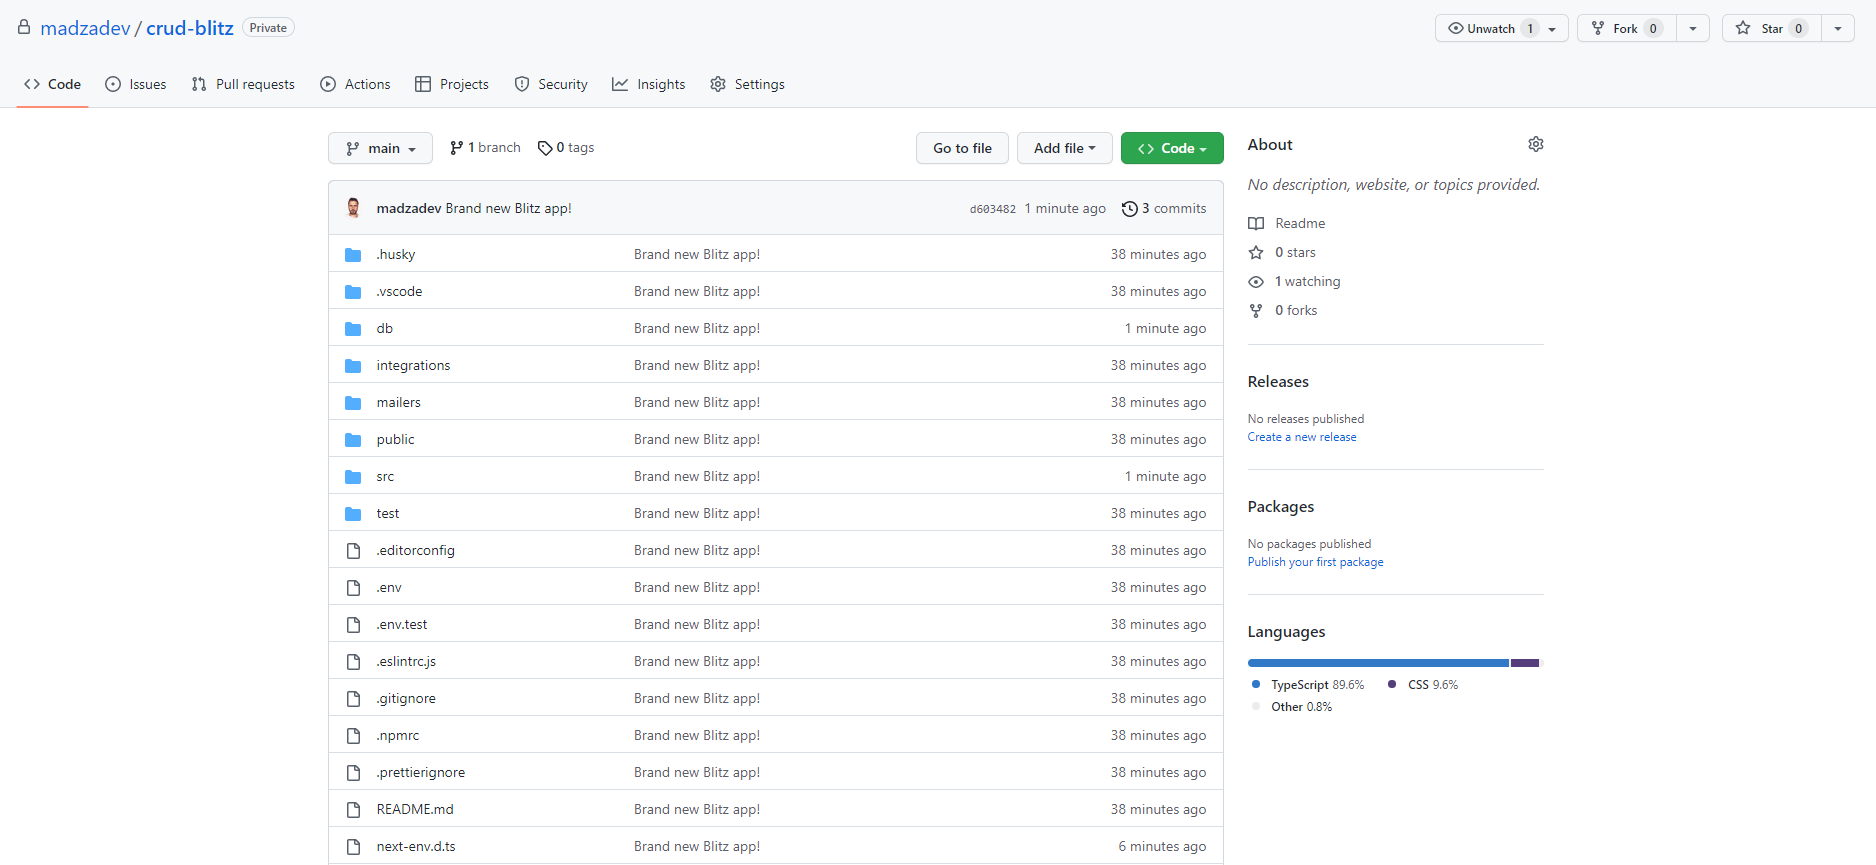
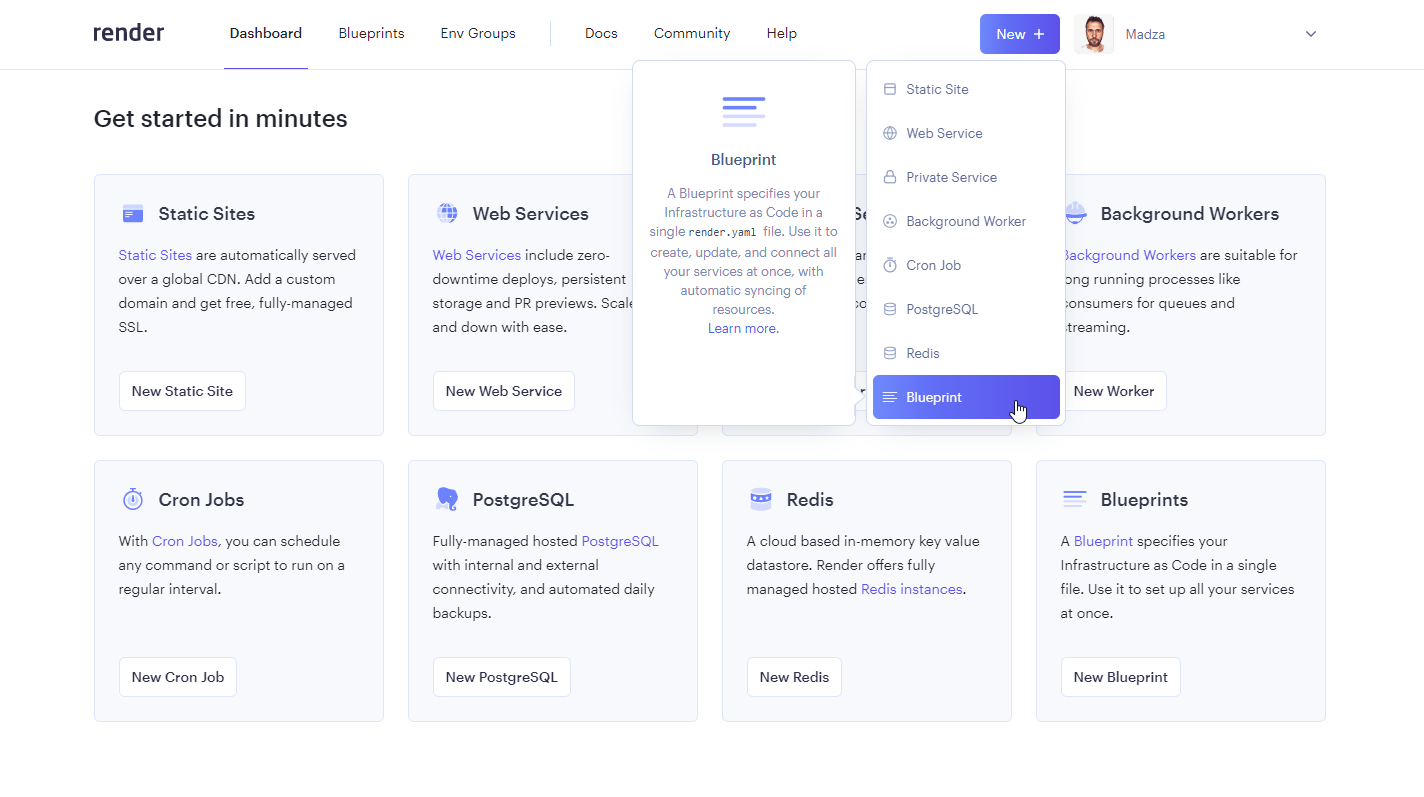
Next, create a free account on Render and log in.
Click on "New" and select the "Blueprint" option.
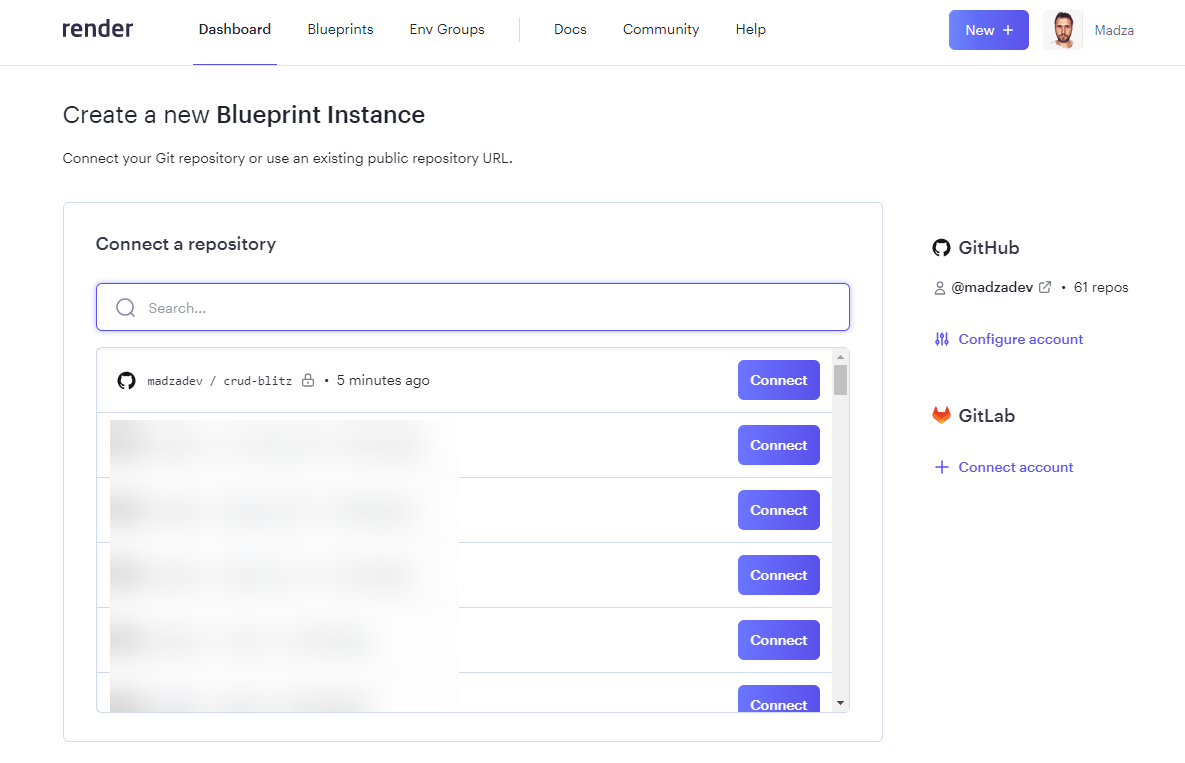
Next, connect your Github account and find your project in the list.
Next, give the Blueprint a name and click on "Apply", so Render sets everything up using your .yaml configuration.
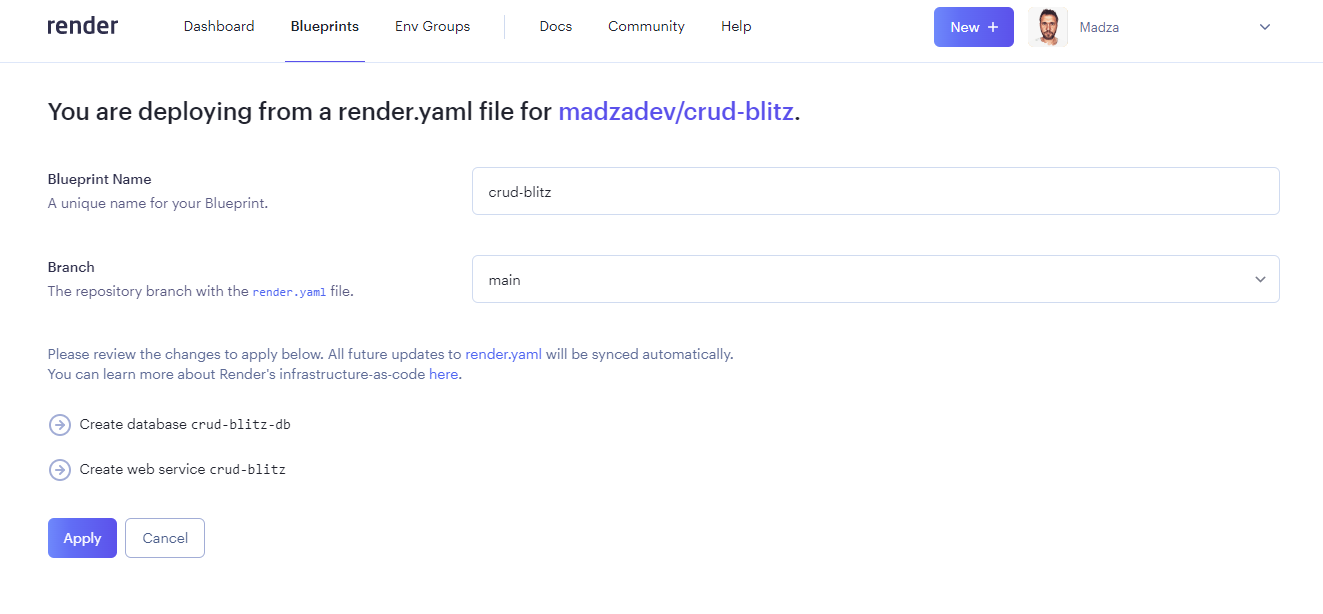
The setup might take a few minutes.
It will give you the live access link to your project once it's done.

Conclusion
In this article, we compared two React frameworks - refine and Blitz. Both have TypeScript support by default, are easy to set up, come with CLI commands, and do not require to use specific UI frameworks.
refine has a built-in data provider. This is great for testing and experimenting. Blitz in comparison comes with SQLite and Prisma studio that offers UI to work with data.
For data tables, refine comes with Inferencer which has already structured the data in the easy-to-perceive UI. For Blitz, you will have to build tables, action buttons, and other components yourself.
Blitz apps are already set with signup, login, and forgot password views, with the models already create to store users and sessions in the database. For refine, you will have to create those from the ground up.
From the project tree standpoint, Blitz looks more like a framework. For those looking for a high flexibility on how to structure the project, you will have to deal with the fact that most of the flow already follows a certain pattern.
refine is virtually a collection of hooks, components, and providers, therefore users can fully design the app based on their individual needs and follow specific logic patterns based on their business schema.
.png?w=800)
